Showing posts with label Fried. Show all posts

Wednesday, April 16, 2014

Vegan Spicy Cheesy Potato Patties

On Sunday I made lasagna for lunch and also a full dinner, including mashed potatoes.  Hubbs always takes the leftovers from dinner with him to work for his lunch the next day.  But since he had two choices, he of course chose lasagna (who wouldn't?).  I convinced myself that I would eat the potatoes over the next couple days, but there they have continued to sit.  We have a rule that we don't eat any cooked food 7 days after being prepared and even though it has been only 4, I knew if I didn't do something with those potatoes soon, they would get thrown out.  Hubbs and I both hate wasting food, so I decided to use them to make something tasty, if a little unusual, for breakfast this morning.  How about potato patties?  I made some when we were in Brooklyn, but with sweet potatoes.  They were amazing!  Of course "regular" potatoes would be just as delicious, so that's what I did.  And they were crazy delicious!  Super simple too since the main component was already prepared.  This came together in like 10 minutes, and was on the table within half an hour - good for the hubby since he had to be to work early.  I think this would be a nice accompaniment to a dinner also.  Super quick and tasty!


Crispy on the outside, creamy on the inside.  Yum!


Spicy Cheesy Potato Patties:
 
2 cups of leftover mashed potatoes
1/4 cup minced red onion
1 jalapeno, minced
1 roma tomato, seeded and minced
handful cilantro leaves, chopped
1 tablespoon ground golden flax seed
2 tablespoons superfine ground rice flour
sea salt and black pepper
unsweetened almond milk, as needed
1/2 cup shredded daiya cheese
 
 
Canola or refined coconut oil to fry
 
To Serve:
Vegan Sour Cream
Sriracha
 
 
1.  Place the potatoes and the remaining ingredients into a large mixing bowl: red onion, jalapeno, tomato, chopped cilantro, flax, brown rice flour, sea salt and black pepper.  Mix well until all the ingredients are combined.  Add enough almond milk so that the mixture is easily moldable, but not too thin.  Season to taste and add the shredded daiya.
2.  Place a layer of refined coconut oil or canola oil in the bottom of a saute pan over medium heat.  Allow the oil to become hot.
3.  In the meantime, portion the the potato mixture into small patties, setting on a clean plate until ready to begin frying.
4.  Once the oil is hot, place 3-4 of the patties carefully into the pan.  Cook for several minutes, or until crispy and browned.  Carefully flip and cook the other side for several more minutes.
5.  Remove the cooked patties from the pan and place on a paper towel lined plate. 
6.  To serve, place a spoonful of vegan sour cream on top and drizzle with sriracha. 
7.  Continue with remaining patties. 
 
 
Enjoy!
 
Koko

Saturday, April 12, 2014

Sesame Seitan Using Homemade Seitan

I love trying to replicate recipes.  Especially those that I really miss being able to order since moving away from NY.  I used to get this awesome sesame vegan chicken recipe from a place called Zen Palate which would deliver directly to my apartment on my days off or whenever I felt too tired to make dinner.  Since coming back to Michigan, the ability to purchase vegan "meats" isn't as easy, so whenever I get the chance, I stock up.  I've also been making several batches of seitan and freezing small portions of them so I can prepare a quick, tasty meal.  This meal came together very fast thanks to that prepared seitan.  Yum!


Tasty, Crispy Yummy Sesame Seitan


2-3 Servings of seitan, homemade or store bought
Canola or refined coconut oil for shallow frying

Broccoli or other veggies to have on the side, steamed

White or brown rice to serve.

Sauce:
1/2 cup filtered water
1 cup unchicken broth
2-4 tablespoons rice vinegar (I used 3)
1 tablespoon tapioca starch
1/2 cup organic sugar or agave
2 tablespoons tamari
2 tablespoons sesame oil (un-toasted)
1 teaspoon chili paste
1 garlic clove, minced
2 tablespoons sesame seeds, plus additional to garnish
1/4 teaspoon onion powder
1/8 teaspoon garlic powder


1.  Prepare the sauce: in a medium sauce pan add all of the ingredients.  Whisk together well. 
2.  Turn the heat on medium and cook until the sugar dissolves and the sauce thickens considerably.  Set aside to cool slightly until ready to use.
3.  Cut the seitan into small pieces, dry well.  Briefly pan fry in a small amount of canola or refined coconut oil until crispy.  Place on a paper towel lined plate to drain.
4.  Once all of the seitan is cooked, place in a bowl with a generous amount of the sesame sauce.  Toss well.
5.  To serve, place a portion of the rice on the plate, followed by a serving of the sesame seitan and the steamed vegetable.  Top the seitan with additional sesame seeds.  That's it!


A close-up of the deliciousness.


Enjoy!

Koko

Saturday, February 8, 2014

Testing Recipes: Country Fried Seitan Caesar Salad & Smoked Tofu Sandwich

Now that Hubbs and I have broken our fast and gotten back into eating (yay!), I have been testing recipes maniacally.  Even if it means I only take a small bite of whatever it is.  I am definitely staying away from more refined sugars and trying to use more local maple syrup and agave as sweeteners, plus dates, when that works for the recipe.  I am also trying not to eat anything fried, or at least a very small portion.  Just really trying to keep things healthier. 
 
I was going through a bunch of photos and recipes I have saved as drafts for this blog and have found a ton that need finishing, which I will publish soon.  It's funny how many of them have fried foods and tons of carbs.  I'm not saying that's bad - it's damn tasty, but just how different it is from how I'm trying to eat now.  I also found a ton of photos of recipes I've tested over the years, especially gluten free.  I'm going to do a post soon with all the pictures of the gluten free items I've tested but don't necessarily have a recipe for.  It either got lost along the way or wasn't exactly great, but the pictures are always fun to look at. 
 
 
Here's two recipes I've been working on over the last several days.  One is for a Seitan Caesar Salad and the other for a Smoked Tofu Sandwich.  I liked the Caesar, I just wasn't crazy for the dressing.  I have researched and made tons of vegan Caesar-type dressings, but none of them have been nearly as tasty as I recall a "true" Caesar dressing tasting.  So I've still got to work on that.  The Smoked Tofu Sandwich tasted great, but was too hard to eat with that bread.  It was a locally made organic baguette that was just too crispy and hard to eat.  I ended up with a sore mouth afterwards!  But definitely easy to fix - I'll have to find another, less crispy local baguette and problem solved!  Testing these both another time, but that's the fun part, right?! We'll get to sample them all over again!


Vegan Caesar Salad with Country Fried Seitan


Smoked Tofu Baguette on Local, Organic Baguette


Closer view on that beautiful sandwich!


Enjoy!

Koko

Tuesday, October 15, 2013

Fried Zucchini from the Garden

Since moving to Michigan, I have been having a blast with the garden.  There is always something coming out of it - even this late in the season.  About a month or so ago, there was some really cold weather that affected our zucchini and summer squash plants, our cucumbers and acorn squash plants.  They had produced for a couple weeks, then finished.  I was pretty disappointed in the harvest , and had been making all kinds of great plans for the harvest.  Then last week as I was making my rounds throughout the garden, I noticed that the plants were reflowering and teeny tiny baby squash were emerging from the flowers!  I was so surprised and happy!  We also have okra plants that my Hubby has been convinced were planted too late and will amount to nothing.  I have told him to be positive and that they will produce, even though I know nothing of the plants and despite the fact that his father used to grow them for income back in the Dominican Republic.  And imagine my surprise and happiness in noticing that those same okra plants that had flowered and done nothing about a month ago, have again flowered and teeny tiny okra are beginning to grow!  I really hope they continue to grow and produce, even if we only get a handful.  Our Japanese eggplants are re-growing again and are only a couple inches long right now, so I'm really hoping for some more nice, sunny weather.  Until then, I decided to make some fried zucchini to celebrate the new crop of squash and will hopefully be posting more about the delicious veggies from the garden.


Fried Zucchini:


Crispy, Salty Goodness!

Serves 2-3

1 large or 2 small zucchini, washed well and sliced into 1/4" circles

Wet Mix:
1/3 cup unbleached flour
3/4 teaspoon baking powder
1/2 cup water
1/8 teaspoon sea salt
1/8 teaspoon black pepper
2 generous pinches cayenne pepper, optional

Dry Mix:
1 cup unbleached flour
1/8 teaspoon sea salt
1/8 teaspoon black pepper
2 generous pinches cayenne pepper


1.  Place the sliced zucchini on a small plate and set aside until ready to use.
2.  Place the wet mix ingredients in a bowl and whisk them together until a batter forms.  Set that next to the zucchini. 
3.  In a second small bowl, add your dry mix ingredients and whisk together until all the ingredients are well combined. 
4.  Place a large saute pan over medium heat and place about 1/4" canola or other no-taste oil inside the pan.  Allow the oil to heat as you begin to prepare the zucchini. 
5.  Get two large clean plates ready.  Cover one plate with multiple layers of paper towels and set aside.  The second plate will be the place you put your dipped zucchini slices on. 
6.  Take a few of your zucchini slices and dip them in the wet mix.  Keep one hand for the wet mix and the other for the dry mix.  Using the wet hand, swish the zucchini around until they are well coated.  Now drain off any excess liquid and place them one at a time into the spiced flour mix.  Using your dry hand, toss them around until they are completely covered with the flour.  Shake off any excess flour.  Place the finished zucchini slices on the clean plate.  Continue to do this until the oil is hot. 
7.  Place the coated zucchini slices into the oil and allow them to fry for several minutes on each side, until they are golden and crispy.  Once they are cooked on both sides, transfer them to the plate with the paper towel and immediately sprinkle them with a little bit of the sea salt.  Continue dipping the zucchini and frying them until all have been fried.
8.  Try to wait at least a minute for them to cool before popping them in your mouth - I know it's almost impossible, but it really burns when the water inside the cooked zucchini squirts your tongue!  So yummy, crunchy and delicious! 


Enjoy!

Koko

Friday, March 8, 2013

Mashed Potaotes & Gravy, Fried Squash, Pepper Steak, Steamed Broccoli & Salad

Ever feel like you have rotating meals?  I certainly do and I feel like this is one variation that I find myself making frequently.  It is just so easy and simple.  It allows you to use every burner on your stove at the same time, but not feel overwhelmed and get it done quickly.  I love mashed potatoes and gravy and Hubby loves the potatoes, but not so much the gravy.  He has this weird things about "creamy" things, although he really likes gravy when it's in things like pot pies, etc.  And since the pepper steak is already made, all you have to do is thaw it out and saute it.  Easy and done.  I love that I don't eat meat.  Seriously.  Sometimes it is so damn easy!  But then again, sometimes it is super labor intensive.  But I love that too! 

Mashed Potatoes & Gravy, Fried Squash, Pepper Steak, Steamed Broccoli & Kale, Salad:


So Tasty and Simple!

Serves 4

Vegan Nutritional Yeast Gravy:
1/4 cup canola oil
1/2 medium onion, finely chopped, about 1/2 cup
1/4 cup unbleached flour
1/4 cup nutritional yeast
2 tablespoons tamari
3 cups filtered water, or as needed
1/4 teaspoon black pepper
3/4 teaspoon sea salt, or as needed

1.  Place a medium pot over medium heat.  Add the olive oil and allow it to become hot. Once it is hot, add the onions.  Cook, stirring frequently, until softened, about 5 minutes. 
2.  Add the unbleached flour and nutritional yeast and whisk together.  It will be a very very thick mixture.  Keep whisking periodically, until the flour loses its raw smell and turns a nice golden color. 
3.  At this point, you are going to add the liquids.  When making a gravy, it is important to whisk the mixture as soon as you add the liquids, or the gravy will be lumpy.  So, add the tamari and 3 cups of water and immediately whisk the mixture together.  It will feel like it's going to seize as soon as you add the liquids, but keep whisking until the gravy is smooth.  Add the sea salt and black pepper.
4.  Now let the gravy come to a simmer, whisking frequently and being sure that it does not stick to the bottom or sides.  Once the gravy thickens, you can determine whether or not you will need more water.  If the gravy is too thick, add water a little at a time until your desired consistency is achieved.  Season to taste with sea salt and black pepper.
5.  Serve over rice, potatoes, biscuits, or whatever makes you happy!


Enjoy!

-Koko

Monday, February 18, 2013

Brunch: Roasted Potatoes, Black Bean Tofu Scramble, Fried Squash

 I must admit my mind is elsewhere right now.  My grandmother on my mom's side is in the hospital and has been all last week.  Her health is declining and although everyone is trying to be positive, I think we have to be realistic too.  She has been in poor health for a while now, with diabetes, open heart surgery back when I was in college and now dementia.  She is unfortunately in congestive heart failure and is so upset to be in the hospital.  She hates being away from home and is worried because she had a bird at home that she is never away from.  I really do appreciate and am thankful for being in New York, but at times like this it really makes me want to drop everything and move back home to be with my family.  All of my 8 aunts and uncles (my mom is included in that number) are at the hospital now talking to the doctor to see what he feels.  My mom left me a voicemail as I was leaving work saying that my Grandma is terminal.  Please keep her any my family in your thoughts.  As of last night Grandma wasn't eating or drinking anything, talking about how she had a great life and wanted to be cremated and buried.  As soon as I hear back from my mom, I'm going to decide what to do.  I have to see my Grandma again.  This is making me get teary-eyed now just typing this up.  It also brings me back to the death of my sister-in-law Kenia not even a year ago - in May from cancer.  It makes me really reevaluate my life, what I am doing, where I am and what my goals are. 

This is just a heads up that I may not be blogging for a while, depending upon how things go.  In the meantime, enjoy what my Hubby and I had for brunch yesterday, our day off together.  I had some leftover cooked black beans in the fridge that needed using up, as well as a package of tofu, so I thought of doing a Spanish-style scramble, with some roasted potatoes (I am always getting organic potatoes for free from work.  Today I got some really cool organic purple potatoes and I am debating making mashed potatoes with them just because I think it is going to look so crazy on our dinner plate!) and fried up some squash I got from work.  It was tasty and came together pretty quickly, which was great - I was able to spend more time with my Hubby!


Roasted Potatoes, Black Bean Tofu Scramble, Fried Squash:


So delicious!  Wish there was some left!


Tofu Scramble:
1 lb. extra firm tofu, drained well and pressed
1 1/2 tablespoons olive oil
1/2 yellow onion, diced
1/2 green bell pepper, diced
1/2 red bell pepper, diced
1 jalapeno, minced
2 cloves garlic, minced
1 roma tomato, diced
2 tablespoons nutritional yeast
1 teaspoon turmeric
3/4 teaspoon cumin
1/2 teaspoon sea salt
1/4 teaspoon black pepper
pinch red pepper flakes
1/2-2/3 cup cooked black beans
tamari, as desired

1.  In the base of a large wok or saute pan, add the oil over medium-high heat.  Allow to become hot.
2.  Once the oil is hot, add the onions, green, red and jalapeno peppers and garlic.  Saute for a couple minutes, or until beginning to soften. 
3.  Crumble the tofu to desired size directly into the pot.  Keep stirring the mixture.  Add the spices: nutritional yeast, turmeric, cumin, sea salt, black pepper and red pepper flakes.  Stir very well into the vegetables and tofu mixture until tofu is completely yellow in color. 
4.  The amount of time you cook the scramble from here is up to you.  I like the tofu to be pretty firm with a more "dry" texture, otherwise it reminds me of undercooked eggs.  Gag.
5.  Add the diced tomato, black beans and tamari to taste.  Stir and cook until all ingredients are heated through. 
6.  Serve with the remaining components.

Enjoy!

Koko

Wednesday, January 23, 2013

Mangu with Sauteed Peppers and Fried "Cheese"

Tonight's dinner was so delicious and fun!  It started out not being either fun or interesting because I had several green plantains that were becoming a little ripe and needed using very quickly.  I didn't know what to make, even though I have successfully made several things from green plantains: Tostones (Double Fried Plantains), Mofongo (Double Fried Plantains mashed with lots of garlic and broth) and Mangu (Mashed Boiled Plantains).  However, I know there are so many more things to make with them and would definitely like to learn more about them, but I really wasn't in the mood today.  I have worked with several women from Peurto Rico who told me about other green plantain dishes, and I know the Hubby has told me about several as well, but I would need to do some research before I really get into it.  I would want to give the Hubby something that is as close to traditional as possible.  The other things I would like to make are: 1) Aranitas (shredded plantain fritter - kind of like a hashbrown), 2) Jibarito (a sandwich where fried plantains are used instead of bread, slathered in garlic mayo, some kind of "meat", cheese, lettuce & tomato - yum!) and 3) Pastelon de Platano (plantain lasagna with "meaty layers").  All sound good, right?  I just need to figure out how to make them as traditionally as possible, but veganized.  Hubby is not very good at giving recipes.  I really need a plantain cookbook or to find a great Dominican website.

So, back to the meal.  I was just going to make tostones because they're easy.  But Mangu is easy too and that's what the Hubby wanted. 

Mangu with Sauteed Peppers & Fried "Cheese":

Mangu, Sauteed Peppers & Yummy Fried Cheese

Serves 2-3

Mangu:
3 green plantains, peeled, sliced in half and chopped
2 cloves garlic, minced
2 tablespoons Earth Balance
1/2 cup cold water
1 1/2 teaspoons sea salt
1/2 teaspoons black pepper

Sauteed Peppers:
2 small orange bell peppers, sliced thinly, about 2 cups
1 small green pepper, sliced thinly, about 1 cup
1 small onion, sliced thinly, about 3/4 cup
1 1/2-3 teaspoons vegetable boullion powder
1/8 teaspoon black pepper

Fried Cheese:
4 oz. chunk of daiya, sliced into pieces and placed in the freezer until very cold and firm
1/2" canola or vegetable oil

1.  Start with the plantains.  The easiest way to peel them is to cut off both of the ends and make a slice the long way down the plantain with a pairing knife.  Then use the back of a spoon to remove the peel in sections.  It seems strange, but this is by far the best and easiest way I have found to peel those bad boys. 
2.  Slice the plaintains in half the long way, then cut the halves into about 3-4 pieces, depending on the size of the plaintains.  This is just to help the plantain cook more evenly.  Place the peeled, sliced plantains in a medium pot filled with water and place on the stove over high heat.  Allow the plantains to cook until they are very easily pierced with a fork.
3.  In the meantime, prepare the veggies to be sauteed.  In a medium pan over medium-high heat, add the oil.  Allow it to become hot and then add the orange and green bell peppers and the onion.  Stir frequently to prevent burning.  Once the veggies have softened slightly, but still maintain their crunch, add the boullion powder and black pepper, seasoning to taste.  Keep hot while preparing the rest of the food.
4.  For the Mangu, drain the cooked plantains and place back in the pot.  Mash with a potato masher until the pieces are even in size.  The mixture will be very dry.  Add the minced garlic, earth balance, sea salt and black pepper and mash together again.  Add the cold water and mash until the desired consistency is achieved.  You can add more water as you wish, but it must be cold.
5.  The last and optional step is the fried cheese.  It is totally not necessary, but oh so damn delicious.  The trick is to partially freeze the daiya until it is very firm, but not frozen all the way through.  Place the oil in a small pot and bring the heat up to medium-high.  Once it is hot, very carefully place the cheese into the oil.  It will sputter and make a lot of noise, but it will be okay- just be very careful.  Use a long fork to turn the cheese over.  Allow it to cook for an additional 30-60 seconds, until lightly browned and soft.  Remove from the oil and place on a plate lined with paper towels. 
6.  To serve, I like to lightly oil a small mug and place the mashed plantains inside, pressing them in tightly.  Then, unmold them onto your plate, surround with the sauteed veggies and top with the fried cheese, if desired.

Enjoy!

-Koko

Friday, March 23, 2012

Country Fried Seitan, Sesame Kale, Fried Zucchini & "Fried" Rice

This is one of the many times the Hubby has come home and said "Mucho Hambre Mami", meaning "I'm very hungry honey!".  Insert roll of the eyes here.  Since when is he not hungry?  Seriously?  It's scary thinking what it's going to be like if/when there's another guy added to the family - like a son!  They would eat me out of house and home!  I always tell people I have to cook for at least 3 people (Hubby counting as 2 people)!  Anyway, knowing that he loves rice and can literally eat it everyday, I made some fried  - more like sauteed - because I already had some cooked rice in the fridge.  And since I was making country fried seitan, which takes a while to make, I'm not going to lie, I wanted to make something that would be a little simpler.  I got this recipe idea from the Vegan Yum Yum cookbook.  The original recipe wasn't exactly super tasty, so after messing around with the spices a few times, I hit it and now it's amazing.  Since the thing that takes the longest time is mixing together the spiced flour, I have wised up a little and made a giant batch of it and now keep a Ziploc of it in the refrigerator at all times so that whenever Hubbs or I have a craving, it's not as far away.  Also always having a batch of homemade boiled seitan in the freezer definitely helps.  (After I finish with this recipe, I will have emptied my supply and am going to have to replenish it soon.)  I've also got the fried zucchini down and can whip that up ridiculously easily.   I have figured out that the key to making a quick meal is to have things ready before hand to help you out and save time for those days when you're really busy.

Country Fried Seitan, Sesame Kale, Fried Zucchini & "Fried" Rice:


Country Fried Seitan, Sesame Kale, Fried Zucchini, Fried Rice


Serves about 4, with extra seitan left over

Fried Zucchini


Fried Rice:
2 cups cooked rice, cold
1/4 cup shredded carrots
1/4 cup green peas, cooked
2 tablespoons olive oil
1/4 teaspoon sea salt
1/8 teaspoon black pepper
1 tablespoon tamari/shoyu
1/4 teaspoon toasted sesame oil
1/2 small onion, small diced, about 1/2 cup
2 green onions, sliced

Country Fried Seitan:
1/2 - 3/4 lb. homemade seitan steaks

Spiced Flour Mixture:
1 1/2 cups unbleached flour
4 teaspoons baking powder (yes, baking powder!  It will make the seitan crispy)
1 teaspoon dried parsley
1 teaspoon seasoned salt
1/2 teaspoon black pepper
1/2 teaspoon onion powder
1/2 teaspoon garlic powder
1/2 teaspoon boullion powder
1/4 teaspoon dry mustard powder
2 pinches cayenne, optional, but a good idea

Wet Seasoned Mixture:
1/3 cup seasoned flour
1/2 cup filtered water
3 tablespoons prepared yellow mustard

1.  Begin by getting everything ready for the fried seitan.  Mix together the flour and all the spices.  Set aside.
2.  Begin making the rice.  In a wok over medium-high heat, add the olive oil and let it become hot.  Once it's hot, add the onion and carrot and saute until the onion is fragrant, about 3-4 minutes.  Add the peas and stir for a minute.  Add the rice and "fry" aka saute for about 10 minutes, letting the grains become a little crispy.  Add the rest of the ingredients, being sure to combine thoroughly.  Continue to cook for an additional couple of minutes.
3.  Back to the country fried seitan.  Set up a station: 1 bowl will have the wet seasoned mixture, the second bowl will have some seasoned flour and a clean plate should end this assembly line. 
4.  Place a large pan over medium heat and cover the bottom with a layer or no-taste oil, like canola.  Allow the oil to become hot.  In the meantime, prepare the seitan.
5.  Assembly line:  keep one hand for the wet mix and the other hand for the dry mix.  Squeeze out any liquid that may be in the seitan into the sink.  Dip the seitan pieces into the wet mixture, coating well.  Shake off excess liquid.  Now place the seitan into the spiced flour.  Cover every surface of the seitan with the flour.  Shake off excess flour and place on clean plate.  Repeat with remaining seitan. 
6.  The oil should now be hot.  Carefully place the coated pieces of seitan into the oil, cooking for several minutes on each side, until browned and crispy.  Once browned on both sides, drain on paper towel covered plates. 
7.  To serve, place portions of each item on the plates, and be prepared to serve seconds.  Delicious!

Enjoy!

-Koko

Sunday, October 30, 2011

V eggies & Seitan in a Brown Sauce with Szechuan Style Fried Eggplant with Spicy Dipping Sauce

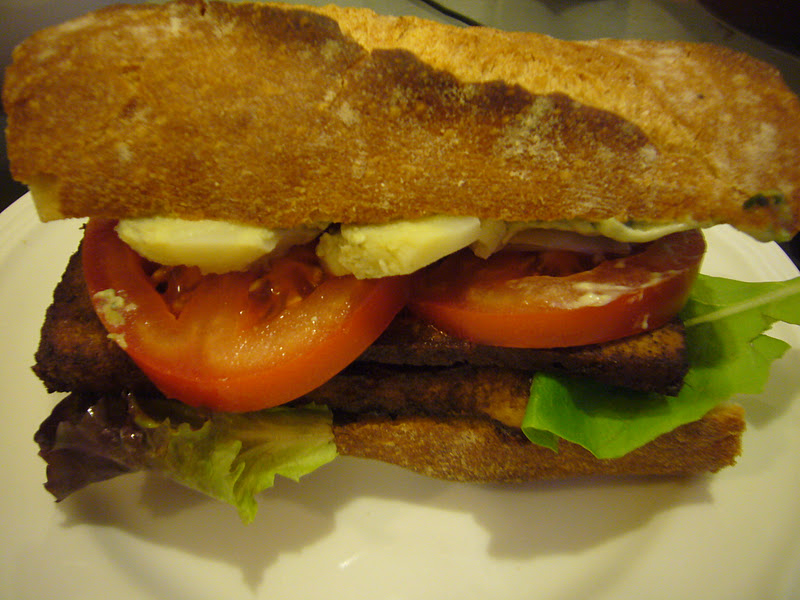
Sometimes I really surprise myself and get really ahead of myself.  This meal is exactly what I mean by that.  I made this on the weekend, on a Saturday when the Hubby and I were spending the day off together.  We both woke up way too early (should have definitely slept in!) and were tired midday.  Hubby, unlike me, has no issues with going back to bed and taking a nap for a couple hours.  I try as hard as possible not to do that because I know how quickly the day goes by then, and working so much really makes you want to take advantage of the time you do have off.  So, off Hubbs went to sleep, and here I was, bored and tired, but not wanting to waste the day (why do I have to be so stubborn!?), so I went through my new Vegetarian Times Magazine and since I was hungry, I decided I would ultimately make every recipe in there (well, most anyway!).  So, I realistically looked through the magazine a second time and looked through the fridge, and decided I couldn't really make anything at that moment.  So. what was I to do?  Go through my bajillions of cookbooks and find something else.  SO, I looked through all the books and settled on something I haven't really made any recipes from before - something I bought when I was a teen still living in Michigan.  The book was Linda McCartney's On Tour - Vegetarian Recipes from Around the World.  I found several recipes I could make then and there, but they were pretty damn labor intensive.  What did I have but time though, afterall?  SO, I started and several hours later (this was supposed to be time off - away from the kitchen, right???), I went and woke up the sleepy Hubby and showed him the great spread.  He was definitely surprised and impressed.  And loved every bite.  It was pretty damn tasty.  So we sat down, ate dinner and enjoyed a nice movie together.  A nice ending to a good (and tasty!) day!

Veggies & Seitan in a Brown Sauce with Szechuan Fried Eggplant with Spicy Sauce:


Serves 4

Veggies & Seitan
1 1/2 tablespoons olive oil
1 green pepper, julienned, about 1 cup
1/2 orange pepper, julienned, about 1/2 cup
1/2 yellow pepper, julienned, about 1/2 cup
1 medium red onion, cut in half and sliced thinly, about 1 1/2 cups
2 broccoli spears, cut into florets and stems peeled and chopped
2 cloves garlic, minced
1 1/2 cups seitan, sliced thinly

Brown Sauce (will include recipe later)
Cooked White or Brown Rice

Fried Eggplant:
1 medium/large eggplant, peeled, sliced into 1/2" slices and cut in half
1/2" no-taste oil, such as canola

1 cup unbleached flour
1 teaspoon baking powder
1/2 teaspoon sea salt
1/4 teaspoon black pepper
pinch cayenne pepper
1 tablespoon olive oil
2 tablespoons flax eggs
2/3 cup water

Spicy Dipping Sauce:
1 1/2 tablespoons olive oil
4 cloves garlic, minced
1 Serrano pepper, seeded and minced
1 tablespoon rice vinegar
2 tablespoons tomato paste
2 teaspoons red chili paste
1/2 teaspoon agave
1 large tomato, finely chopped, about 1 1/2 cups
2/3 cup water
1/8-1/4 teaspoon cayenne pepper

1.  Prep the vegetables first.  Set aside.  They will come together very quickly once everything else is going.
2.  Now prepare the dredging mixture for the eggplant - it has to sit for 15-20 minutes before it can be used.  In a small mixing bowl, add the flour, baking powder, sea salt and black pepper.  Whisk together (I used a fork).  Add the flax eggs and water and whisk again.  A thick batter should have formed.  Allow it to sit for the indicated amount of time, stirring occasionally.
3.  Make the spicy dipping sauce.  In a large pan over medium heat, add the oil and allow it to become hot.  Once it is hot, add the garlic and the Serrano pepper.  Saute for about 2 minutes, or until fragrant, but not browned.  Add the vinegar to deglaze the pan.  Add tomato paste, red chili paste and agave and stir until the pepper and garlic are coated.  Cook for one minute.
4.  Add the chopped tomato and the water and bring to a simmer.  Lower the heat slightly and allow the sauce to continue cooking.  You want the sauce to be pretty thick - about the consistency of a thick marinara.  This will take about 10 minutes.  When the sauce has thickened, turn the heat off, cover with a lid and keep on the stove - you want the sauce to stay warm. 
5.  Begin to cook the eggplant.  Place the oil in a medium sized pot over medium-high heat.  Allow the oil to become hot.  In the meantime, Line two plates with paper towels and set aside.  Dip the eggplant slices into the mixture.  It should stick and coat the pieces very well. 
6.  The oil is ready when a drop of the batter begins sizzling and immediately comes to the surface.
7.  Make sure the eggplant slices are thoroughly coated in the mixture, allowing excess batter to drip back into the bowl.  Place carefully into the hot oil.  You can cook up to 5 at a time in the oil, depending on the size of your pan.  These need to cook for about 2-3 minutes per side.  If yours are cooking faster than that, your oil is too hot. 
8.  Once the eggplant slices are cooked thoroughly on both sides, place on paper towels to drain and immediately sprinkle with sea salt.  Continue cooking the rest of the eggplant.
9.  Begin cooking the seitan and veggies.  Place a large wok over high heat and add the oil.  Once the oil is hot, add all of the peppers, the onions and the broccoli.  Cook for several minutes, stirring frequently.  If the veggies appear to be sticking to the pan, add a small amount of water - this will also help to steam the veggies and let them cook faster.  Once the veggies are tender-crisp, add the minced garlic and cook for an additional minute.  Add the seitan and cook just until hot.
10.  Add the brown sauce by the ladleful, stirring to coat, until your desired sauciness is achieved.  I used about 2/3 of a cup of the sauce.  Stir to coat. 
11.  To serve: place a serving of the prepared rice in the center of your plate, top with the sauteed veggies and seitan mixture, followed by any additional sauce.  Place 2-3 slices of the fried eggplant (you can always get more - the plate just looks better when it's not so heaped with food!) on your plate and serve a ramekin or small bowl of the dipping sauce on the side.  That's it!  And if you're cooking for two, you'll have leftovers for the next day.  Can't wait to eat this tomorrow too!

-Enjoy!

-K

Wednesday, July 27, 2011

Gluten Free Wednesday: GF Split Pea Chips

Happy Gluten Free Wednesday!

I had such high hopes and expectations for this recipe!  I was given a sample a couple months ago of a gluten free split pea chip.  It was seriously insanely delicious!  I couldn't imagine how something like that could even be made, so like a geek, I wrote down all of the ingredients, hoping one day to make it.  Fast forward a couple of months later, when I was going through my computer desk, sifting through the volume of recipe scribbles I had on so many pieces of paper.  I was sorting them into piles of things I would realistically do, and getting rid of the things I most likely wouldn't do, when I came across the list of ingredients and my thoughts on how the gf split pea chips were made.  My coworkers at the time suggested that according to the ingredients, the company must have cooked the split peas, pureed them, seasoned them with spices, added a gf flour to create a dough, rolled it out and fried the resulting pieces. 

Easy, I thought.  Until I got started!  I did everything I assumed was done, cooking the peas, seasoning them, adding the flour and seasoning again.  Everything seemed ok until I started to roll out the dough.  I know all about xanthan gum, and was thinking I should have put some in there, even though the ingredients did not specify it, but lately I have been trying to abide by the idea that you should make a recipe exactly as it is stated the first time, then make any changes you want the second time around, once you know how it behaves, so I did just that.  I should have listened to what I was thinking!  The dough was impossible to roll out, or maybe not so impossible to roll out, once I added a bunch more flour to the ingredients to it (thereby changing the flavor I had created initially!), but when I sliced the rolled out dough into pieces and tried to lift the pieces is when it all fell apart ... literally.   I tried to fry them anyway, but they exploded into tiny bits as soon as I submersed them into the hot oil.  Damn!  I was so excited!  They were tasty, but not too pretty, and kinda funky if I must admit.  I think it was a really good idea and a good base, but next time I will listen to myself and add a little xanthan gum, - I'm sure it will work out much better.  I will definitely try this again when I have a little extra time!  Try this if you would like, but make a couple changes, and if you do, let me know how it turns out.


Gluten Free Split Pea Chips:


Very Messy, But Very Tasty!


1/2" no-taste oil to fry, such as canola

1 cup split peas, soaked for several hours (I used green), then cooked until soft
1/2  cup water
2 teaspoons vegetable boullion powder
1/4 teaspoon black pepper
1/2 teaspoon onion powder
1/2 teaspoon garlic powder
1/4 teaspoon chipotle pepper powder
1/8 teaspoon cayenne pepper, or more to taste
1/2 cup sorghum flour, mixed with 1/4 teaspoon xanthan gum (I added the xanthan gum part for next time, but I have not tried it yet.)

1.  Place the cooked split peas in the bowl of a  food processor.  Add the water and all of the spices.  Just do not add the flour and xanthan gum.
2.  Process the mixture until completely smooth. 
3.  Remove the mixture from the processor and place in a medium mixing bowl.  Add the flour and xanthan mixture and stir until a thick dough has formed.  It should not be sticky.  If it is, add a little more flour until it is no longer sticky.
4.  Sprinkle a good amount of sorghum flour on your work surface and turn half of the dough onto the flour.  Sprinkle with additional flour.  Press the dough down with your hands until a disk has formed. 
5.  Get your oil ready - the rest of the recipe will come together very quickly.  Place the oil in a medium sized pot and place over medium-high heat.  Allow the oil to become hot.  It is hot when a drop of the batter immediately sizzles and comes back  to the surface. 
6.  Using a rolling pin, roll out dough to desired thickness.  Cut into desired shapes using a paring knife.  Use the paring knife to carefully remove the chips from the counter and place them into the oil.  Do not place too many in the oil at the same time, or they will bump into each other and break up, like mine did.
7.  Cook for a couple minutes until golden.  Remove from the oil with a slotted spoon onto paper towel lined plates and immediately sprinkle with sea salt.  Continue cooking the remaining chips. 
8.  If the chips appear to be breaking and you did not add too many to the pot, your oil may also be too hot. 
-Enjoy!

-K

Sunday, May 29, 2011

Seitan Empanadas, Sauteed Kale, Pan Fried Yucca, Simple Salad

Today was my day for Spring Cleaning!  Time to go throughout the house and organize and clean everything, getting rid of things we haven't been using and use up the things that are getting a bit old.  I went through both the refrigerator and freezer.  The fridge was fine - just a little unorganized and messy, but nothing in particular that had  been in there for a while.  The freezer was an entirely different story.  I feel like I use it a lot when I have great intentions of saving something to use it later, but then it gets pushed to the back and forgotten about.  So, I went through it and discovered several things:
1.  I still have tons of homemade freezer jam - at least 5 pint containers (yikes, what am I going to do with all of those!?)
2.  I still have two small bags of homemade Monster cookies my Mum made for the Hubby and I the last time I visited her (which was definitely last year some time!).  Mum made them using white sugar, which the Hubby and I never eat, so we found them way too sweet (sorry Mum!) and couldn't eat them, but didn't want to throw them away because of all the love and effort she put into them.  But, after finding them a year later, I thought it was time to let them go.
3.  There was a bag of ground almonds I had left over from a Friday Night Dinner at the Natural Gourmet Institute a long time ago that I didn't want to get rid of, and after using it on everything I could possibly think of, I tasted it and it was quite freezer burned!  Sad!
4.  Lastly!  There was a package of Goya Discos para Empanadas (Goya pastry circles, specifically used for Empanadas and other appetizers) that was hanging out in there for about three months.  That could be used up though, so I took it out of the freezer, let it thaw on the counter until completely thawed, and made the filling for empanadas, using up come ground seitan I had left over from when I made tacos.  These took a while to make, but were so worth it, and now that I know how easy those discos are to work with, I'll definitely buy them again, but this time, use them much sooner!

Seitan Empanadas:


Seitan Empanadas, Garlic Sauteed Kale, Pan-Fried
Yuccs, Salad with Carrots, Scallions & Croutons

 Yields 10 Empanads, plus 1 cup additional filling

2 tablespoons olive oil
1 cup small diced onion
3 scallions, thinly sliced
1/2 orange bell pepper, small diced, about 1/2 cup
1/2 green bell pepper, small diced, about 1/2 cup
1 small jalapeno, minced, about 2 tablespoons
4 cloves garlic, minced
2 cups small diced seitan
4 tablespoons chopped pimento stuffed olives (about 12-14 olives)
1/4 teaspoon onion powder
1/4 teaspoon garlic powder
1/4 teaspoon chili powder
1/4 teaspoon black pepper
1/2 teaspoon boullion powder
1/2 teaspoon smoked paprika
3-4 tablespoons vegetarian oyster mushroom sauce
1 tablespoon vegan parm

10 pre-made empanada shells
1/2 " no-taste oil, such as canola or vegetable

1.  Place a large wok over medium-high heat and add the oil. Allow the oil to become hot and add the onions, scallion, green and orange bell peppers, jalapeno and garlic cloves.  Saute for several minutes until softened.  Add the seitan and cook for several additional minutes.
2.  To the veggie-seitan mixture, add the olives and all the spices, stirring to coat.  Add the oyster mushroom sauce and the vegan parm and stir well to coat.  Continue cooking the mixture the flavors have melded and some of the liquid has cooked off.
3.  Turn the heat on under the pot with the oil to medium high.  Allow it to become hot. 
4.  In the meantime, place one of the pre-made empanada shells on your cutting board. Lightly roll them out with a rolling pin, just to enlarge them slightly.  Place a couple tablespoons of the filling in the center and bring the top portion of the dough to the bottom, pressing the edges together until the empanada is securely sealed.  Repeat with remaining filling and shells. 
5.  Once the oil is hot, carefully place 2 empanadas at a time into the oil, cooking for about 30-60 seconds per side.  All you want is for the outside to become nice and golden.  If the outside is browning too quickly, turn down the heat. 
6.  Remove the empanadas from the oil with either a slotted spoon or a pair of tongs and place on a paper towel lined plate to absorb the oil and serve.  You don't need a dipping sauce because the center is so flavorful.

Enjoy!

-K

Monday, April 18, 2011

Vegan Donuts!

I don't know what has come over me, but I feel like I need to have donuts!  Vegan donuts of course!  And where in the world will I find them?  As fresh and delicious as I want them?  Answer - ask Mum for her recipe she made for us when we were kids.  Not sure about you, but even now, whenever I have questions about food, I still go to Mum for help.  Now, my mother is not vegan, not vegetarian and certainly does not use the most health supportive ingredients I favor.  She is one to use white flour, white sugar, eggs, milk and butter.  I grew up with these foods, but after so many years of not eating this way, it never fails to surprise me what I ate back then. 

So, armed with a recipe containing eggs, milk, butter, white flour and sugar, I set to work veganizing it and could not wait to taste those delicious donuts!  Just so you know - there is absolutely nothing healthy about these, and I actually fried them if you can imagine!  And they were amazing!  Without further ado:

Vegan Donuts:


Cinnamon Sugar and Chocolate Glazed

Yields: 2 dozen

4 cups unbleached flour
1 cup turbinado/raw sugar
1 tablespoon baking powder
1/2 teaspoon sea salt
1/2 teaspoon cinnamon
1/4 teaspoon nutmeg
2 tablespoons earth balance
1/4 cup flax eggs (1 tablespoon ground flax mixed with 3 tablespoons water)
3/4 cup vanilla soymilk
a TON of flour to coat your parchment/waxed paper

Chocolate Dip:
1/2 cup chocolate chips
1 tablespoon canola or vegetable oil

Cinnamon Sugar:
1/2 cup raw or turbinado sugar
1 teaspoon cinnamon

1.  In the bowl of a stand mixer, combine the sugar, earth balance, soymilk and flax eggs.  Mix on low/medium speed until completely combined.  Add the flour, baking powder, sea salt, cinnamon and nutmeg.  Begin on low speed, gradually increasing to medium speed as the ingredients are incorporated.  Continue mixing for 1-2 more minutes.  The dough should be very thick and will be sticky.
2.  Remove from bowl of mixer and place on a large piece of plastic wrap that has been laid out on the counter.  Using the plastic wrap as a guide, roll the dough into a ball, wrapping tightly.  Place in the refrigerator for about 30-45 minutes or until thoroughly chilled.  This is a very important step!
3.  In the meantime, fill a wok or large pot with 1" of no taste oil, such as canola or vegetable.  Also, prepare the chocolate and cinnamon sugar.
4.  In a small pot, place the chocolate chips and oil, whisking constantly over low heat until the chocolate is smooth and glossy.  Keep a close eye on it- chocolate burns very quickly.  Turn off the heat and set aside. 
5.  Prepare the cinnamon sugar: place the raw sugar and cinnamon in a medium bowl, using a whisk to stir well.
6.  Once the donut batter has chilled, place a generous amount of flour evenly over either a large piece of parchment paper or a large piece of waxed paper.  Place the dough in the center, sprinkling the top generously with flour.  Using a rolling pin, which has been, you guessed it - generously sprinkled with flour, carefully roll out the dough to between 1/2" and 3/4" thick.  Using a donut cutter fitted with a donut hole cutter, dip into a bowl of flour, making sure it is well coated.
7.  At this point, turn on the burner with the oil on medium heat and prepare a plate lined with several pieces of paper towel.  The oil is ready when a small piece of dough immediately sizzles and comes to the top.
8.  Start cutting the dough with the donut cutter, being sure to dip it into the bowl of flour between each cut. 
9.  Once the oil is ready, drop the donut in very carefully, about 4 at a time, cooking on each side for 2-3 minutes, or until lightly golden brown.  Remove from oil and place on paper towels to drain.  Allow to cool while frying the remaining donuts.
10.  Once donuts have cooled enough to handle (they still need to be warm though!), dip half of them (or however many you want) into the melted chocolate and roll the rest of them around in the cinnamon sugar. 


Donuts Rolled Out and Cut

Donuts Frying: Half Cooked On Left, Raw on Right


These are amazing warm, but are great at room temperature too.  To store overnight, place in an airtight container and be sure to eat them all by the next day.  They are great popped into the oven for a couple minutes to re-heat.  Take them to work to share or make them when you have company over or you will never go through them all, at least I hope not by yourself!  I know that as soon as I took the picture, the hubby immediately ate three of them!

Enjoy!

-K

Friday, April 15, 2011

Moro de Gandules with Tempura Veggies and Salad

Sometimes I go through phases where I am absolutely obsessed with moro (Spanish seasoned rice dish usually with beans served mixed in with the rice) - I want it several times a week.  Other times, not so much.  It seems that when the Hubby isn't requesting it for dinner, is when I want it the most.  Hubby's only wish for this meal was tempura.  My good friend K, knowing how much I love tempura, bought me a package of tempura mix when she was at this Japanese food market in Jersey (have I mentioned yet that it is 2 lbs. of tempura mix?!  That is going to make more tempura than I know what to do with!).  So, having only made it once since she gave it to me, yet knowing that I still had a lot of the mix, I agreed.  I love tempura and am more than happy to make it.  Hubby was also in the mood for shrimp, real shrimp mind you - remember, he is not a vegetarian.  Not having any real shrimp and definitely not going out to buy it for him, I remembered that I had some vegan shrimp I got from May Way in Chinatown in the city.  So, I made that instead, and even though he was absolutely not fooled, loved it nonetheless.  As did I!  Wishing we didn't eat it all so I could snack on some now as I'm typing!


Moro de Gandules, Tempura Veggies, Romaine Salad

Moro:

1 1/2 tablespoons olive oil
1 cup long grain white rice
1/2 cup green pepper, small diced
1/2 cup red or orange bell pepper., small diced
1 cup onion, small diced
1 jalapeno, minced
1 carrot, small diced, about 1/2 cup
3 mini vegetable bouillon cubes (Maggi is a good brand)
1/2 teaspoon onion powder
1/2 teaspoon garlic powder
1/4 teaspoon sea salt
1/4 teaspoon black pepper
1/8 teaspoon chipotle pepper powder
3/4 cup full fat coconut milk
3/4 cup filtered water
1/2 cup frozen gandules

Tempura Veggies:
1 onion, sliced into medium-thick rings\
1 green bell pepper, sliced into thick strips
1 large handful baby carrots, about 2/3-3/4 cup
Veggie Shrimp, optional
Tempura mix, made according to directions
Vegetable or canola oil, a couple inches worth in a pot

Salad:
1/2 head romaine lettuce chopped into bite sized pieces, washed, dried
1 tomato, sliced into thin slices
1/2 lemon , olive oil, sea salt and black pepper as dressing

1.  Start with the moro first - it will take the longest.  Put a medium sized saucepan over medium heat and add the oil. Once hot, add all the vegetables and cook till softened. Rinse the rice under water. Add the wet rice and frozen gandules to the pot and cook, stirring, until the rice is no longer wet. Once the rice has dried, add the coconut milk and the water. Add all the spices and stir well to combine. It should taste too salty and too spicy - it will mellow once it cooks.
2. Lower the heat to low and cover with lid. Stir the contents every few minutes until the rice is completely cooked through - this will take at least half an hour. Once the rice is just cooked, allow it to continue cooking in the pan for about 10 minutes without stirring it. This will give it the customary crunchy bottom layer that Spanish people love so much.
3.  Make sure everything for the salad is prepped - chop, wash and dry the salad, slice the tomatoes and set aside until ready to use - it will come together in no time. 
4.  Get the oil ready and turn the heat on medium.  Pour about 2" of oil into a medium sized pot and allow it to become very hot. 
5.  In the meantime, prepare the veggies.  Prepare the tempura batter - it should be about the consistency of pancake batter.  Once the oil is ready (a drop of tempura batter will immediately begin sizzling and come to the surface of the oil), begin frying the tempura in batches.  Dip the veggies/shrimp in the batter, covering the entire surface and shaking off the excess.  Carefully place the covered veggies/shrimp one by one into the oil, not exceeding 10-12, as they will overcrowd and not fry up well and will stick together.  Turn the tempura covered goodies every minute or so until the outside of the batter has firmed up and the veggie in the middle is cooked all the way through.  Drain on paper towels and sprinkle immediately with sea salt.  Continue frying the veggies/shrimp in batches until they are all cooked.
6.  To serve, place a serving of the moro, tempura veggies and shrimp, and romaine lettuce topped with tomato slices, sprinkled with sea salt and black pepper, and drizzled with lemon juice and olive oil.  Serve a sauce for dipping the tempura.  I did a mixture of tamari, filtered water, toasted sesame oil, grated garlic and ginger and red pepper flakes.  Delicioso!

Enjoy!

-K

Friday, March 25, 2011

Eggplant Parmesan with a Kale & Broccoli Saute

Sometimes when Hubby is working or has a different schedule than I do, I have to try to cook for myself.  So much for the trying to cook for one this time!  I bought a large eggplant and even though the Hubby was not here, I was expecting to have someone over for dinner and planning on making Eggplant Parmesan.  Unfortunately, that did not work as I had planned, but I had already prepared and purchased all the ingredients I needed to make the dish and have been craving it for over a week.  When I was the Head Chef at this organic vegan restaurant in Brooklyn, I created this Eggplant Parm sandwich, which we ultimately ended up only making for ourselves for our family dinners because it was so labor intensive and unrealistic to make on a larger scale.  I remember it being amazing though, so searched through all of my old recipes, found it, modified it and ended up with Eggplant Parmesan over spaghetti.  It was so delicious that I ate about 1/3 of the eggplant, as well as a side of kale and broccoli. 

The recipe does have a few steps to it but they are so worth it and so necessary.  If you do not have the time or energy to make it in one night, you could definitely make the marinara sauce and pasta the night before and just reheat them.  I will definitely be making this again, and since I didn't listen to myself saying I need to cook for one, I'm going to pay for it by eating this for at least three more meals.  No problem - I'm remembering when I had so much lasagna left after making it for the Hubby and having him visiting his family in his country and being left with 2/3 of the lasagna, that I ate it for breakfast.  And damn was it delicious!

Eggplant Parmesan


Creamy Yet Crunchy (and delicious!)  Eggplant over Pasta

1 large eggplant, peeled and sliced into 1/2 " rings

16 oz. brown rice or wheat spaghetti, cooked till al dente

Slurry:
1/2 cup unsweetened soymilk
1 tablespoon arrowroot powder
1 teaspoon prepared mustard
1 teaspoon dried basil
1 teaspoon dried oregano
1 teaspoon dried thyme, crushed with fingers
1 teaspoon sea salt
1/4 teaspoon black pepper

Bread Crumb Mixture:
3/4 cup breadcrumbs (use brown rice breadcrumbs to make gluten free)
1/3 cup Vegan Parmesan (1/4 cup each nutritional yeast and sesame seeds, 1 tsp. sea salt ground in coffee mill till fine, then measure)

Marinara:
32 oz. canned tomatoes, crushed with hands
1 tablespoon olive oil
1 medium onion, minced
4 cloves garlic, minced
2 teaspoons dried basil
2 teaspoons dried oregano
1 teaspoon sea salt
1/4 teaspoon black pepper
1/4 teaspoon onion powder
1/4 teaspoon garlic powder

Kale and Broccoli Saute:


Crisp Broccoli, Fresh Veggies in a Tamari Sauce

1 tablespoon olive oil
1/2 bunch broccoli, florets separated and stems sliced
6 large leaves kale, tough stems removed and leaves sliced
1/4 red onions, sliced into strips
1/4 green pepper, julienned
4 cloves garlic, minced
2 tablespoons tamari
1/4 teaspoon red pepper flakes
1/4 teaspoon toasted sesame oil

1.  Begin by preparing the marinara: in a medium saucepan over medium heat, saute the onions and garlic in the oil until fragrant and lightly golden.  Add the tomatoes and lower heat.  Add the basil, oregano, salt, pepper, onion and garlic powder and stir to combine.  Cook till sauce has thickened and is fragrant, stirring periodically.
2.  In the meantime, prepare the veggies: bring a medium pot of water to a boil and blanch the veggies briefly till they become a vibrant green but maintain their texture.  Set aside to drain and cool.
3.  Cook the pasta and keep it hot. 
4.  Prepare the eggplant: set up a station - one bowl with the slurry, a second bowl with the breadcrumb mixture and a plate with the finished eggplant slices.  Heat a saute pan with a thin layer of oil and heat over medium heat until a piece of breadcrumb dropped in the middle immediately begins to sizzle.  Dip each slice of eggplant into the slurry mixture, being sure to press the center to allow the juices to penetrate.  Shake off excess liquid and immediately dredge through the breadcrumb mixture, being sure to get the top, bottom  and sides well coated.  Place on plate until ready to begin frying. 
5.  Line a plate with paper towel and once the oil is hot, begin frying the eggplant slices.  Fry for a couple minutes on each side, or until golden brown and fragrant - be careful that the bread crumb mixture does not slide off. 
6.  Finish the veggies: in a wok, add the oil over high heat and place the onions, peppers and garlic.  Cook till the garlic is fragrant, then add in the semi cooked broccoli and kale.  Saute for a couple minutes or until well flavored.  Add the tamari, toasted sesame oil and red pepper flakes, tossing to coat. 
7.  To serve, place a mound of spaghetti in the middle of a plate.  Top the marinara sauce over top, followed by the cooked eggplant slices and optional vegan Parmesan.  Serve the sauteed veggies on the side.  Yum!

Enjoy!

-K

Tuesday, December 14, 2010

Vegan Mozzarella Sticks!

Vegan Mozzarella Sticks!  The best and least healthy thing in the world - something that makes me deliriously happy!  I used to love the ooey gooey cheese sticks when I was a kid and definitely ate them far too often.  I can't remember how many years it's been since I've had them - high school was probably the last time!

I am so lucky to work in a vegan bakery within an extremely vegan friendly kitchen.  Our chef allows myself and others in our department to purchase items from the kitchen at her cost, which is a considerable discount  when you consider the price at retail.  So, I recently purchased a one pound chunk (there is no better word!) of daiya mozzarella style vegan cheese.  I had such grand ideas of things to make with this cheese, but truth told, once I purchased it, it seemed like too much and I rarely seem to use "cheese" anymore on anything I cook.  I've started getting nervous about it going bad, and even though I bought it at a nice discount, it wasn't free and I definitely don't want to throw it away.

I was talking to a coworker about my dilemma, and she came up with an entire list of suggestions, like lasagna, stuffed shells ... and ... mozzarella sticks.  I was so overwhelmed by the sheer quantity of cheese that it hadn't occurred to me to make any of those things, even though I have tried the vegan cheese sticks before and had success with my recipe.  So cheese sticks here we come:

Vegan Mozzarella Sticks:


Yields: 4-6 Servings

Wet Batter:
1/2 cup unbleached flour
1/2 cup unsweetened soy milk
1 tablespoon arrowroot or tapioca starch
1 tablespoon corn meal
1/4 teaspoon sea salt
1/4 teaspoon garlic powder

Breadcrumb Mix:
1 cup panko breadcrumbs
1 teaspoon dried basil
1 teaspoon dried oregano
1/2 teaspoon sea salt
1/2 teaspoon dried parsley
1/2 teaspoon black pepper
1/4 teaspoon garlic powder
1/4 teaspoon onion powder

1.  Slice the cheese into rectangular sticks and set aside.
2.  Prepare the wet batter.  Place all ingredients into a small bowl and whisk together until smooth and no lumps remain.  This mixture will be very thick.
3.  Prepare the herbed bread crumb mixture.  Place all the ingredients into a small bowl and mix with hands until the herbs and spices are evenly distributed.
4.  Set everything up in an assembly-line production style:  the mozzarella sticks, the wet batter, the bread crumb mixture and a clean plate to put the finished sticks on.
5.  Place the mozzarella stick in the wet batter and coat all sides. Immediately dunk the wet cheese stick into the bread crumb mixture, and working quickly, coat all sides in the herbed mixture and place the finished cheese stick onto the clean plate.
6.  Repeat with remaining ingredients until all the cheese sticks are coated in both the wet mix and the bread crumb mix. 
7.  Place the entire plate of cheese sticks in the freezer for 15-20 minutes or until the outer crust firms and is no longer soft to the touch.  This is a very important step - if you do not do this, the outer coating will fall off as soon as it hits the oil and the cheese will burn all over the pan and oil and just creates a terrible mess - I made this mistake the first time because I was feeling lazy about waiting while the cheese sticks  were in the freezer.
8.  Place about an inch of no-taste oil like canola or vegetable in a small sauce pot and heat over medium-high heat until a piece of bread crumb immediately starts bubbling and comes to the surface.
9.  Fry these in batches and place on a paper towel lined plate to drain.  Watch these very carefully as they like to stick to one another and they take only about 30-40 seconds.  As soon as they are lightly golden, take them out or the cheese will start exploding out the sides.
10 .  Eat these with a nice warm dish of marinara sauce - homemade hopefully!  So delicious!

Enjoy!

-K