Showing posts with label Soy Free. Show all posts

Monday, May 12, 2014

Gluten Free Double Chocolate Brownies

I have recently been blessed with a second job.  I am so happy about it!  Time to start saving my money and continue working on the business hardcore!  I went from working about 16 hours per week to about 60-70.  Believe me I am definitely not going to complain.  Very thankful to have this going on.  The people that I am working for have great hearts and really want to help me out - really just great people that you genuinely want to be around.  Thank goodness for that!!

I have also been doing a lot of baking.  Including these crazy delicious gf brownies.  I found the recipe on Oh She Glows of course and after a bit of tweaking, they came out perfect (they were pretty close to perfect in the first place).  I brought them to a vegan meeting and I think they were well received.  I also had hubby take them to his job for his coworkers to sample - there are several gluten free people that work with him. They loved them!


Giant pan of Gluten Free Brownies!


Oh She Glow's Recipe

Changes I made:

-  used 2 tablespoons of ground flax
- used sorghum flour instead of brown rice flour
- used ground walnuts instead of ground almonds - it was all I had on hand
- added 1 teaspoon xanthan gum
 - didn't add the additional 1/4 cup chocolate chips
 - baked the brownies in a 9x13" baking pan so they weren't so thick


That's it!  Very good base recipe.  I love Angela Liddon's recipes and creativity.


Cut into small pieces for samples!


Koko

Thursday, April 24, 2014

Pesto Pizza Pinwheels

Hubbs and I both love pizza.  I mean, who doesn't?  We definitely love the convenience of buying out, and when we lived in Brooklyn, we bought pizza out a lot.  Most of the pizza places we frequented were just small local stores using homemade, good ingredients, so we didn't have to worry about it. I know there are places here in Michigan, but they are not as convenient to get to as we would like.  We have to get in our car and drive to get the pizza (we just walked there on the way to our house from getting off the subway in Brooklyn), and we might as well just make it ourselves - control the ingredients and use exactly what we want.  

We end up making pizza about once every week to week and a half.  This time when I made it, I decided to try something different and fun - pinwheels.  I've seen them for years, but have never made them before.  I had some extra pesto in the freezer from last summer when we had our bountiful basil crop, so decided to use that.  These turned out really good!  We dipped them in hot marinara sauce.  Yum!  My little brother came over when I was making them and hinted that they looked great.  I gave him several of them, which he promptly dipped in ranch!  He literally puts ranch on everything - even in the sauce when he makes his lasagna.  Funny kid!  These could work with any combination.  They would also be great for a party or a get together.  


Freshly baked pesto pizza rolls


Ingredients:

Pizza Dough (I use this recipe.  Use half for these rolls and freeze the remaining half for later.)

Pesto Sauce
Vegan Cheese

Toppings:
 - Green Peppers
 - Onions
 - Baby Spinach
 - Kalamata Olives
 - Pickled or fresh Jalapeno Peppers
 - Pignolis

Filtered water to seal the dough. 


1.  Prepare the dough according to the attached instructions. 
2.  After the dough has risen, punch it down.  Place the half you are not using in a freezer bag, label and freeze for later use. 
3.  Roll the pizza dough out into a large rectangle-ish shape on a floured surface. 


4.  Liberally spread pesto over the surface of the dough - leaving about an inch of space at the top bare.


5.  Sprinkle the vegan cheese over the surface of the pesto, followed by the veggies and other toppings, as desired.


6.  Top with baby spinach.


7.  Slowly roll the pizza into a cigar shape.  Sprinkle a little water onto the top of the pizza to help the dough seal together. 


8.  Use a sharp non-serrated knife to slice the pizza into rounds.


9.  Place the pizza rounds onto an oiled sheet tray.  At this point, you can decide to place a towel over the prepared rolls, place in a warm place and allow them to rise some more, then bake them.  Or you can put them in the oven right away at 375 degrees for about 15-22 minutes - which is what I did.

10.  Let them cool just until you are able to handle them safely.  Dip into warm marinara sauce or whatever else you like to eat with your pizza.  Depending on my mood, I may drizzle some sriracha over the top.  Yum!


Enjoy!

Koko

Wednesday, April 16, 2014

Vegan Spicy Cheesy Potato Patties

On Sunday I made lasagna for lunch and also a full dinner, including mashed potatoes.  Hubbs always takes the leftovers from dinner with him to work for his lunch the next day.  But since he had two choices, he of course chose lasagna (who wouldn't?).  I convinced myself that I would eat the potatoes over the next couple days, but there they have continued to sit.  We have a rule that we don't eat any cooked food 7 days after being prepared and even though it has been only 4, I knew if I didn't do something with those potatoes soon, they would get thrown out.  Hubbs and I both hate wasting food, so I decided to use them to make something tasty, if a little unusual, for breakfast this morning.  How about potato patties?  I made some when we were in Brooklyn, but with sweet potatoes.  They were amazing!  Of course "regular" potatoes would be just as delicious, so that's what I did.  And they were crazy delicious!  Super simple too since the main component was already prepared.  This came together in like 10 minutes, and was on the table within half an hour - good for the hubby since he had to be to work early.  I think this would be a nice accompaniment to a dinner also.  Super quick and tasty!


Crispy on the outside, creamy on the inside.  Yum!


Spicy Cheesy Potato Patties:
 
2 cups of leftover mashed potatoes
1/4 cup minced red onion
1 jalapeno, minced
1 roma tomato, seeded and minced
handful cilantro leaves, chopped
1 tablespoon ground golden flax seed
2 tablespoons superfine ground rice flour
sea salt and black pepper
unsweetened almond milk, as needed
1/2 cup shredded daiya cheese
 
 
Canola or refined coconut oil to fry
 
To Serve:
Vegan Sour Cream
Sriracha
 
 
1.  Place the potatoes and the remaining ingredients into a large mixing bowl: red onion, jalapeno, tomato, chopped cilantro, flax, brown rice flour, sea salt and black pepper.  Mix well until all the ingredients are combined.  Add enough almond milk so that the mixture is easily moldable, but not too thin.  Season to taste and add the shredded daiya.
2.  Place a layer of refined coconut oil or canola oil in the bottom of a saute pan over medium heat.  Allow the oil to become hot.
3.  In the meantime, portion the the potato mixture into small patties, setting on a clean plate until ready to begin frying.
4.  Once the oil is hot, place 3-4 of the patties carefully into the pan.  Cook for several minutes, or until crispy and browned.  Carefully flip and cook the other side for several more minutes.
5.  Remove the cooked patties from the pan and place on a paper towel lined plate. 
6.  To serve, place a spoonful of vegan sour cream on top and drizzle with sriracha. 
7.  Continue with remaining patties. 
 
 
Enjoy!
 
Koko

Thursday, March 27, 2014

Homemade Vegetable Stock

I have been making homemade vegetable stock for years.  Years and years actually.  I've gone through different systems of making the stock with varying degrees of success, but I've perfected the stock over my years of living in New York in all kinds of tiny kitchens and spaces.  The best method that I have come up with by far is freezing all of my vegetable scraps in a gallon Ziploc bag and placing it in the upright freezer on top of our refrigerator in our tiny kitchen.  Whenever the bag would get completely full, I would toss it all in a large pot and make stock.  Then I would use whatever stock I needed that day and freeze the rest of it in pint and quart deli containers.  Several food blogs that I follow have suggested freezing in glass jars, but I have never had success, even when waiting for the food/liquids to cool completely, then sitting in the refrigerator for a couple hours and cooling it even more before putting it in the freezer.  I have had too many jars break on me to want to try it again.  So I have been storing it in deli containers and it has been working very well.  It's also super convenient. 


Veg Stock ready to go in the fridge and freezer
 
 
There is nothing better than making homemade vegetable stock.  It is super easy, costs almost nothing and gives tons of flavor and extra nutrients to your soups, sauces, stews, etc.  I also love that you have complete control of what goes in, how you prepare it, and therefore the end result.  There are no unnecessary added ingredients.  And if you are organized about it, you can make different kinds of stock for different purposes.  Several kinds I have made before include:


1.  Roasted Onion Stock for French Onion SoupKeep the onion ends, papers and outer layer of skins separate.  If I remember, I throw the ends of garlic in there as well - frozen of course.  Once I have a good amount, I roast the contents of the bag with some peppercorns until golden and dark.  Then I will simmer that mixture until fragrant and use it to make my delicious, super tasty soup.  Yum!
 
2.  Mushroom Stock:  I save all of the stems of the mushrooms I cook with and place them separately in a Ziploc bag in the freezer.  Once it's full, I'll simmer the stems along with a couple dried shiitake mushrooms, black peppercorns, dried thyme (or be even thriftier by freezing the stems from fresh thyme in the same bag with the mushroom stems).  Use the stock to make a killer Green Bean Casserole for Thanksgiving, a crazy flavorful mushroom soup or a delicious sauce to go with tempeh, tofu or seitan.
 
3.  Roasted Vegetable Stock:  Instead of placing the frozen veggies directly into the pot and covering with water, roast for 30 minutes or so at 400 degrees, then simmer.  Add a handful of lentils, black peppercorns and bay leaves for extra deliciousness.  Then use this tasty stock for more strongly flavored soups or a seitan pot roast or something equally amazing!


Frozen veggies in the pot, getting ready for some filtered water


Suggested Veggies:

Onion ends and peels (get rid of the papery outer-skins: they will make the stock bitter)
Carrots peels and ends
Garlic ends
Celery ends and leaves
Mushroom stems
Parsley Stems
Fresh thyme stems
Tomato cores and ends


Veg Stock Working


Homemade Veggie Stock:

Yields: 1 Gallon Stock


1.  Take the contents of the gallon Ziploc bag and place it in a large pot. Cover with at least 1-1 1/2 gallons of filtered water. Add several black pepper corns, a couple bay leaves and dried thyme if you would like. 

2.  Bring the contents to a boil, then reduce heat to a simmer.  Simmer for 45-60 minutes, or as desired.  The longer the stock simmers, the darker in color and stronger in flavor it will be. 

3.  Allow the veggies to sit in the cooking liquid for about 10-15 additional minutes, or until the stock is more manageable to handle (temperature-wise). 

4.  Strain the veggies out of the stock, pressing to release as much liquid as possible.  Discard the stock veggies - preferably in a compost pile. 

5.  Cool the stock, package and be sure to date clearly.   Don't fill the containers completely full or they may explode in the freezer  - the liquid expands as it freezes. 


Labeled and frozen!
I've been doing this for years!
(And don't worry this picture was taken years ago & the stock long since used up.)


Fresh veggie scraps getting ready to go in the freezer.


Now save those organic veggie scraps and make your own homemade stock!


Enjoy!


Koko

Wednesday, March 12, 2014

Potatoes and Broccoli in a Creamy Sauce

This is a recipe I made using up the last of the ingredients I had in the fridge to tide us over until we were able to schedule a time to go shopping.  I just took what I had and came up with a simple, hearty, comforting dish and it came out really tasty.  Reminds me of the peas and potatoes my mom used to make for us when we were kids, that her mother used to make for her children as a way to make an inexpensive meal stretch out to feed many.  It always makes me happy to be eating meals similar to those my grandmother served her children during those difficult times.  Shopping sometime soon and then more creative and fun meals coming up!


Hearty and Comforting


1 tablespoon olive oil
1 yellow onion, small diced
2 cloves garlic, minced
2 tablespoons superfine brown rice flour 
4 cups unsweetened almond milk
4 large potatoes, peeled and diced
1 head broccoli, cut into small florets, stems peeled and diced
1 red bell pepper, medium diced. or other vegetable
 
1.  Place the potatoes in a medium pot and cover with cold water.  Cook until the potatoes are just tender.  Add the broccoli and red bell pepper into the same pot and cook for about a minute, or until tender-crisp.
2.  Meanwhile, in a large pot over medium heat add the olive oil.  Allow it to become hot.  Add the onion and garlic.  Saute for about 5 minutes, until lightly browned.  Add the brown rice flour.  Continue cooking for several minutes.
3.  Lower the heat to medium.  Add the almond milk, stirring immediately so it does not clump.   Stir until the mixture has thickened.  Season with sea salt and black pepper.
4.  Add the cooked potatoes, broccoli and red peppers.  Season to taste.

I always top this with lots of sriracha.  Yum!


Enjoy!

Koko

Thursday, March 6, 2014

Vegan Gluten Free Cakes and Cake Decorating Class: May 9, 2011

I was going through more pictures on my computer and found some more cakes from a cake decorating class that I taught a couple years ago.  I unfortunately did not record which flavors of cake are which, so I just have the pretty pictures of the cakes my students made.  So take a look at the cakes, all of which are vegan, gluten free, soy free, refined sugar free and mostly organic.


Hope you enjoyed these pretty pictures!

Koko


Saturday, February 22, 2014

Vegan Gluten Free Masterpieces Class: October 17, 2011

Just came accross some pictures of a Gluten Free Vegan Masterpieces Class I taught several years ago. About 2 1/2 years ago in fact! Thought I would share them. It was a great class - they all were! I have been blessed with awesome students at NGI!


Cinnamon Swirl Coffeecake


Partially Eaten Coffeecake


Marble Cake with Chocolate Frosting


Pretty Cake!


Another marble cake with chocolate frosting


Pumpkin Spice Pecan Cookies


Cherry Almond Biscotti


Spiced Whoopie Pies


Spiced Whoopie Pies in Action


The beautiful gluten free spread!


A blurry, but tasty sample plate.


Pumpkin Bundt Cake


Hope you enjoyed the pictures!

Koko

Thursday, February 13, 2014

Valentine's Day Goodies: Gluten Free, Soy Free Sugar Cookies

Happy Valentine's (a day early!).  And happy b-day to my baby brother, who is turning 23 today.  So young!


For this Valentine's Day I am going to be posting one recipe, even though there are many, many amazingly delicious goodies that I have baked for this holiday in the past.  It's funny to me how so many people are against Valentine's, saying it's a holiday manufactured by the greeting card companies to make money.  I was definitely one of those people before I got married.  That does not mean, however, that I go all out for Valentine's Day, but that I definitely appreciate it more now.  It gives me an excuse (not that I need one at all!) to make tasty heart shaped goodies, spend quality time with my Hubby and to take the time to tell him how much I really appreciate him. 
 

Gluten Free, Soy Free Sugar Cookies:


I am Adorable!  And Delicious!  And Gluten Free!!


Yields: 2 dozen cookies


Cookies:
1 cup earth balance
2 teaspoons vanilla extract
1 cup organi cane sugar
2 tablespoons flax eggs (mix 1/3 cup ground flax seeds with 2/3 cup water in a jar and shake until combined and measure 2 tablespoons)

2 1/2 cups finely ground white rice flour
1 teaspoon baking powder
2 1/2 teaspoons xanthan gum
1/2 teaspoon nutmeg (optional)


1.  Preheat oven to 350 degrees.  Line two baking trays with parchment paper and set aside until ready to use.
2.  In the bowl of a stand mixer, add the earth balance and vanilla extract and whip until soft and fluffy.  (If you don't have a stand mixer, you can use a hand mixer or if you also don't have a hand mixer, use some elbow grease to whip it together.)
3.  Add the sugar and flax eggs to the softened earth balance and continue whipping until the sugar has mostly dissolved.  Add all of the dry ingredients: the white rice flour, baking powder, xanthan gum and (optional) nutmeg.  Whip until the batter just comes together. 
4.  Lightly flour your work surface with additional rice flour and place the ball of dough in the center.  Sprinkle with a small amount of flour and using a rolling pin, roll out the dough to your desired thickness (some people like a crispy sugar cookie, some like a doughy cookie - I like something in the middle.)  Just be sure that the whole rolled-out cookie dough is the same thickness.
5.  Using a heart shaped cookie cutter, cut out hearts and place on the parchment lined sheet trays.  These do not spread, so they can go pretty close to one another on the trays.  Bake 8-12 minutes, depending upon the thickness, and your preference for doughy or crispy cookies. 
6.  Allow the cookies to cool for several minutes before removing them to cool the rest of the way on a cooling rack. 
7.  Eat as is or prepare a simple vegan buttercream tinted with natural food coloring and spread on top of each cookie.  Yum!


Red Velvet Cupcakes Sprinkled with Red Sugar!


Gluten Free Sugar Cookie Hearts


Gluten Free, Soy Free Sugar Cookie Hearts


So Adorable!


Pink & Reds, Not Black & Whites!


Vanilla Raspberry Cupcakes with Vegan Cream
Cheese Icing & Pink Stars


Close-Up!


Enjoy!

-Koko

Sunday, January 19, 2014

Millet with Kale, Mushroom Gravy and Beet Salad

I love the website Oh She Glows.  I follow it quite religiously and am always so impressed how Angela Liddon makes all of the food just look so amazing and healthy.  Pretty much every picture I see, I say to myself "I am so going to make this!"  The reality, of course is that I have so many recipes that I just have to make, and trying as of this point to keep to a budget, but still eat healthfully, is challenging, and I can't make every dish if I don't have the ingredients at home.  I think most of the ingredients in this dish people with a well stocked fridge and pantry should pretty much have on hand at all times.  This is one that seemed pretty easy to make, healthy, but also very much a "comfort food" item.  Sometimes the hubby can be finicky about creamy sauces and gravies, but I thought this would be great.  He ended up loving it, but didn't want to take it to lunch the next day, because in his words it was too light for a hardworking, strong man like him.  Insert good-humerdly crossing of the eyes here.  It ended up being a bonus for me because I ended up taking it for my lunch and was very satisfied!  Try making it and go over and take a look at what Angela ended up doing for the same dish over at Oh She Glows.  I didn't follow her recipe exactly, but used it as a guideline to make my own dish.


Super Comfort-Foody and Delicious!


Gravy:

Yields: 2 1/2 cups

2 tablespoons canola oil
2 cloves garlic, minced
1 onion, small diced
4 oz. criminis, small diced
4 tablespoons unbleached flour
2 cups filtered water
1/2 teaspoons sea salt
1/8 teaspoon black pepper
1/4 teaspoon dried thyme, crushed with the fingers
2 tablespoons nutritional yeast
1 tablespoon tamari
1/4 teaspoon unchicken boullion

Garlic Kale:
12 cups kale, blanched
1 1/2 tablespoons olive oil
4 cloves garlic, minced
sea salt and black pepper

Millet:
1 1/2 cups millet, rinsed
1 teaspoon olive oil
3 cups filtered water
1/2 teaspoon sea salt

1.  Cook the millet in the oil until toasted and most of the water has evaporated.  Add the filtered water and sea salt.  Bring the millet to a boil, reduce heat to a simmer, cover, and cook till the water has absorbed and the millet is fluffy,
2.  Prepare the gravy:Add the oil over medium heat.  Once it is hot, add the onion, criminis and garlic, stirring frequently until they begin to color.  Add the unbleached flour and stir well to coat. 
3.  Allow the flour to cook for a couple minutes so that the raw flour taste goes away.  Add the water all at once, whisking immediately so the gravy does not clump.
4.  Add the remaining in gredients to the gravy: the sea salt, black pepper, thyme, nutritional yeast, tamari and unchicken boullion.  Whisk well to combine all the ingredients.  Continue cooking till the gravy has thickened to your liking.  Season to taste.
5.  Prepare the garlic kale:  blanch the kale just until it turns a bright green color - about 30 seconds.  Drain.
6.  In a small pan over medium heat, cook the garlic in the olive oil until it becomes golden and cooked through.  Season to taste with sea salt and black pepper.
7.  To serve, place a mound of the millet on the plate, followed by a generous serving of kale, then top it all off with gravy.  Healthy comfort food at its best!


The millet mixed with the garlic kale.


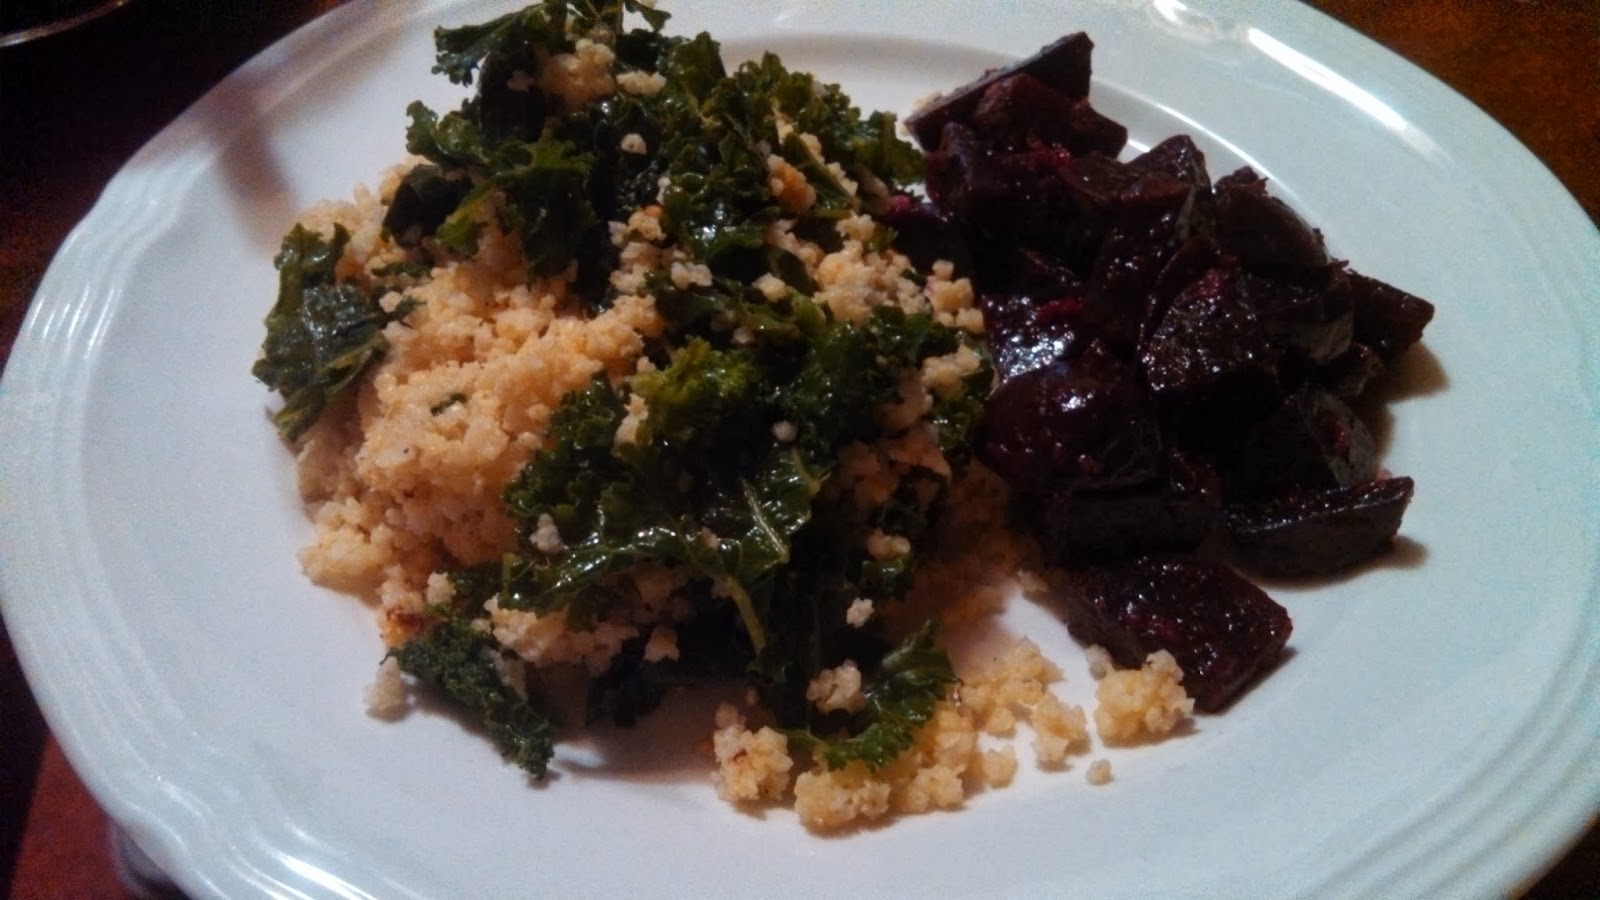
The plate before adding the gravy.  Yum!


Enjoy!

Koko