Showing posts with label Gluten Free Wednesday. Show all posts

Wednesday, March 12, 2014

Potatoes and Broccoli in a Creamy Sauce

This is a recipe I made using up the last of the ingredients I had in the fridge to tide us over until we were able to schedule a time to go shopping.  I just took what I had and came up with a simple, hearty, comforting dish and it came out really tasty.  Reminds me of the peas and potatoes my mom used to make for us when we were kids, that her mother used to make for her children as a way to make an inexpensive meal stretch out to feed many.  It always makes me happy to be eating meals similar to those my grandmother served her children during those difficult times.  Shopping sometime soon and then more creative and fun meals coming up!


Hearty and Comforting


1 tablespoon olive oil
1 yellow onion, small diced
2 cloves garlic, minced
2 tablespoons superfine brown rice flour 
4 cups unsweetened almond milk
4 large potatoes, peeled and diced
1 head broccoli, cut into small florets, stems peeled and diced
1 red bell pepper, medium diced. or other vegetable
 
1.  Place the potatoes in a medium pot and cover with cold water.  Cook until the potatoes are just tender.  Add the broccoli and red bell pepper into the same pot and cook for about a minute, or until tender-crisp.
2.  Meanwhile, in a large pot over medium heat add the olive oil.  Allow it to become hot.  Add the onion and garlic.  Saute for about 5 minutes, until lightly browned.  Add the brown rice flour.  Continue cooking for several minutes.
3.  Lower the heat to medium.  Add the almond milk, stirring immediately so it does not clump.   Stir until the mixture has thickened.  Season with sea salt and black pepper.
4.  Add the cooked potatoes, broccoli and red peppers.  Season to taste.

I always top this with lots of sriracha.  Yum!


Enjoy!

Koko

Wednesday, October 23, 2013

Gluten Free Private Class: Chicago

 
Before moving away from New York, I taught a private class for a family that lived in Chicago.  They had three girls that were gluten free with several other allergies, including soy, dairy, eggs, nuts and probably a couple other things I am forgetting.  It was such a great experience to be invited into somebody's home as an educator and help the family learn to prepare the dishes for one another that they have not had in so long.  The mother told me stories about how her children felt bad going to parties or get togethers because they were not able to enjoy the same snacks and treats as the other children and would feel left out.  So we were sure to make recipes for cookies, muffins, brownies loaves and other goodies that they could make and bring with them or simply have at home.  It was such a nice experience and I just wanted to share some photos from that time.  I love how the three girls were willing and happy to help during the class- not just their mom.  We made so much food and desserts it was crazy.  I think her freezer was definitely full for quite a while after that!


The local gluten free store, run by an eccentric lady (not the
one pictured).


Sandwich bread with a design from one of the girls.
 

Gluten free pizza to suit everyone - some with just sauce,
some with veggies and some with veggies and cheese. 
Kids are too funny!


Crispy eggplant with homemade gf breadcrumbs


Homemade baguette made into garlic bread.  Sooo good!


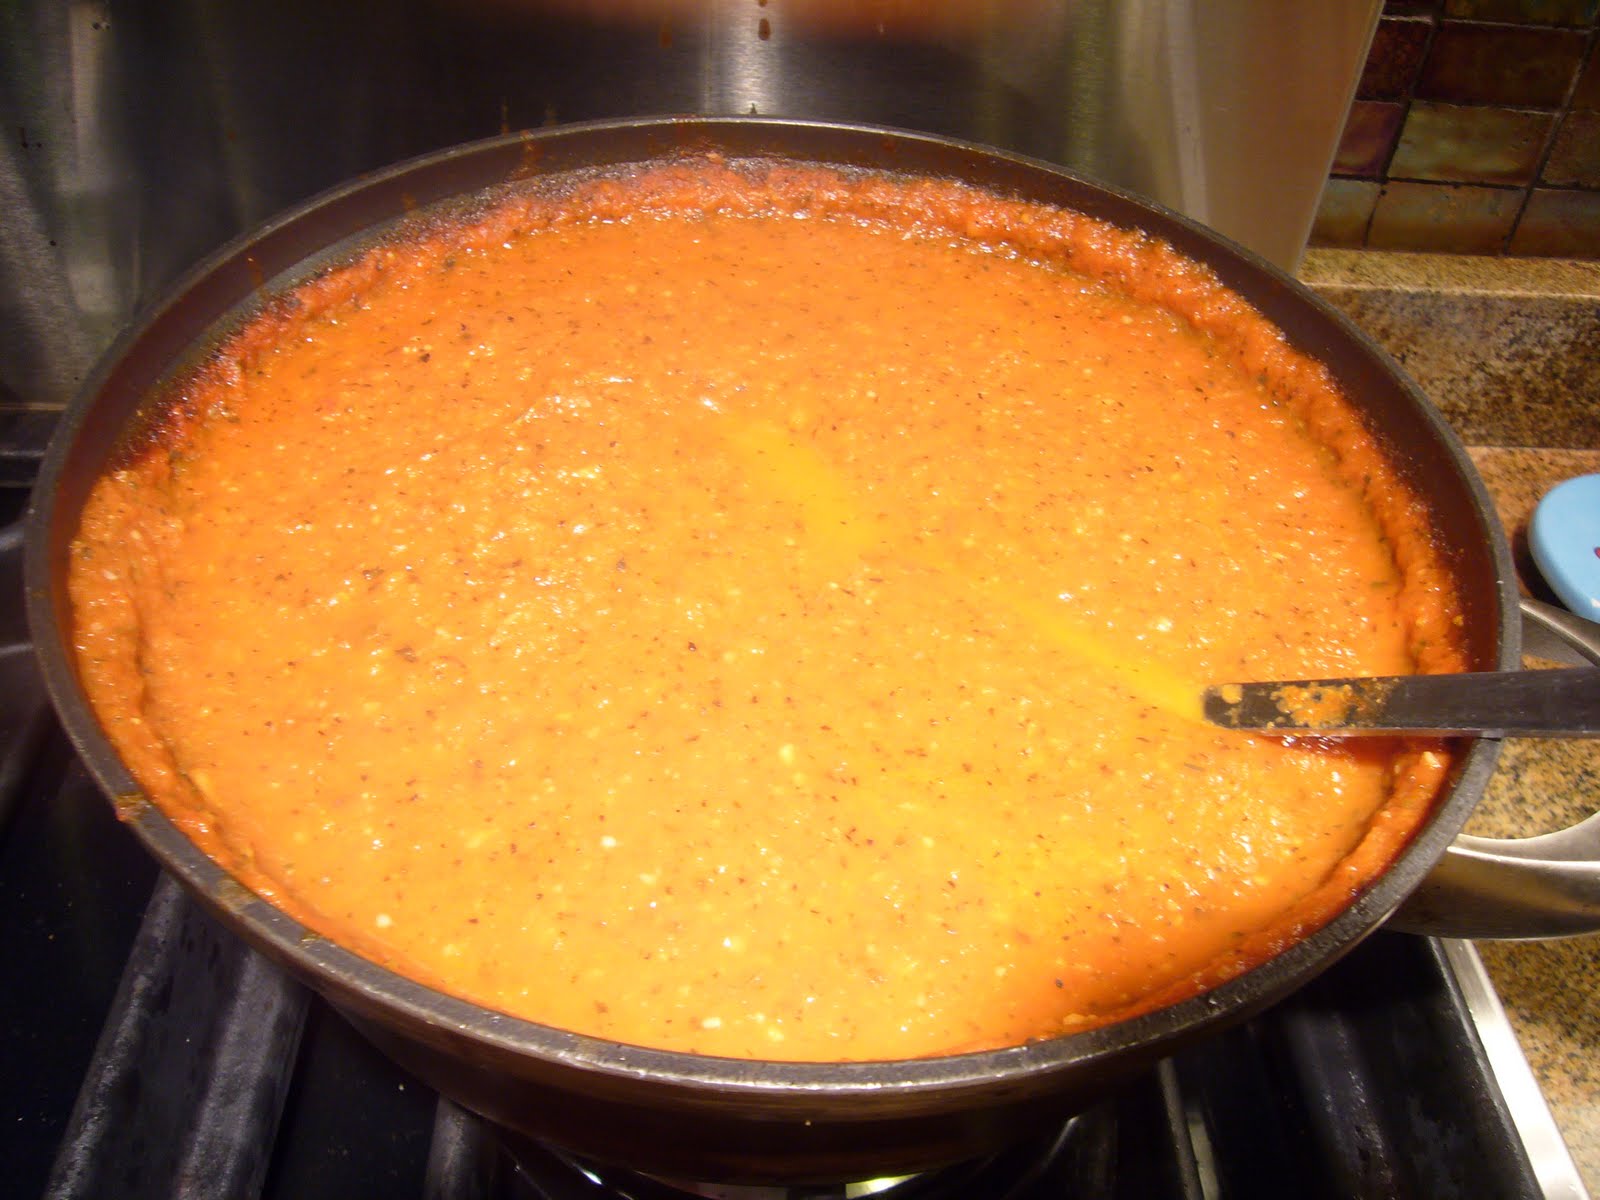
Giant pot of marinara.


The sauce for a lemon chicken dish my client wanted.  The sauce was great!


Vegetable Rissotto


Cooked gluten free quinoa pasta


Quinoa Tabouli


The Lemon Chicken Potato Dish


Gluten Free, Vegan Eggplant Parmesan


The table
 

Giant Platter of Eggplant Parmesan


More food.

And more.


And more.


The seriously delicious plate of gluten free, vegan food.


The happy family.


A tasty chocolate cake with chocolate frosting.


The girls were very happy to put edible glitter on the cake!


Chocolate Cake, Banana Bread, Brownies
 

Seeded Sandwich Bread


Chocolate Chip Cookies - delicious!


Banana Chocolate Chip Muffins


Delicious blueberry muffins


Yum!


Enjoy!

Koko

Wednesday, June 19, 2013

Gluten Free Testing: Cinnamon Rolls #8

I've been working on a gf recipe for cinnamon rolls for a couple years now.  On and off mind you.  The first, oh five batches or so, were pretty terrible I would honestly say, but I never quit.  Every subsequent recipe has gotten better and better.  This is test #8 and is the best so far.  I'm not going to post the recipe because I'm already on test #9 and the changes were somehow lost.  I should have written out each recipe individually and labeled them all, but hindsight is 20/20, right?  Next time I'll be sure to do it.  Once this recipe is perfected, I'll be sure to post it.  Until then, enjoy these pretty pictures!

Gluten Free Testing: Cinnamon Rolls #8:


After Rolling and Proofing - Unbaked


After Being Baked - Hot Out of the Oven


Drizzled in Icing!


Don't I Look Delicious!


Enjoy the pics!

Koko

Wednesday, March 20, 2013

Chickpea Vegetable Soup with Sweet Potatoes

I am fortunate to work in a place where I can purchase large bulk quantities of organic foods.  I do a lot of recipe testing and go through a lot of ingredients that are expensive when paying the retail cost.  I recently purchased a 25 pound bag each of organic unbleached flour, organic sugar, organic chickpeas and a case of soy free earth balance (the 2 lb. containers).  I've gone through almost all of the flour, 1/4 of the sugar and probably a couple pounds of the beans.  I use beans all the time in my cooking at home, the vast majority of the time I cook them from dry, using canned only when I am in a super hurry.  Garbanzo beans (chickpeas) are by far my favorite bean - I put them in everything.  Sometimes when I am cooking them from dry, I get carried away and make too many.  I don't love the texture of frozen garbanzo beans, so I try to use them all fresh, but I would much rather freeze them than throw them away, so sometimes they end up in the freezer.  Whenever I freeze them, I use them in soup - how this recipe came about. 

I have pretty much been making soup 2-3 times a week in this cold weather.  Even though today is technically spring, it is still pretty chilly out, so I felt like making this tasty, comforting soup.  I am a fan of the brothier soups and love me some greens in my soups, added at the end to still have a nice bite.  Try this soup before the weather starts to actually turn nice and warm!

Chickpea Vegetable Soup with Sweet Potatoes:


So hearty with delicious chunks of sweet potatoes.


Yields: 2 1/2 Quarts (6-8 servings)

2 tablespoons olive oil
1 medium yellow onion, diced
2 medium yams, peeled and diced
2 cloves garlic, minced
3 tablespoons red curry paste
2 teaspoons sea salt
1 teaspoon cumin
¼ teaspoon black pepper
¼ teaspoon cayenne pepper
8 cups vegetable stock
4 large leaves kale, shredded
2 cups chickpeas, cooked


1. Place a large stockpot over medium-high heat and add olive oil. Allow the oil to become hot.
2. Once the oil is hot, add the onion, yams and garlic and sauté for several minutes.
3. Add the seasonings: red curry paste, sea salt, cumin, black pepper and cayenne pepper. Toss to coat.
4. Add the stock and bring to a boil. Once the ingredients boil, reduce to a simmer.
5. Once the yams are just tender, turn off the heat and add the kale and chickpeas, stirring to combine.
6. Season to taste.  That's it!


Enjoy!

Koko

Wednesday, February 6, 2013

Gluten Free Bread Testing


I have been doing a lot of testing lately.  Mostly vegan, and gluten free about half of the time.  My husband and I are in major crunch time testing for our future cafe.  Our main menu is finished and I am mostly working on the no-fun stuff: business plan, recipe costing, etc.  I am still making time to test ideas for our baked goods section of the cafe - there is still a lot to do there.  It's difficult sometimes to really get into the baking at home though because there is only so small of a batch I can accurately make, and then what to do with the rest of it?  It's just Hubbs and I.  We might eat it for a day or two, but then what?  I've been trying to take it to work the last couple times, but riding a bike to work makes that problematic sometimes.  I'll figure something out in the meantime and take what I can to work.

I have also been working on gf breads lately, which have been challenging, rewarding, frustrating, exciting and many other things.  Making them is soooo unlike making conventional breads, they really almost shouldn't even be called breads - it should be called something much more amazing!  I have had many many failures and several successes.  The only thing I really do not like about gf bread is that it is really amazing only the first day it is baked.  After that it gets dry and is still very good when toasted, but you really can't eat it as happily as you did the day it was baked.  Also refrigerating it is a bad idea because it turns crazilly dry and crumbly.  I'm enjoying the experience and who honestly doesn't like bread?  So, that's a great plus too.  I'm not going to share the recipes yet because I still feel like they are not quite there yet, but I will once I'm very happy with them.  Until then, enjoy some pretty pictures of the last couple batches of bread I've been testing.


Mini Loaf - Adorable!  So delicious warm with earth balance!


Mini Loaf Sliced - Next Time I'll Make Mini Tea Sandwiches!


GIANT Loaf Of GF Multigrain Bread: 2x the Recipe


I Was Surprised by how Beautifully & Easily it Sliced!

Enjoy!

Koko

Wednesday, January 9, 2013

Gluten Free Testing: Lemon & Lemon Raspberry Cookies

Most of the time I love testing recipes.  The only downside to them is when they don't work out.  It's a great learning experience, but it's tough because it can end up hurting your wallet when you have to test a recipe multiple times.  But it's a necessary part of working in the food business or even being a home cook or baker.  And I am thankful to work with and around people that are interested in health, even if they are not particularly interested in or fond of gluten free, because they are much more willing to sample the goodies I make, even when it may not be the best test I've done. 

I know this is a strange recipe for this time of the year.  After all it is in the middle of winter, but I feel tired of everything being spiced and pumpkin-y.  I'm in the mood for some spring tasting goodies.  Maybe if I eat enough spring flavored goodies, spring will hurry up and get here!!  So I did some testing the other day with gf cookies.  I was in the mood for lemony goodness.  I absolutely love lemon in baked goods: lemon blueberry cake, lemon creme, lemon pie, lemon cookies, lemon bars, the list goes on and on!  So I have a base recipe I have been playing around with for gf cookies that is good, although a little sweet.  I have tried changing around the sweetener, but the cookie changes texture drastically, so that means I have to play around with other elements in the cookie, which I have been a little too lazy to do. ;)  For this test, I changed the sweetener from organic can to maple syrup, and it wasn't as sweet, but a little puffy, so perhaps a little more adjusting next time, but it certainly hit the spot. 

So once I made the lemon cookie which was super tasty, I wanted to add some raspberries to the mix as well.  Frozen, obviously.   But I was concerned that adding frozen fruit to the batter would result in a mushy or too wet cookie, so I tried a couple different ways to add the raspberries.  And each test was a fun experiment in seeing what would happen in different scenarios.  You can check out the pictures below.  And see the recipe I am currently working on too.


Raspberry Lemon Cookies Test:


I Think these should be called
 "Lemon Raspberry Swirl Cookies"


Yields 10-12 Cookies

1 1/4 cups sorghum flour
1/2 cup tapioca starch
1 teaspoon baking powder
1 teaspoon baking soda
1/2 teaspoon sea salt
1/2 teaspoon xanthan gum
1/2 cup maple syrup
1/4 cup + 1 tablespoon canola oil
2 tablespoons flax eggs
1 1/2 teaspoons vanilla extract
2 teaspoons lemon extract
zest of 1 lemon
1/3 cup frozen raspberries
organic cane sugar as garnish

1.  Preheat oven to 350 degrees.  Line a baking pan with parchment paper and set aside until ready to use.
2.  In a small mixing bowl add all of the dry ingredients: the sorghum flour, tapioca starch, baking powder, baking soda, sea salt and xanthan gum.  Whisk together until well combined.
3.  In a separate small mixing bowl add all the wet ingredients: the maple syrup, canola oil, flax eggs, vanilla extract, lemon extract and lemon zest.  Whisk together well.
4.  Carefully pour the dry ingredients into the bowl with the wet ingredients and mix together with a spatula until a thick cookie batter forms.  Add the berries and very carefully mix into the batter.
5.  Use a small portion scoop and scoop out the cookie dough onto the prepared baking tray. 
6.  Sprinkle each cookie with 1/2 teaspoon organic sugar. 
7.  Using a slightly moistened palm, flatten each cookie slightly.
8.  Bake 10-12 minutes, or until lightly golden around the edges, but still soft in the center.
9.  Allow to cool completely before sampling.


Lemon Cookies: Test 1 - No Berries Added


Lemon Raspberry Cookies: Test 1.1  - Added Raspberries
to Top of Cookie


Lemon Raspberry Cookies: Test 1.2 - add the very frozen
raspberries to the batter and mix gently gently gently.

Enjoy!

Koko

Wednesday, December 19, 2012

Gluten Free Arepa and Dominican-Style Hot Chocolate

My husband doesn't cook a lot, but when he is really in the mood to do so, look out!  I love it when he comes up with ideas from his home in the Dominican Republic and recreates them using the ingredients I would prefer we use.  The recipe he made for the arepa ended up making a huge 9x13" pan, and for only two people, we were eating it for over a week, but we didn't complain at all!  It was crazy delicious!  Now, arepa is a dish that is traditionally prepared over an open fire and eaten for breakfast, so it is not super sweet, which makes me happy.  I am not into the overly sweet dishes.  Now, admittedly, watching my husband in the kitchen is a little painful sometimes, seeing how he uses my expensive knives and pots, or chooses to use a tool that is not super efficient, but I keep my mouth closed and end up smiling in the end when I see how happy he is and how amazing and delicious the food turns out. 

Unfortunately, I do not have a recipe for this at the moment, because my hubby  never ever measures anything and thinks I am hilarious for measuring everything.  Next time, I will stand over his shoulder and estimate everything he puts in there.  It is the exact same way I learned to make Dominican beans from his cousin Wady, who barely speaks a word of English, and my Spanish is certainly nothing to get excited about.  Wady taught me how to make the beans speaking Spanish, which I could understand maybe every other word, and also didn't measure anything, so I stood over under his shoulder, seeing as he is 6'5" tall, and estimated the amounts of everything he was adding.  And damned if it didn't turn out so so close when I made it by myself the next time.  So, to make a short story long, next time Hubbs makes this, I'll write it down and post it.  I will write up a list of the ingredients I can remember that he put in there, but I will come back with a tasty recipe soon.  The recipe for the Dominican-Style hot chocolate is below.


Dominican-Style Hot Chocolate and Arepa

Dominican-Style Hot Chocolate:

8 ounces non-dairy milk or water (definitely better with the milk!)
pinch cinnamon
3-4 tablespoons organic sugar
2 1/2 tablespoons cocoa powder, sifted

1.  Place the non-dairy milk or water in a small pot and bring to a simmer.
2.  Place the cinnamon, sugar and cocoa powder in a small bowl and whisk to combine, making sure there are no lumps.
3.  Add the cocoa mixture to the simmering milk/water and whisk very well to combine.
4.  Allow the hot cocoa to cool for a couple minutes before enjoying.


The Amazing gf Arepa

Ingredients for Arepa (that I can remember):

corn meal
organic sugar
whole cinnamon sticks
fresh nutmeg, grated
whole cloves
pinch sea salt
Michigan cherries (sent to us by my mum!)
coconut milk
almond milk/ soy milk (I can't remember which one)

Until I can figure out the recipe from him!

Enjoy,

Koko

Wednesday, November 14, 2012

Spicy Black Bean & Quinoa Stuffed Peppers

I love me some stuffed peppers!  I ate these many times growing up and have thought about them over the years, but it never really went beyond simply thinking about them.  They were naturally meat filled (beef), so I couldn't get over thinking about using a soy substitute, but that didn't really sound all that appetizing to me.  I love beans (hubbs loves beans) and I love love quinoa (hubbs tolerates it but says it's too vegan - insert roll of eyes), so I thought about doing a black bean, quinoa stuffed pepper.  To keep it from being bland, I added some ground chipotle pepper powder and some other tasty peppers and they turned out amazingly!  So yummy and the pepper texture was just as I remembered it as a kid - firm enough to hold up, yet soft enough to be cut with a fork. 

They were really great and pretty quick, since I have been in the habit lately of cooking beans in large batches and freezing them in bags or plastic containers, then thawing them as I need them. I usually put 1-2 cups of cooked, drained beans in plastic bags, label them and freeze them flat.  Sometimes I will reserve the cooking liquid and place some beans in plastic deli containers, label and freeze them as well.  I use these for cooking Dominican beans.  Using the cooking liquid is the secret to having a thick sauce with the beans, and it gives them a lot of flavor as well.  Not to mention when the hubbs gets hungry and wants beans, all I have to do is thaw out the beans, add my seasoning, simmer and we have dinner in the amount of time it takes for the rice to cook.  Easy and delish!


The uncooked peppers stuffed with the quinoa/bean mix


Serves: 4-5

4 assorted color peppers, top removed and all insides taken out
2 cups cooked quinoa
1 cup cooked black  beans
3 chipotles in adobo sauce, chopped finely
1/2 teaspoon onion powder
1/2 teaspoon garlic powder
1/4 teaspoon black pepper
1/8 teaspoon cayenne pepper
2 teaspoons boullion powder
1 tablespoons olive oil
1/2 cup shredded carrots
1/2 small red onion, small diced, about 1/2 cup
3 cloves garlic, minced
Pepper tops, chopped
1 jalapeno, seeded and small diced
Fire roasted tomatoes with chipotles, to top peppers


1.  Preheat the oven to 375 degrees.  Place an 8" square baking pan on the stove and fill with 1/2" water.  Set aside until ready to  use.
2.  In a medium saute pan over medium heat, add the olive oil and allow it to become hot.  Add the shredded carrots, onion, garlic cloves, tops of peppers and jalapeno pepper.  Saute, stirring frequently for about 5 minutes, or until softened.
3.  In  the meantime, in a large mixing bowl, add the cooked quinoa and black  beans, the chipotles in adobo sauce, the spices (onion and garlic powder, black and cayenne peppers and boullion powder).  Add the cooked veggies and stir the mixture to coat. 
4.  Taste - it should taste a bit on the over-spicy side, but that's ok - it will mellow as it cooks.
5.  Fill the peppers with the stuffing, pressing down firmly to ensure the filling will not come out as it cooks.  Place the stuffed peppers into the prepared baking pan.  If the peppers have a tendency to tip over, prop them up with the other peppers.
6.  Cover the peppers with aluminum foil and bake for 35 minutes. 
7.  After the 35 minutes, remove the foil and top each pepper with a couple tablespoons of the fire roasted chipotle tomatoes. 
8.  Return the peppers to the oven without the foil and bake for an additional 5-10 minutes.
9.  Allow the peppers to cool for at least 10 minutes, then serve. 


Topped with fire roasted tomatoes


Dinner - stuffed pepper and a simple mixed green salad

Enjoy!


-Koko

Wednesday, January 11, 2012

Gluten Free Wednesday: Gluten Free Cherry Almond Biscotti

Happy Gluten Free Wednesday!

I have honestly never really been that into biscotti before.  Not until my brief stint working as a vegan baker at 'Snice Brooklyn.  They have several creative baked goods that I really enjoyed making, although not eating.  The thing I didn't like about the baked goods there is that they were very refined.  They used a ton of Earth Balance, which I appreciate as much as the next person, but do not use it in all of my vegan baking applications.  I tend to use it in only certain things and would never use it in muffins or cakes, unlike 'Snice.  But I really did appreciate their creativity and presentation of the baked goods.  I love how they serve their cookies behind the counter in cookie jars - I think it is adorable and I am hideously obsessed with their sandwiches.  They are really too expensive for my tastes at the moment, unfortunately.  One of the good things about working there though was that I was given a bagel and coffee for breakfast and a complimentary sandwich when I left each day.  That was very cool, since I was able to sample a lot of the sandwiches free.  I have tried to replicate several of them at home, to the approval of my Hubby.  When I was working there, I would save him half of the sandwich, which he absolutely enjoyed.

Back to biscotti, shall we?  The first time I actually ever made biscotti was at 'Snice.  And it was another one of those things calling for mixing Earth Balance and white sugar together, then adding several other ingredients to the mixer to create the dough.  I do have a stand mixer, which is a little uncommon for NYC, simply because we tend not to have a lot of counter space.  Most of the time my mixer is in storage and I only get it out occasionally, so I did not want to make something with the mixer unless it is absolutely necessary.  I also thought their biscotti was far too sweet, but a good starting point.  So, I searched and searched for a gluten free recipe for biscotti, because I figured why not make something that I have never made before a little more complicated by trying to make it gluten free.  I came across several, but not a vegan gluten free biscotti recipe.  So I took several points from several of the recipes and combined them. 

The first time I made the recipe I was convinced it wouldn't work.  I was very surprised when it almost worked.  So I set about making several changes, trying it again, with the result being even better but not exactly what I was looking for.  It really improved the third time around.  Sometimes I think about how many times I test each recipe, and think about how many resources it takes to prepare them: time, money, supplies, disappointment when it doesn't work out ...  But I hate the fact that even after Hubby and I sample it, we have to throw it away.  If it is edible and enjoyable, I give it to him to take to work and give to his coworkers who are very honest in their opinions.  But a lot of the time when I make the first or second batches, they don't turn out and I wouldn't want to give them to someone.  Yuck.  I would love to compost them, like my parents in Michigan do.  They have an amazing organic garden and have composted my whole life.  I'm sure there are locations here in NY I can bring my compost to, but do I really want to keep a container of smelly compost in my apartment, and lug it on the train or bus somewhere.  Sigh.  Until a garden opens up down the block.  Shall we get onto the biscotti???

Gluten Free Cherry Almond Biscotti:


Perfectly Crisp & Delicious, Studded with Bits of Almonds
& Dried Cherries

Yields 8 Pieces, plus the ends

¾ cup sorghum flour
1/3 cup whole almonds
3 tablespoons tapioca starch
2 tablespoons arrowroot
¾ teaspoon xanthan gum
½ teaspoon baking powder
¼ teaspoon sea salt
½ cup sliced almonds
½ cup dried cherries
½ cup organic dehydrated cane juice
¼ cup flax eggs (1 tablespoon ground flax seeds mixed with 3 tablespoons water)
3 tablespoons canola oil
1 ½ teaspoons vanilla extract
1 teaspoon almond extract

1. Preheat the oven to 350 degrees. Line a baking tray with parchment paper and set aside until ready to use.
2. Place the almonds and the sorghum flour in a food processor and process until it is fine textured and no bits of almonds can be felt. Place in a medium mixing bowl and add the rest of the dry ingredients: the tapioca starch, arrowroot powder, xanthan gum, baking powder, sea salt, sliced almonds and dried cherries.
3. In a separate bowl, add the sugar, flax eggs, canola oil, vanilla and almond extracts. Whisk together until completely emulsified and thickened.
4. Add the dry ingredients to the wet and mix together with hands until a very firm dough forms - this cannot be mixed with a spoon or spatula. Press into a rectangle and bake for about 30 minutes, or until firm in the very center and the edges are golden brown.
5. Allow to cool for 15 minutes.
6. Place baked biscotti onto a cutting board. Using a very sharp knife, slice off the very ends. Slice the remaining dough into 8 slices, about ¾” each. Lay the biscotti on their sides and bake for 10-15 minutes, or until firm and crispy. They will continue to firm up as they cool.
7. Allow to cool completely before serving.

Enjoy!

-Koko

Wednesday, December 28, 2011

Gluten Free Wednesday: Korean BBQ Baked Tofu, Beet Salad & Moro

Happy Gluten Free Wednesday!

This was a pretty simple meal - one where I had three pots/pans going at once, and everything was finished at the same time.  I love that.  This just came together based upon the ingredients I had in my fridge and pantry.  It is once again time for a trip to the grocery store, but until then, I was able to make a nice, simple tasty meal.  And Hubby definitely enjoyed it.   He always loves a good beet salad and naturally loves moro.  And the most surprisingly, he actually really enjoys tofu.  Strange I know for a meat-eating, meat-loving Dominican guy that never tasted tofu in his life before he met me, but I love it!

The first time I really ever cooked cooked for him (fancy-style if you get what I mean :), I was doing a practice run for a dinner I was making for 100 people as the guest Chef at one of the Natural Gourmet Institute's Friday Night Dinners.  I invited like 12 people over (I had quite a giant apartment at the time), spent two full days in the kitchen (even tinier than the one I have now, which seems impossible!), cooked and baked my heart out, and served a gourmet three-course vegan meal.  Everyone had a great time and loved everything.  Hubby (just the boyfriend then) loved the tofu the most.  As well as he should have, because that is the most attention I had ever and will ever focus on tofu in my life.  It was pressed, marinated for two days, baked, marinated, grilled then marinated some more.  It was the most delicious thing ever!  It was supposed to be like a salmon-style entree, complete with the pink color and grill marks, and damn if it wasn't absolutely delicious!  And the most beautiful part?  Then entire menu was gluten free and vegan!

This was the menu, but for 100 people:

First Course:
Creamy Green Pea Soup with Spicy Red Pepper Coulis, Frizzled Leeks

Second Course:
Marinated Grilled Tofu with Caper Aioli, Portabella Mushroom Risotto and Herico Verts with Pickled Baby Carrots Garnished with Marinated Radicchio Chiffonnade

Third Course:
Mini Lemon Tart with Brandied Almond Crème and Glazed Strawberries with Vegan Rhubarb Ice Cream

It was seriously ridiculously delicious!

Korean BBQ Baked Tofu, Beet Salad & Moro:


Serves 2-3


Korean BBQ Baked Tofu:
1 lb tofu, gently squeezed to remove excess water
Spray olive oil
Prepared Korean BBQ Sauce
Sriracha or Hot sauce, to taste

1.  Follow the instructions on the links to prepare the beet salad and the moro.
2.  To make the tofu, preheat the oven to 450 degrees.  Lightly spray a baking tray with the olive oil spray and set aside while the oven heats up.  (I don't like to use parchment paper here because I feel like it makes the tofu mushy.  Baking it directly on the pan makes it crisp up nicely.)
3.  Place the tofu on a cutting board and cut into 4-6 small slabs.  Place on the prepared baking tray.  Spray with additional olive spray oil and place in the oven.  Bake for 20-25 minutes, or until the tofu is firm and crispy on the bottom.
4.  Allow the tofu to cool until it can be comfortably handled.  Cut the tofu into small triangles.
5.  Place the tofu in a saute pan and coat with the prepared bbq sauce and hot sauce or sriracha.  Turn the heat on medium, and toss the tofu to coat.  Cook just until the sauce and tofu are heated through.  Season to taste. 
6.  Place a portion of each the beet salad, moro and bbq tofu on a plate and serve!

Enjoy!

-Koko

Wednesday, December 14, 2011

Gluten Free Wednesday: Gluten Free Sugar Cookies with "Cream Cheese" Frosting

Happy Gluten Free Wednesday!

Since I've been working in a bakery, I've noticed that I really do not have much of a sweet tooth anymore.  I prefer fruit or fruit based cobblers or crisps for desserts, nothing overly sweet.  I am convinced that because I am inhaling all that sugar all day long it is actually making its way into my system anyway and my body is saying "no more!"  Regardless of how crazy that may sound, I really believe it!  Anyway, Hubby is definitely not in the same situation as me and wants dessert almost every day.  Seriously.  Sometimes he is pretty insistent about it, so I actually have to bake a little bit at home, which I don't generally like to do anymore, unless it involves testing for my upcoming Gluten Free Classes I teach at the Natural Gourmet Institute - which I am teaching tonight actually.  Here is the link to the class.  I don't mind savory baking, just not so much sweet baking at home. 

Anyway, I decided something easy to make that he would like and could grab out of the fridge as he liked was sugar cookies.  A little strange timing considering the month and time of year, but hey, it just means that I'll have to make some more in a couple weeks for Santa. :)  I do have to admit that I snagged a couple too, although I was more in it for the frosting than the cookie - it's something we make in our bakery, and is highly addicting!

Sugar Cookies:


Dropped and pressed sugar cookies with Cream Cheese Icing


Makes 2 Dozen

2 1/2 cups super fine white rice flour
1 teaspoon baking powder
2 1/2 teaspoons xanthan gum
1 cup turbinado sugar
1 cup earth balance
2 tablespoons flax eggs (mix 1/3 cup ground flax seeds with 2/3 cup water in a jar and shake until combined and measure 2 tablespoons)
2 teaspoons vanilla extract
1/2 teaspoon nutmeg (optional)


1.  Preheat the oven to 350 degrees.
2.  The easiest way to make this cookie dough is to do everything in the food processor.  Cream together the earth balance and the sugar until smooth - do not over mix.  Add the flax eggs and vanilla extract and quickly mix again.  Add the rest of the ingredients and mix together using the pulse button, pulse until all ingredients come together - do not overmix or the dough will become overly sticky.
4.  Remove the dough from the processor and place in a medium bowl.  Cover with plastic wrap and place in the refrigerator for at leasthalf an hour.
5.  When dough has chilled, prepare a place to roll out on your counter top.  Sprinkle with flour, place 1/4-1/2 of the dough in the center of the floured surface, sprinkle with additional flour  and roll out to desired thickness (I like mine inbetween - not too thick and doughy, but not too thin and crispy).  Using desired cookie cutters, cut out pieces of the dough and place onto a parchment lined sheet tray.  Bake for 10-15 minutes, or until golden along the edges and slightly firm in the center.
6.  Once cookies have baked, remove entire sheet of parchment paper and place on a cookie cooling rack or onto the counter.  If you leave them on the sheet tray, they will continue to cook and possibly overbake, and no one wants an overbaked sugar cookie.

Cream Cheese Frosting:

1/3 cup earth balance
1/3 cup tofutti cream cheese
2-3 tablespoons soymilk
1 teaspoon vanilla extract
1 lb. florida crystals powdered sugar

1.  In a medium bowl, place the earth balance, vanilla extract and soymilk.  Using a hand mixer, mix until ingredients are completely emulsified and smooth - it may take a little while and will be a touch messy with the milk, but it will come together.
2.  Add the cream cheese and mix together until just incorporated.  If you overmix tofutti brand cream cheese, it will separate and the frosting will become grainy.  Add the powdered sugar in two batches, mixing until the frosting is smooth.  Add enough powdered sugar until the frosting is the desired texture.  Place in the refrigerator for up to half an hour to set up.  Ice as desired.

Enjoy!

-Koko

Wednesday, December 7, 2011

Gluten Free Wednesday: Gluten Free Bread - Baguette Style

Happy Gluten Free Wednesday!

I love bread.  In fact I sadly consider myself a bit of a bread-a-holic.  But I am sure you know that if you eat a lot of traditional bread, and by that I mean wheat-based, not gluten free bread, it does not always sit well in your digestive tract.  I am not gluten free, nor do I have issues/sensitivities at all with gluten.  I simply think it is a good idea to give your system a rest occasionally.  And since I had the opportunity of working with a girl that was gluten free when I was the Head Baker at Lifethyme Natural Market in the Village, I really learned to appreciate the fact that I can purchase relatively inexpensive healthier breads and not worry that they will taste strange or have a funny texture. 

So I began my gluten free bread quest basically out of curiosity and a desire to make an inexpensive, relatively easy, and tasty gf bread.  Believe me, in the beginning, the results were pretty terrible.  I had no idea what to look for or what recipe looked doable or tasty.  I just googled several gluten free bread recipes that weren't even vegan.  I just substituted the eggs and dairy as I went.  Those first several loaves were absolutely disgusting.  I even tried making a gf crusty bread which seemed like it would work and was very tasty.  The dough even looked similar to "normal" wheat bread, but it never baked completely through in the very center.  Yuck.  The longer I baked it, the harder the outside became, but it just never really baked through on the inside.  I should revisit the recipe later to see if there is anything else I can do to it to make it better.  Once I have some more time, I am going to finally order myself a vitamix (I know, I still can't believe I don't own one at this point!), make my own flours and make some more tasty gf bread!

Gluten Free Vegan Baguette:

The Bread Shaped After Mixing, Not Proofed

Fresh Baked GF Baguette! The warm yeasty aroma!

Yields 2 Loaves

¾ cup millet flour (Arrowhead Mills is the best brand.  Bob's Red Mill doesn't work well here)
½ cup sorghum flour
¼ cup brown rice flour
1 cup potato starch
½ cup tapioca starch
2 teaspoons xanthan gum
2 teaspoons sea salt
2 tablespoons raw sugar/turbinado sugar
1 tablespoon yeast
1 ½ cups + 2 tablespoons warm filtered water
Pinch raw sugar
1 tablespoon extra virgin olive oil


1.  Preheat the oven to 350 degrees.  
2.  Place the warm water, yeast and pinch of sugar in a glass, stirring with a fork to combine. Place in a warm place while preparing the flour mixture and assembling ingredients. It is ready when the mixture starts to grow and has a strong yeasty smell.  If it does not grow, chances are that your yeast may be dead.  Try again.
3. In the bowl of a stand mixer fitted with a paddle attachment (note that you can make this by hand, just be prepared to use a lot of elbow grease!), place the millet flour, sorghum flour, potato starch, tapioca starch, xanthan gum, sea salt and raw sugar. On low speed, mix until all ingredients are well combined.
4. Once the yeast mixture is ready, lower the bowl and pour into the flour mixture. Add the olive oil and raise bowl. On low speed, begin mixing the batter until all ingredients are combined, then continue mixing for an additional 1-2 minutes, or until batter is very thick and sticky. It will look nothing like a wheat dough, but don’t worry, it will be delicious.
5.  Once the dough is mixed, portion it out into two blobs on your parchment paper lined baking trays.  Have a bowl of warm water nearby to help you mold the loaves, as the dough will be sticky. 
6.  Dip your hands into the bowl of water, shaking off the excess and shaping the dough into long, thin loaves.  Try to make them as even looking as possible.  It's difficult to make them look perfect without the aid of a french loaf baking pan, which I do not have and am assuming you do not have as well.  (It's next on my list of cooking items to purchase!)
7.  Using a very sharp paring knife, make diagonal slices across the surface of the bread - this is purely cosmetic - you don't have to do this if you don't want to, but it looks great as it rises and bakes - the slices become larger and prettier.
8.  Lightly spray the loaves with some spray oil and lightly place a piece of plastic wrap over top of the free form bread loaves.  We're using the spray oil so that the plastic wrap doesn't stick to the bread and ruin the design we created.  And we're using the plastic wrap so that the bread will not develop a skin while it is proofing. 
9.  Place the bread in a warm spot and allow it to rise for about 30-45 minutes or until roughly doubled in size. 
10.  Once the bread has risen to your liking, carefully remove the plastic wrap and place in the oven.  Bake for about 15-20 minutes, or until doubled in size and golden on the top.
11.  Allow the bread to cool in its own pan - it will continue to cook a little bit anyway when you remove it because the pan is so hot.  Once the bread is manageable and not too hot, go ahead and slice it, slather it with Earth Balance and enjoy!  Seriously so delicious!  Amazing as garlic bread too!  I want some more now!

Enjoy!

-Koko