Wednesday, January 23, 2013

Mangu with Sauteed Peppers and Fried "Cheese"

Tonight's dinner was so delicious and fun!  It started out not being either fun or interesting because I had several green plantains that were becoming a little ripe and needed using very quickly.  I didn't know what to make, even though I have successfully made several things from green plantains: Tostones (Double Fried Plantains), Mofongo (Double Fried Plantains mashed with lots of garlic and broth) and Mangu (Mashed Boiled Plantains).  However, I know there are so many more things to make with them and would definitely like to learn more about them, but I really wasn't in the mood today.  I have worked with several women from Peurto Rico who told me about other green plantain dishes, and I know the Hubby has told me about several as well, but I would need to do some research before I really get into it.  I would want to give the Hubby something that is as close to traditional as possible.  The other things I would like to make are: 1) Aranitas (shredded plantain fritter - kind of like a hashbrown), 2) Jibarito (a sandwich where fried plantains are used instead of bread, slathered in garlic mayo, some kind of "meat", cheese, lettuce & tomato - yum!) and 3) Pastelon de Platano (plantain lasagna with "meaty layers").  All sound good, right?  I just need to figure out how to make them as traditionally as possible, but veganized.  Hubby is not very good at giving recipes.  I really need a plantain cookbook or to find a great Dominican website.

So, back to the meal.  I was just going to make tostones because they're easy.  But Mangu is easy too and that's what the Hubby wanted. 

Mangu with Sauteed Peppers & Fried "Cheese":

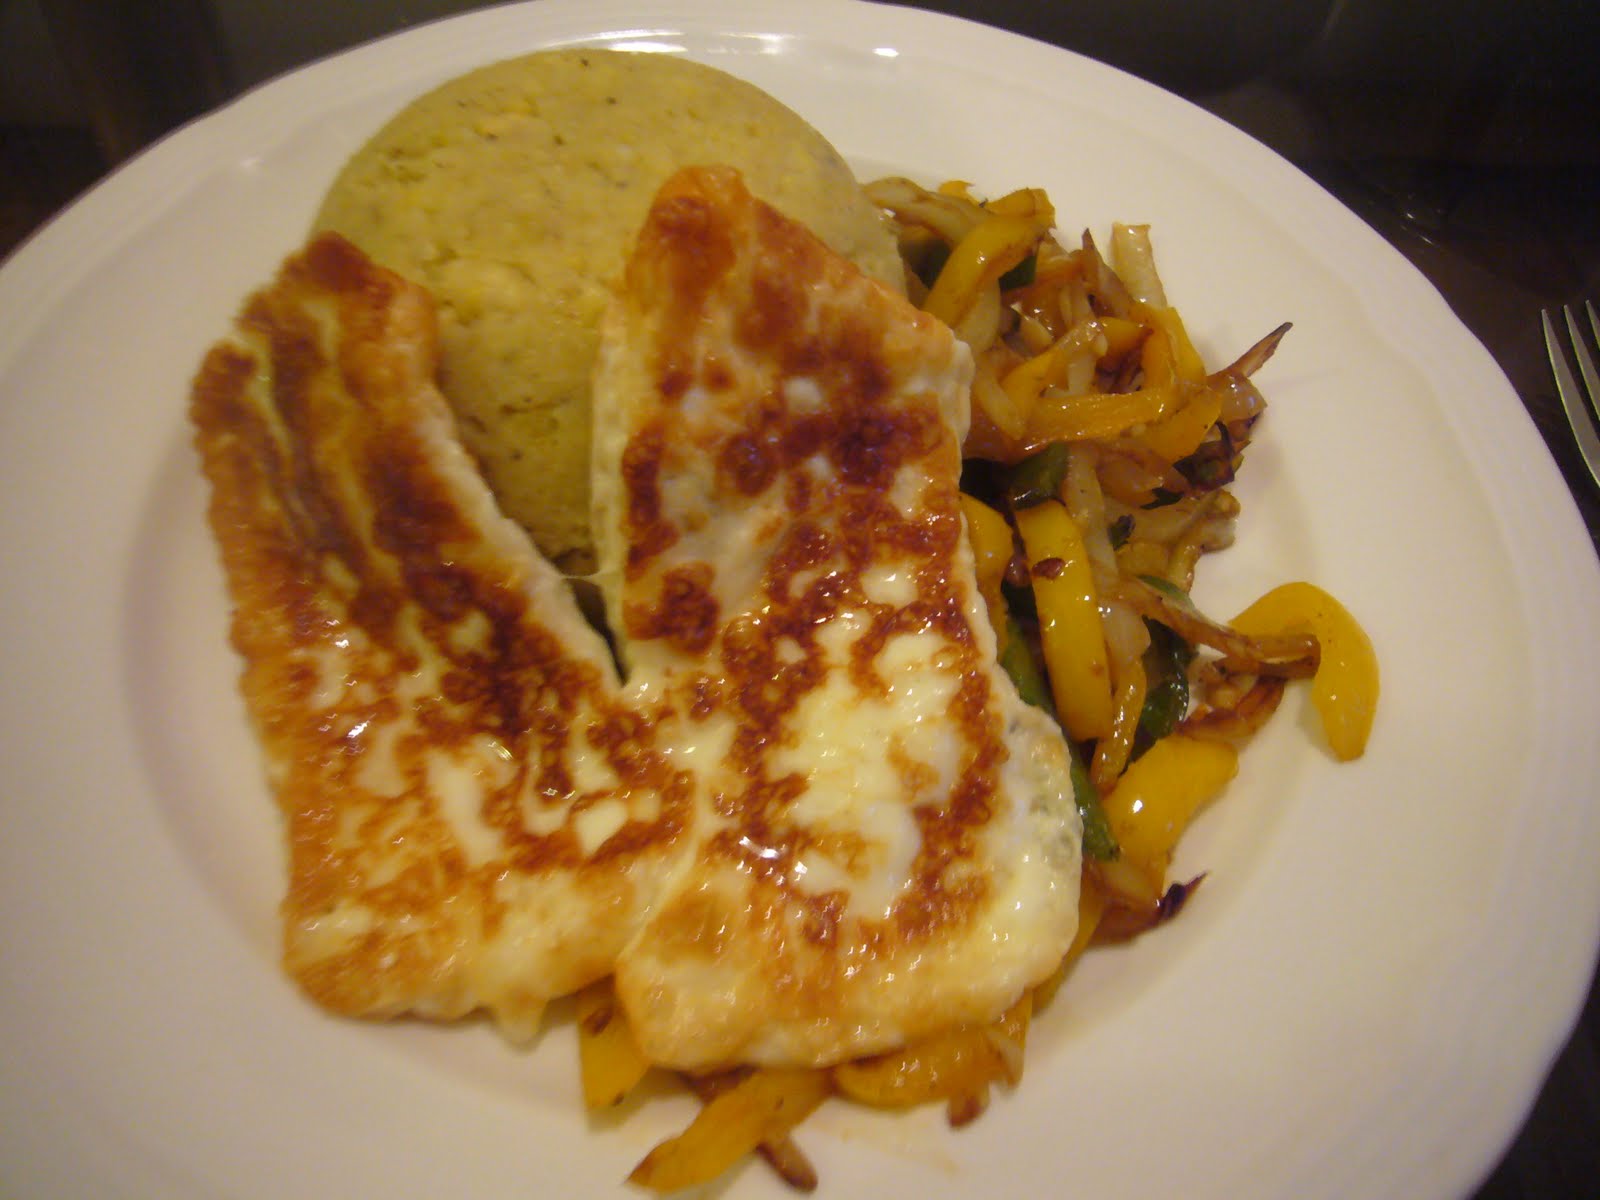
Mangu, Sauteed Peppers & Yummy Fried Cheese

Serves 2-3

Mangu:
3 green plantains, peeled, sliced in half and chopped
2 cloves garlic, minced
2 tablespoons Earth Balance
1/2 cup cold water
1 1/2 teaspoons sea salt
1/2 teaspoons black pepper

Sauteed Peppers:
2 small orange bell peppers, sliced thinly, about 2 cups
1 small green pepper, sliced thinly, about 1 cup
1 small onion, sliced thinly, about 3/4 cup
1 1/2-3 teaspoons vegetable boullion powder
1/8 teaspoon black pepper

Fried Cheese:
4 oz. chunk of daiya, sliced into pieces and placed in the freezer until very cold and firm
1/2" canola or vegetable oil

1.  Start with the plantains.  The easiest way to peel them is to cut off both of the ends and make a slice the long way down the plantain with a pairing knife.  Then use the back of a spoon to remove the peel in sections.  It seems strange, but this is by far the best and easiest way I have found to peel those bad boys. 
2.  Slice the plaintains in half the long way, then cut the halves into about 3-4 pieces, depending on the size of the plaintains.  This is just to help the plantain cook more evenly.  Place the peeled, sliced plantains in a medium pot filled with water and place on the stove over high heat.  Allow the plantains to cook until they are very easily pierced with a fork.
3.  In the meantime, prepare the veggies to be sauteed.  In a medium pan over medium-high heat, add the oil.  Allow it to become hot and then add the orange and green bell peppers and the onion.  Stir frequently to prevent burning.  Once the veggies have softened slightly, but still maintain their crunch, add the boullion powder and black pepper, seasoning to taste.  Keep hot while preparing the rest of the food.
4.  For the Mangu, drain the cooked plantains and place back in the pot.  Mash with a potato masher until the pieces are even in size.  The mixture will be very dry.  Add the minced garlic, earth balance, sea salt and black pepper and mash together again.  Add the cold water and mash until the desired consistency is achieved.  You can add more water as you wish, but it must be cold.
5.  The last and optional step is the fried cheese.  It is totally not necessary, but oh so damn delicious.  The trick is to partially freeze the daiya until it is very firm, but not frozen all the way through.  Place the oil in a small pot and bring the heat up to medium-high.  Once it is hot, very carefully place the cheese into the oil.  It will sputter and make a lot of noise, but it will be okay- just be very careful.  Use a long fork to turn the cheese over.  Allow it to cook for an additional 30-60 seconds, until lightly browned and soft.  Remove from the oil and place on a plate lined with paper towels. 
6.  To serve, I like to lightly oil a small mug and place the mashed plantains inside, pressing them in tightly.  Then, unmold them onto your plate, surround with the sauteed veggies and top with the fried cheese, if desired.

Enjoy!

-Koko

Thursday, January 17, 2013

Soy Free Cinnamon Rolls

 I have been making and enjoying these cinnamon rolls for a couple years.  They come from the cookbook Vegan Brunch by Isa Chandra Moskowitz.  That book is amazing!  I work as a Private Chef in the mornings for a family that lives in Queens.  Everyday I have to make some form of a "baked good", whether that is pancakes, waffles, muffins,coffeecake, etc.  I keep the Vegan Brunch book at the family's house - that's how serious I am about it.  And I really regret that sometimes because then I want to make something at home and don't have the recipes. But the good thing about it being there is that I have a legitimate excuse to eventually make all of the recipes in the book.  That is goal.  I literally have at least 100 cookbooks - all of them either vegan, vegetarian or gluten free, except of course my professional pastry and cookery books from culinary school back in Michigan - I would love to look over them at some point and try to veganize some of the recipes - especially croissants.  I also have this thing where after I prepare the recipe, I will write down -in the cookbook itself- the results, my opinion, any modifications I have made or that I should make the next time around.  I always do it. And why not, after making hundreds of them - it's impossible to remember all the recipes I have made.

Anyway, I have been making the cinnamon rolls since I got the book and pretty much loved them since I first tried them.  Then I became a little picky and changed a couple things, making it even better and yummier!  So below is the recipe from Vegan Brunch, modified to be made soy-free and even tastier (in my opinion) than the original.  I don't think the recipe holds very well the next day - it tends to dry out a bit, so I like to separate the prepared rolls (unbaked, and before they've proofed) into batches, bake like 6 or so of them, keep 6 more in a container, then freeze the rest of them.  To freeze them, I place them on a baking tray lined with parchment paper, spaced well apart so they are not touching, and freeze them until they are solid - overnight is usually good.  Then I will transfer them to a deli container with a tight fitting lid, label them, and take them out whenever I am craving that deliciousness.  You can either de-frost them overnight in the refrigerator, or place them on top of the oven, allowing it to thaw and proof at the same time. 


Soy Free Cinnamon Rolls:


Amazing!

Yields: 12 Cinnamon Rolls

Dough
2 1/4 teaspoon yeast
1/3 cup + 1 teaspoon turbinado sugar
1/2 cup filtered lukewarm water
3/4 cup rice milk
1/3 cup canola oil
3/4 teaspoon sea salt
1 teaspoon cinnamon
3 1/2 - 4 cups unbleached flour

Filling
1/4 cup sucanat
1/4 cup organic sugar
1 tablespoon cinnamon
1/3 cup chopped pecans

To roll
1/3 cup soy free Earth Balance

Icing
1 cup organic powdered sugar, sifted
1-2 tablespoons rice milk

1.  Place yeast, 1 teaspoon turbinado sugar and lukewarm water in a medium mioxing bowl.  Whisk together and allow to sit for 5 minutes, or until the top becomes frothy and bubbly.  If nothing happens, this may mean that your yeast is dead.  Throw out and try again with a new yeast. 
2.  Into this mixture, add the oil, rice milk, remaining sugar, sea salt and cinnamon.  Whisk to combine.
3.  Add 2 cups of the flour and mix with a wooden spoon.  Add more flour by the 1/2 cupful until the dough is too thick to continue being mixed by hand.
4. Add the remainig flour on a clean countertop.  Place the dough on top of the flour, sprinkling the top with additional flour.  Using the palms of your hands, knead the dough until most of the flour is incorporated and the dough is no longer sticky.  Keep in mind, however, that this is not bread dough - so don't knead too much or the end result will be too tough.
5.  Place in a clean bowl with 1 tablespoon of oil.  Roll the dough around in the oil and cover the bowl either with a clean towel or plastic wrap.  Place in a warm place and allow to double in size, about 45-60 minutes.
6.  In the meantime, prepare the filling.  Mix together both of the sugars, the cinnamon and chopped pecans.  Set aside until ready to use. 
7.  Punch down the dough so that it deflates.  Sprinkle your work surface with a small amount of flour and place the dough in the center.  Roll out dough to approximately 12" x18", trying to keep it as rectangular as possible. 
8.  Rub the earth balance over the suface of the dough, keeping about 2 inches on the very top free of the earth balance.  Sprinkle the filling evenly over the entire surface of the dough. 
9.  Start rolling from the bottom of the dough, working slowly and trying to keep the roll as tightly together as possible. 
10.  Oil a large baking tray and set aside.  Cut off the very two ends of the roll and set aside.  Cut as acurately as possible:  cut the log in half, then each half in half again, then each quarter into thirds.  Carefully pick up the pieces and place them on the tray, leaving lots of room between each roll.  Do not throw out those little ends you set aside - place them on the tray as well - you can eat those yourself, while you present the others for company! :)
11.  Cover the tray with a clean towel or plastic wrap and place in a warm place for 30-45 minutes.
12.  While the rolls are rising again, preheat the oven to 350 degrees.
13.  Bake the rolls for 18-20 minutes, or until the top bounces back lightly when touched and the roll is golden in color.
14.  While the rolls are baking, prepare the icing by whisking all of the ingredients together.
15.  Allow the rolls to cool for at least 10 minutes before icing them, or all of the icing will melt off.


An idea to think about is not baking them all at once.  When I make these, since it is only the Hubby and I, I do not bake them all at once.  I am a Cinnamon Roll a couple times a year kind of girl, and will only ever eat one at most when I bake these.  What I usually do, unless I am having company or prepaing a brunch, is keep 4 of the rolls out to bake, and place the other rolls on a sheet tray lined with waxed paper, pop it into the freezer for about 4 hours, then transfer the rolls to a sturday bag or container.  That way I can easily and quickly have them whenever the mood strikes, since I have already prepared them most of the way.  I'll just take them out of the freezer, the night before, placing them in the refrigerator.  They will thaw out all of the way and may even start rising inside.  You can then take them out in the morning, preheat the oven, and let them keep rising for about 20 minutes.  Bake them, and viola!  Cinnamon Rolls in the A.M. without all the work!


Enjoy!

- Koko

Tuesday, January 15, 2013

Soft Sugar Cookies with Buttery Frosting

Because I teach baking classes a lot, and therefore am in the kitchen testing sweet recipes all the time, I am not always in the mood to taste-test my new recipes.  I love baking them and am so happy when others enjoy eating them, but I sometimes feel like my sweet tooth has disappeared.  I guess I shouldn't be so concerned though, because just yesterday, only a couple days after teaching a gf cakes and cake decorating class in the city, I was craving sugar cookies.  But not your ordinary sugar cookies.  A thick, soft sugar cookie with sweet frosting.  Something like those disgusting frozen packaged cookies I used to put on the shelf when I worked in a "bakery" at a grocery store in Michigan oh so many years ago.  So, I searched and searched for some good recipes and came up with one that was for thick, soft delicious sugar cookies, not vegan of course.  So with a little tweaking, it easily became vegan and when they came out of the oven and had that delicious thick icing spread on top, oh god were they amazing.  I actually ate two of them right in a row, which rarely rarely happens.  When hubbs came home from work, he devoured three of them and then chugged an ice cold glass of filtered water.  I ended up packing two of them in his lunch for today too.  He also got a nice fresh blueberry muffin I have been testing too.  Nice day for snacks for him.  He's very lucky his wifey is on vacation now, because there is so much I am overdue on. 

So many things I have been needing to do but just not able to really spend a lot of time to do them.  Yesterday and today I have been working on reorganizing my spice and baking cabinet, which really needs some reworking.  I've changed over all of the containers the spices go in and have to go pick up a label machine (I have one in Michigan, but that really doesn't help me here!) to keep things nice and organized.  I also did 4 loads of laundry yesterday, hung it out to dry and have to put it away today.  So not fun stuff.  Now though I get to start testing some recipes I have had listed for the longest time.  Hopefully I can get started today, but I'm sure I'll be in the kitchen all day tomorrow.  I have also been asked to make a vegan wedding cake for a close friend.  No stress there.  So I have to start testing the cake flavors she and her fiance are thinking about having.  So hopefully coming up, you'll be seeing some of the interesting things I am going to be up to in the next couple days.  Until then,  enjoy these super tasty cookies!


Delicious soft sugar cookie with sweet frosting!


Yields 20 Cookies

1 cup earth balance
1 cup organic sugar
4 tablespoons flax eggs
1 tablespoon vanilla extract
3 cups organic unbleached flour
1 tablespoon baking powder
1/4 teaspoon sea salt

1.  Preheat the oven to 350 degrees.  Line two baking trays with parchment paper and set aside until ready to use. 
2.  In the bowl of a mixer, place the earth balance, sugar, vanilla extract and flax eggs.  Whip until light and fluffy and the sugar has incorporated well. 
3.  In a separate bowl add the dry ingredients: the flour, baking powder and sea salt.  Whisk well to combine.  Stop the mixer and add the flour mix.  Turn the mixer on slow and whip until a thick dough forms. 
4.  Place the dough in a clean bowl and cover with plastic wrap.  Refrigerate for about 30 minutes, or until the dough firms up, but does not become too hard to work with.
5.  Generously coat your work surface with flour and roll out the dough to desired thickness,  To get those thick, soft cookies, keep the dough thick. 
6.  Use preferred cookie cutter and place cut out dough onto prepared baking sheets.  Bake for about 8-12 minutes, or until the cookies turn a very light golden color.  Do not overbake or they will not be those delicious soft sugar cookies.

Frosting:
1/3 cup earth balance, melted
1 tablespoon vanilla extract
4 tablespoons rice milk
5 cups sifted, organic powdered sugar
1.  Place the butter, vanilla and rice milk in a large bowl.  Whisk together very well.
2.  Add the powdered, sugar, 1 cup at a time, until the frosting reaches desired consistency.  (I used a little spirulina powder (and I mean a little!!) to tint it that nice green color. 
3.  Once the cookies cool completely, frost as desired with the frosting.


The dough, scooped out with a portion scoop.


Close up of the dough


After pressing the dough down


After baking - a little golden around the edges


Soft and tasty cookie!!


All frosted !


Couldn't resist!

Enjoy!

-Koko

Wednesday, January 9, 2013

Gluten Free Testing: Lemon & Lemon Raspberry Cookies

Most of the time I love testing recipes.  The only downside to them is when they don't work out.  It's a great learning experience, but it's tough because it can end up hurting your wallet when you have to test a recipe multiple times.  But it's a necessary part of working in the food business or even being a home cook or baker.  And I am thankful to work with and around people that are interested in health, even if they are not particularly interested in or fond of gluten free, because they are much more willing to sample the goodies I make, even when it may not be the best test I've done. 

I know this is a strange recipe for this time of the year.  After all it is in the middle of winter, but I feel tired of everything being spiced and pumpkin-y.  I'm in the mood for some spring tasting goodies.  Maybe if I eat enough spring flavored goodies, spring will hurry up and get here!!  So I did some testing the other day with gf cookies.  I was in the mood for lemony goodness.  I absolutely love lemon in baked goods: lemon blueberry cake, lemon creme, lemon pie, lemon cookies, lemon bars, the list goes on and on!  So I have a base recipe I have been playing around with for gf cookies that is good, although a little sweet.  I have tried changing around the sweetener, but the cookie changes texture drastically, so that means I have to play around with other elements in the cookie, which I have been a little too lazy to do. ;)  For this test, I changed the sweetener from organic can to maple syrup, and it wasn't as sweet, but a little puffy, so perhaps a little more adjusting next time, but it certainly hit the spot. 

So once I made the lemon cookie which was super tasty, I wanted to add some raspberries to the mix as well.  Frozen, obviously.   But I was concerned that adding frozen fruit to the batter would result in a mushy or too wet cookie, so I tried a couple different ways to add the raspberries.  And each test was a fun experiment in seeing what would happen in different scenarios.  You can check out the pictures below.  And see the recipe I am currently working on too.


Raspberry Lemon Cookies Test:


I Think these should be called
 "Lemon Raspberry Swirl Cookies"


Yields 10-12 Cookies

1 1/4 cups sorghum flour
1/2 cup tapioca starch
1 teaspoon baking powder
1 teaspoon baking soda
1/2 teaspoon sea salt
1/2 teaspoon xanthan gum
1/2 cup maple syrup
1/4 cup + 1 tablespoon canola oil
2 tablespoons flax eggs
1 1/2 teaspoons vanilla extract
2 teaspoons lemon extract
zest of 1 lemon
1/3 cup frozen raspberries
organic cane sugar as garnish

1.  Preheat oven to 350 degrees.  Line a baking pan with parchment paper and set aside until ready to use.
2.  In a small mixing bowl add all of the dry ingredients: the sorghum flour, tapioca starch, baking powder, baking soda, sea salt and xanthan gum.  Whisk together until well combined.
3.  In a separate small mixing bowl add all the wet ingredients: the maple syrup, canola oil, flax eggs, vanilla extract, lemon extract and lemon zest.  Whisk together well.
4.  Carefully pour the dry ingredients into the bowl with the wet ingredients and mix together with a spatula until a thick cookie batter forms.  Add the berries and very carefully mix into the batter.
5.  Use a small portion scoop and scoop out the cookie dough onto the prepared baking tray. 
6.  Sprinkle each cookie with 1/2 teaspoon organic sugar. 
7.  Using a slightly moistened palm, flatten each cookie slightly.
8.  Bake 10-12 minutes, or until lightly golden around the edges, but still soft in the center.
9.  Allow to cool completely before sampling.


Lemon Cookies: Test 1 - No Berries Added


Lemon Raspberry Cookies: Test 1.1  - Added Raspberries
to Top of Cookie


Lemon Raspberry Cookies: Test 1.2 - add the very frozen
raspberries to the batter and mix gently gently gently.

Enjoy!

Koko

Sunday, January 6, 2013

Mashed Potatoes & Gravy, Roasted Portabella Mushroom, Pepper Steak & Garlic Kale

I'm loving mushrooms right now, even the funky white ones.  Well, ok, I'm loving all of them except for straw  mushrooms.  Those have always and probably always will freak me out.  I've never eaten them and never intend to.  Ugh!  I just really think they look like mini people and that is creepy.  My sister-in-law Debbie used to always get Moo Goo Gai Pan whenever we went to get Chinese back home and loved those things.  Every time she popped one in her mouth, I cringed, thinking she was eating people.  Strange I know, but they really look like people to me!  Besides those, I love the mushrooms that I have tried thus far.  Especially morels!  Seriously delicious! 

I was just talking to my Mum the other day, who lives in Michigan and she was telling me that hopefully this coming spring will be a good time to go hunting for mushrooms in the woods.  The last few years have not been great and she has not found a ton of morels, but even finding one is so worth it!  She usually dries them at home and then will send them to me because they're too fragile to be shipped all the way from Michigan to New York fresh.  But damn, I remember them being the most amazing thing in the world when they were fresh picked from the woods behind our house.  I remember seeing small containers of dried morel mushrooms at Whole Foods Bowery for over $200 per pound.  Yes that is $200 / lb!  No thanks!  And where the heck where they picked?  I'll stick to my Mum's home picked morels, thanks!  Unfortunately, since it is still a little early for morels, I had to settle on portabellas, even though that is not really settling because portos are super tasty too.  Waiting (not so) patiently for those morels! 


Mashed Potatoes & Gravy, Roasted Portabella Mushroom, Kale & Pepper Steak:


Sauteed Kale, Roasted Portabella, Pepper Steak & Mashed Pots


Mashed Potatoes & Gravy, prepared
Sauteed Kale, prepared
Pepper Steak, prepared

Roasted Portabella Mushroom:

2 portabella mushrooms, large stem removed
Extra Virgin Olive Oil
Sea Salt
Black Pepper
2 cloves garlic, minced
2 pinches onion powder
2 pinches garlic powder

1.  Preheat oven to 400 degrees. 
2.  In the meantime, prepare the mushrooms.  Line a baking sheet with parchment paper or aluminum foil.  Get your spices and fresh garlic ready.  Drizzle the mushrooms on one side with the oil and immediately sprinkle with the sea salt, black pepper, fresh minced garlic, and garlic and onion powder.  Flip the mushroom over and do the same to the other side.  Place the seasoned mushrooms in the oven and roast for about 10 minutes on each side, flipping the mushrooms over half-way through the baking.
3.  The mushrooms are finished when the edges are browned and crispy and the very center is soft and juicy.
4.  Allow the mushroom to cool for at least 5 minutes for the juices to distribute.  If you try to cut the mushrooms right away, all the juice will immediately come out and the flavor will not be as good.  It's worth the wait. 
4.  To serve, place a portion of the potatoes and gravy, pepper steak, sauteed kale and sliced portabella mushrooms on the plate.

Enjoy!

-Koko

Friday, January 4, 2013

Fresh Artichoke with Garlic Butter

I am seriously in love with fresh artichokes!  There is just something about them that hits the spot every time!  The first time I ever had them fresh was when I was in culinary school here in NY.  I know it's really sad.  After having moved here, I was so surprised by how many things I have never tried, or how many things I had these strange pre-conceived notions about.  I'm now wondering what it is that I really ate while growing up, besides all the fresh fruits and veggies from the garden.  Hmm...  Anyway, as soon as I tried an artichoke for the first time, I was amazed and couldn't believe how tiny the heart was, and what it took to get to it.  No wonder artichoke hearts are so damn expensive! 

The first time I brought them home for the Hubby was when I made one of my monthly trips to Trader Joes (it's just so far away from us!).  I usually avoid TJ's produce section like the plague because 99% of the time it is not very fresh.  And the thought of buying pre-chopped onions, celery, carrots, etc. is very nauseating to me.  I get that people are super busy living in Manhattan and nyc in general, but it takes 30 seconds, if that to chop a stalk of celery!  And maybe costs like 50 cents or less for the amount that they are charging $3.00 for.  I know, a little ridiculously impassioned, but I have always felt like that.  Anyway, when I discovered the artichokes in the produce department, I checked them over very very thoroughly and found them to be quite fresh, I bought 6 of them for like $3.50.  I steamed them and made a light dinner of toasted fresh baked baguette, sliced vegan cheeses, gourmet olives, etc.  I thought it was the most amazing, simple, delicious dinner.  Then I made a super simple vegan garlic butter to go along with the artichokes and presented it with a flourish.  I was very proud of myself!  And Hubby's reaction?  ...   Yum.  Give me some more, I'm still hungry.  There wasn't any more of course.  Then, that's it?  Oh man it was so good I want some more.  Next time I'll make all 6 of them and he can eat the remaining 5!


Steamed Artichokes with a Vegan Garlic Butter


2 fresh artichokes, bottom trimmed & pointy ends snipped with kitchen scissors

Garlic Butter:
2 tablespoons earth balance
2 tablespoons olive oil
6 garlic cloves, minced
sea salt to taste
1/4 teaspoon dried parsley
pinch black pepper

1.  Place a steamer basket in a medium sized pan.  Cover the bottom of the pan with water and place the trimmed artichokes on top of the steamer basket.  Cover tightly with a lid and steam until artichoke can easily be pierced with a fork, about 30-45 minutes.  Remove from pot and allow to cool for several minutes before handling.
2.  Prepare the garlic butter: in a small pan over medium heat, add the oil and earth balance.  Once the earth balance melts, add the minced garlic and cook until golden.  Immediately remove from the heat or it will burn - it will still continue to cook even once the heat is off. 
3.  Add the salt, parsley and black pepper and season to taste.
4.  To eat, remove each artichoke leaf and dip in the garlic butter.  Use your teeth to scrape off the "meaty" portion on the bottom of the leaf.  Continue with the remaining  leaves.  Once you get closer towards the center, the majority of the leaves can be eaten almost in their entirety.  Once you reach the very center, the artichoke heart, it will be protected by a group of fine hairs.  You cannot eat these.  Use a spoon to scoop out all of the hair, leaving behind the heart.  This is the best part, so dip it in the butter and thoroughly enjoy!

Enjoy!

-Koko