Tuesday, April 30, 2013

Chickpeas and Spinach (Chole Palak)

I love Indian food, although I don't really make it at home all that often.  I've made channa masala for the hubby before and he really liked it, so I thought this would be a great dish to make.  I was browsing through recipe ideas to make for dinner and came across this chickpeas and spinach dish.  I had all of the ingredients in the refrigerator (which rarely happens!) so decided to make it.  It made the house smell amazing and as I was cooking it, I was thinking how much the Hubbs was going to love it. 

This recipe even caused me to have an accident with my chef knife, which rarely, rarely, rarely happens.  I was so into chopping the spinach I happened to look away while I was chopping and chopped off 1/3 of the nail (+ skin) on my index finger.  The. most. painful. thing. ever.  It took a good week+ for me to be able to type properly and put any kind of pressure on it.  This accident did make me realize that Hubby is good in stressful situations where wifey is crying hysterically with a bloody bloody finger.  He has always told me he feels sick/weak at the sight of blood, so this was reassuring.  I'm not telling you this to gross you out, only just that I gave this recipe everything.  And the (not so) funny part?  Hubby didn't like it.  Not really at all.  Sigh.  I thought it was great.  It caused him to realize that he doesn't like garam masala, so if I had made it without (I wouldn't though because it added such flavor!) he probably would have liked it.  So I have two small deli containers of it in the freezer because I couldn't eat all of it when I made it.  But hey, now I have a tasty meal ready to go for my lunch when I don't feel like cooking!  Try it.  Just be careful when chopping the spinach!


Chickpeas and Spinach (Chole Palak):


So delicious!

Serves: 4-6

3 tablespoons olive oil

1 large onion, diced
4 cloves garlic, minced
1" piece ginger, peeled and minced
2 teaspoons cumin
1 tablespoon coriander
1 teaspoon turmeric
1/4 teaspoon red pepper flakes
1 teaspoon sea salt
1 teaspoon garam masala
1/4 teaspoon black pepper
3 cups cooked chickpeas
28 oz. can fire roasted diced tomatoes

8 oz. bag baby spinach, chopped


1.  Place a large pot over medium-high heat, add the olive oil and allow it to become hot.   Once it is hot, add the onions, garlic and minced ginger.  Cook, stirring frequently for 3-5 minutes, or until the garlic and ginger become fragrant. 
2.  Add the spices: cumin, coriander, turmeric, red pepper flakes, sea salt, garam masala and black pepper.  Stir to coat the onion mixture.  Cook for 1-2 minutes, or until fragrant. 
3.  Add the chickpeas and diced tomatoes, stirring to coat.  Lower the heat and allow ingredients to simmer for about 15-20 minutes, stirring periodically, until liquid thickens. 


Look at that deliciousness!


4.  Add the chopped spinach and stir to coat.  Stir periodically until the spinach wilts.  Season to taste.  Serve over rice.  That's it!

Enjoy!

Koko

Friday, April 26, 2013

Unchicken Cutlet, Forbidden Rice Salad, Roasted Zucchini, Beet Salad

Today was a nice day weather-wise and I was craving something fresh, with tons of colors.  In came today's dinner complete with forbidden rice, beet salad and roasted zucchini.  It was so tasty and even though there were several components that had to be put together, I organized everything nicely and it came together pretty quickly.  Today was a strange day for work though, something that has made me appreciative that I spend my days on my feet for 10 hours a day, sometimes more when I have a class to teach.  Today I had to go to upstate NY with one of my bosses to renew a health certificate, which involved about 4 hours driving in the car total (on my butt the whole time!). 

Makes me even more appreciative that I either use my bike to get where I need to go, or the subway when the location is farther away.  We sat down for an additional 4 hours for the class.  My butt was literally asleep and when the class was finished, I felt more exhausted than when I am on my feet lifting 50-80 lb. things for 10 hours straight.  How does that make sense?  I actually fell asleep mid-sentence on the way back to work while my boss was driving because the traffic was so heavy, the car was so warm and we were basically stationary, while he went on and on about his accomplishments in life.  Sorry, but a little boring. 

I got home only an hour and a half later than I usually do and even though I didn't physically do anything today other than bike to and from work, I am more exhausted than ever!  Strange.  So I feel like taking a nap, which I did not give into - instead I am writing this post and made a beautiful dinner.  Then off to work on the business, waiting for the Hubby to get home from work, then off to bed and awake at 4 am to start it all over again.  But this time all day on my feet.  Yay!  (Funny to think that I complained when my feet hurt after a long day.  Appreciative now!)


Crispy Roasted Zucchini


The contrast in colors of the peppers and the rice is amazing!


My standard marinated beet salad.  Yum.


 Roasted Zucchini:
2 large zucchini, ends trimmed, cut into circles on the diagonal
1 1/2 tablespoons olive oil
heaping 1/4 teaspoon sea salt
1/8 teaspoon black pepper
1/8 teaspoon dried oregano

Forbidden Rice Salad:
1 1/2 cups dry forbidden (black) rice, cooked
1 small green bell pepper, small diced
1 small red bell pepper, small diced
1 scallion, thinly sliced
2 teaspoons toasted seasame oil
2 teaspoons olive oil
3/4 teaspoon sea salt, or to taste
1/4 teaspoon black pepper

1.  Cook the rice.  Allow it to cool slightly.
2.  Prepare the roasted zucchini.  Preheat the oven to 400 degrees.  In a large bowl, toss together the zucchini, olive oil, sea salt, black pepper and dried oregano.  Place on a parchment-lined sheet tray and roast until cooked through and crispy. 
3.  Once the rice has cooled slightly, place in a large mixing bowl.  Add the green and red bell peppers, scallions, sesame oil, olive oi, sea salt and black pepper.  Toss very well to coat.  Season to taste with additional sea salt or black pepper as necessary. 
4.  Serve. Yum!


Such a tasty, colorful dinner!


Enjoy!

Koko

Wednesday, April 17, 2013

Vegan "Chicken" Noodle Soup with Homemade Noodles & Soy Protein

 Today is a day when the fridge is empty, it's time to go shopping and Hubbs and I are hungry, so I decided to make dinner with what I had on hand.  Homemade noodles are always a fun thing to make - something my Mom used to make all the time when I was a kid.  But of course she would make egg noodles and put them in "real" chicken noodle soup.  No worries, this is equally as good.  I have made this soup with homemade seitan before and also just the noodles and broth.  Those ways have been equally good, but with a hungry hubby constantly mentioning how hungry he is, I decided making homemade seitan was out of the question for today.  So a simple, hearty soup to make when you're hungry but don't have a lot of time or ingredients!

Vegan "Chicken" Noodle Soup with Homemade Noodles:


Seriously delicious.  Ultimate comfort food!


Serves: 4-6

1/2 cup onions, diced
2 tablespoons olive oil
3 cloves garlic, minced

8 cups vegan chicken stock, made with un-chicken boullion
1 cup soy curls
1/4 teaspoon black pepper

Pasta:
1/2 cup water
1/2 teaspoon sea salt
1 1/2 teaspoons olive oil
1 1/2 cups unbleached flour (plus an additional 1/4 cup for kneading)
2 tablespoons minced parsley, optional


1.  Prepare the pasta: in a large bowl add the water, sea salt and olive oil.  Mix together till combined.  Add the flour and optional parsley.  Mix together with a wooden spoon until the dough comes together.
2.  Sprinkle a clean cutting board with additional unbleached flour and roll the dough around in the flour to coat.  Press the dough into a disc and roll out to desired thickness with a rolling pin. 
3.  To make rustic pasta (the kind my mom would always make), slice the pasta into strips with a paring knife. 
4.  Sprinkle a baking pan with additional unbleached flour, carefully pick up the pasta and place on top of the flour.  Cover the pasta with a clean, dry towel and set aside until needed.
5.  Now prepare the soup part of the recipe: in a large pot, add the olive oil over medium-high heat.  Once the oil is hot, add the chopped onions and cook for about 3-5 minutes, or until translucent.  Try not to let the onions color.
6.  Add the garlic and allow to cook for 1-2 minutes, or until fragrant.  Add the "chicken" stock made with filtered water and unchicken boullion.  Bring the ingredients to a boil.
7.  Once the liquid boils, reduce heat slightly and add the soy curls and black pepper.  Cook till the soy curls are just about cooked.
8.  Add the pasta: place once piece of pasta into the simmering water at a time to reduce the likelihood of the pasta completely sticking together. 
9.  Stir periodically until the noodles and soy curls are completely cooked through.  The pasta will rise to the top once it has cooked.
10.  Try to allow it to cool slightly before eating.

Enjoy!

Koko

Saturday, April 13, 2013

Gluten Free Testing: Yeast Free Baked Donuts!

Remember that baked donut craze that happened a while ago?  Is it still going on?  I am still seeing baked donuts on menus in places here in the city.  Back when that was happening, I was working with a girl that was gluten free and had several allergies on top of that and I came up with this recipe for her, surprising her when she came to work one day.  I haven't made these in a little while, but I remember them being very tasty.  Being the perfectionist that I am, I don't think they are quite perfect yet, so that is why I labeled them "testing".  But that shouldn't deter you from making these tasty little bites.  And being that I made them in a mini baked donut pan, they are one-biters.Yum!  My favorite was the cinnamon sugar ones - always has been.  Make them and let me know what you think.

Vegan, Gluten Free, Yeast Free Baked Mini Donuts


I made coconut glazed, cinnamon sugar tossed and chocolate
glazed.  Can you see she grabbed the chocolate before
I could even snap a picture?  The rest were eaten literally 10
seconds later!!


Yields: 2 dozen mini donuts

1 cup sorghum flour
1/2 cup potato starch
1/4 cup tapioca starch
2 teaspoons baking powder
1/2 teaspoon baking soda
1/4 teaspoon sea salt
1/2 teaspoon xanthan gum
1/4 teaspoon nutmeg
3/4 cup organic sugar
2 tablespoons canola oil
1/4 cup flax eggs
1 teaspoon apple cider vinegar
3/4 cup soymilk

Cinnamon Sugar Mix:
1 cup organic sugar
1 tablespoon ground cinnamon


1.  Preheat the oven to 350 degrees.  Spray two mini donut pans with spray oil and set aside until ready to use.
2.  In a medium sized mixing bowl, add all of the dry ingredients: the sorghum flour, potato starch, tapioca starch, baking powder and soda, sea salt, xanthan gum and nutmeg.  Whisk well to combine all ingredients.
3.  In a separate medium mixing bowl, add the wet ingredients: the organic sugar, canola oil, flax eggs, cider vinegar and soymilk.  Whisk together until the sugar dissolves and all the ingredients are well combined. 
4.  Add the wet ingredients into the bowl with the dry ingredients.  Whisk together just until combined.
5.  Place several scoops of the batter into a pastry bag fitted with a large circular tip.  Squeeze the batter into the mini donut pan, into each individual donut hole. 
6.  Place into the oven and bake for 8-10 minutes. 
7.  Allow the cooked donuts to cool for a couple minutes, then flip onto a pastry cooling rack to cool until easy to handle. 
8.  If using the cinnamon sugar, do not allow the donut to cool completely.  The sugar sticks better if the donut  is still slightly warm.
9.  Liberally toss the donuts in the sugar.  (Or other desired topping.)


Enjoy!

Koko

Thursday, April 11, 2013

Dominican Style Pinto Beans

These are the most delicious beans I have ever made.  And there is a funny story behind their creation.  Hubbs and I have been married for almost four years now and we both love beans.  When we were first married, I could cook beans just fine, I just couldn't make them "saucy" like he wanted.  Oh he would eat them and really wouldn't say anything, but I knew he wasn't thrilled to be eating them.  I tried so many different recipes, but let's face it: I am American and the only beans I ever ate growing up where the canned variety in the chili my Mum would make, or cooked in her Ham and Bean Soup, where she would actually cook them from dry.  That's it.  Or maybe a can of refried beans or baked beans here or there.  Since attending culinary school in the city at NGI, I have learned to make beans from scratch for all kinds of dishes, but we never covered the "saucy" beans Hubbs so craves.  The kind of beans he was craving are cooked to perfection and accompanied by a thick, well seasoned sauce. poured over rice so that the sauce soaks into the rice.  I tried making the seasoned beans several times, listening and jotting down everything my Spanish coworkers would tell me.  And I would make it at home, and it would be tasty, in an American kind of way, and Hubby would eat it, but I knew it was never really that good.

Thankfully Hubby's cousin, a fellow Dominican named Wady moved here to Brookyn and was staying with us for a couple weeks while he got everything together.  And he did not speak a word of English.  Seriously.  Not. A. Word. And Hubby would leave us together for extended periods of time.  So, whenever I would finish with work, I would come home, and he would be there, and I would have to entertain him for hours until the Hubby got back, with me not really speaking much Spanish, although understanding quite a bit.  It was pretty awkward for several days, until I somehow learned that Wady could cook - and cook beans! 

So, he decided to teach me.  We went shopping together for the ingredients, using my pocket translator, and he bought everything we needed.  Then we went back home and he proceeded to teach me how to make Dominican Beans.  He talked the whole time, but I mostly watched his hands - and noticed he of course did not measure anything!  So, I judged how many teaspoons or tablespoons of whatever ingredient he was putting in the pot, and just basically watched the whole thing.  The beans were damn tasty!  So, a week later, I went into the kitchen with my scribbled over recipe and set to work.  When the Hubby came home and I set the plate in front of him, you really should have seen his face.  He looked so hopeful!  He took one bite, declared the beans "amazing" and hugged me.  In the middle of dinner!  Success!  So I am now a pro at making Dominican beans, if I do say so myself.  And this is the recipe Wady and I came up with - a long time in coming!


Dominican Style Pinto Beans:


Pot 'o Steaming Dominican Beans!


Serves 4-6 (or 2 big Dominicans and one blanquita ;)

8 oz. pinto beans, soaked
4 tablespoons olive oil
1 large onion, small diced, about 1 1/2 cups
1 medium green pepper, small diced, about 3/4 cup
1 stalk celery, halved and thinly sliced, about 1/2 cup
6 cloves garlic, minced
10 sprigs cilantro, thick stems removed
1 large jalapeno, small diced, about 1/4 cup
6 tablespoons tomato paste
8 tablespoons homemade sofrito (recipe to come later)
1/2 teaspoon black pepper
2-2 1/2 tablespoons unchicken boullion
1/2 teaspoon garlic powder


1.  Search through the beans and discard any stones.  Soak them overnight preferably, but if time doesn't allow, do my quick method: Place beans in a covered pot filled with water.  Bring to a boil and boil for 5 minutes.  Turn off the heat, but keep the lid on the pot.  Let beans sit in hot water for an hour and they will look like they have been soaking for 8 hours.
2.  Drain the water and plumped beans.  You can either cook them in an open pot or pressure cook them, which takes a fraction of the time.  Do not add salt to the cooking beans - it will not allow them to cook properly.  Cook until they can be easily squeezed and squished between your fingers.  DO NOT drain the water!  This is one of the most important things!  There should be several inches of water on top of the beans - do not dump any of it out.  Set pot aside. 
3.  While the beans are cooking, you can move onto the next step.  In a medium pot over medium-high heat, add the olive oil and allow it to become hot.  Add the onions, pepper, garlic, cilantro, jalapeno, tomato paste and sofrito.  Do not add the spices.Cook for 5-10 minutes, stirring frequently, until the entire mixture is thick, well seasoned and fragrant. 
4.  Once the beans are cooked, keep them at a high simmer and add the seasoned mixture you sauteed.  Stir into the beans well.  Now add the spices: the black pepper, vegetable boullion powder and garlic powder.  You shouldn't need salt because it is in the boullion powder, tomato paste and sofrito.  But you can add some if you feel like.


Close Up of the Tasty, Steamy Beans


5.  Continue simmering beans, turning the heat down a little.  The longer they simmer, the more flavorful they become and the thicker the sauce.  Keep tasting the liquid.  After a half hour of simmering, they should be ready.  The sauce should have thickened and they should be nice and flavorful. 
6.  That's it!  So tasty!  Make it and appreciate all my hard work learning to make beans for my Hubby.
7.  Serve over white or brown rice.


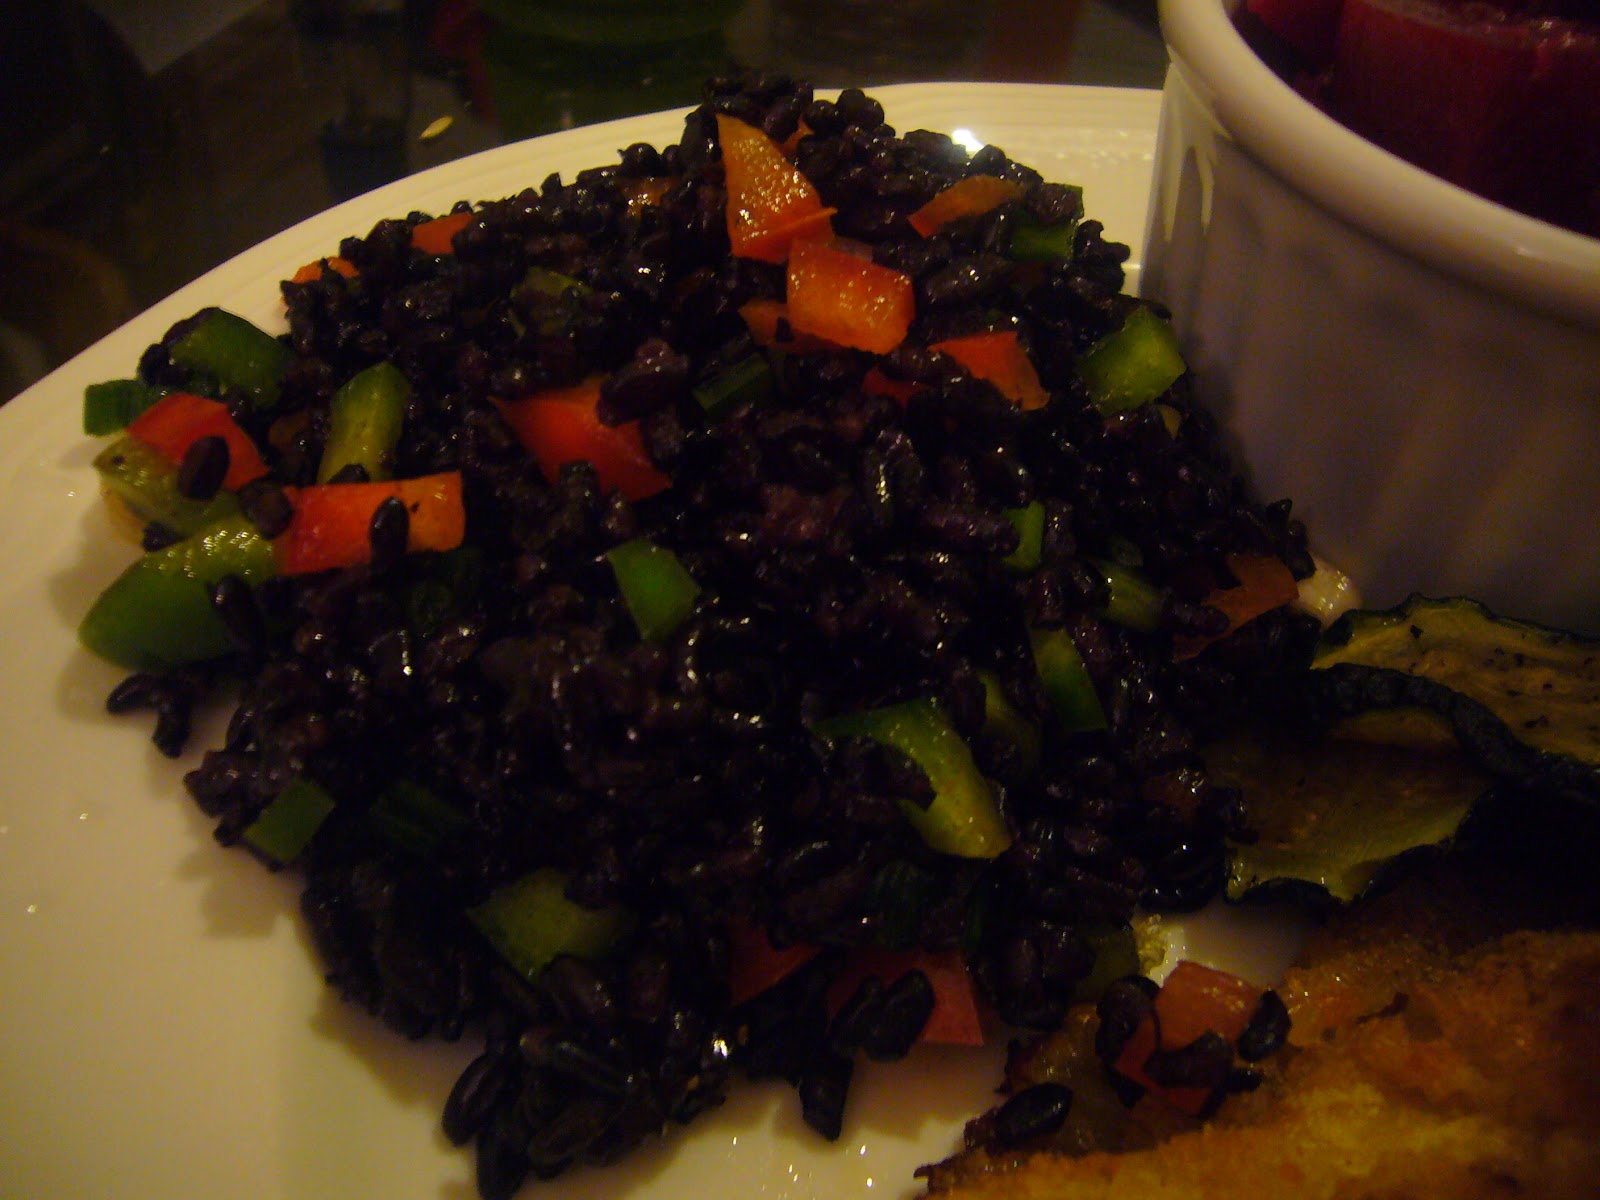
Dinner: Dominican Beans over Brown Rice, Sauteed Zucchini
and Mixed Green Salad with Avocado


Enjoy!

-Koko

Monday, April 1, 2013

Comfort Food: Peas & Potatoes in a Creamy White Sauce

This is one of those things I grew up eating as a kid that is strictly all about comfort.  There is absolutely nothing beautiful about this dish, nor really anything healthy at all, but it brings back a lot of memories and sometimes you really just need something nice and homey.  This is something my mom would make for us when we were kids, because it is something her mom would make for her and her siblings.  Growing up, my Grandma Allen was a single mother to 8 children, yes 8!  She would make all kinds of interesting dishes that we migh not appreciate as my mom, aunts and uncles appreciated then.  She would make this toast (homemade in my Grandma's case) served with gravy made from chicken drippings.  Needless to say, she really had to make things stretch out to feed everyone and make use of all ingredients - wasting nothing.  I can certainly appreciate that way of thinking and try to do the same in my daily food preparations.  I keep all my vegetable scraps in the freezer in a gallon Ziploc bag, and once the bag is full, I make a giant batch of vegetable stock.  Then I can make tons of soups, sauces, etc.  I also try to use all components of other ingredients, like kale and collards.  I cook with the leafy greens (or make smoothies), then juice the stalks.  The whole bunch of kale is used.  And at almost $4 a bunch for organic kale, I'd better be using all of it!

With yesterday being Easter, a special time for family, I was feeling pretty lonely and a bit sad.  It is the first holiday without my Grandma Allen.  And even though I have not been to Easter or really any family holiday since moving to NY in the past 6 years, I really felt the loss this year, and the regret from not getting to make it home for those holidays.  Every Easter and Thanksgiving we would all (imagine her 8 children with children of their own and some even with grandchildren of their own - a nice, full home!) go to Grandma's house and spend time with family.  I remember being a kid and having such a blast.  It's sad to think that that is never going to happen again.  So, with all of these sad feelings, no wonder I was gravitating toward eating something very homey that my Grandmother taught her kids, who in turn taught their kids (us).  It was a very tasty dish too, so it hit the spot.  Make it when you are missing your family or when you want something simple and tasty.


Peas and Potatoes in a Creamy White Sauce:


Sigh.  Reminds me of childhood.


Serves: 2

2 large potatoes, peeled and medium diced
1/2 cup frozen green peas
1/2 small yellow onion, small diced
1 tablespoons olive oil
2 heaping tablespoons unbleached flour
2 cups unsweetened almond milk, or more as desired
sea salt and black pepper to taste

1.  Place the potatoes in a medium pot and cover with cold water.  Place pot over medium heat and bring to a simmer.  Periodically check the doneness of the potatoes by poking them with a fork.
2.  When they are just able to be pierced, add the peas. 
3.  Drain the peas and potatoes into a colander.
4.  Prepare the white sauce: in a medium sauce pan over medium heat, add the olive oil and allow to become hot.  Once the oil is hot, add the onion and cook till softened, but do not allow it to color. 
5.  Add the flour and cook for a couple minutes, stirring frequently.
6.  Add the almond milk, whisking immediately so the sauce doesn't clump.  Add sea salt and black pepper to taste.
7.  Bring the sauce up to a simmer, allowing it to thicken.  Once it reaches the desired thickness, add in the cooked potatoes and peas.  Stir to coat in the sauce and season. 
8.  My choice is to eat with sriracha, but Grandma would serve it as is, using dairy milk and butter instead of almond milk and olive oil of course!

Enjoy!

Koko