Showing posts with label Rice. Show all posts

Saturday, April 12, 2014

Sesame Seitan Using Homemade Seitan

I love trying to replicate recipes.  Especially those that I really miss being able to order since moving away from NY.  I used to get this awesome sesame vegan chicken recipe from a place called Zen Palate which would deliver directly to my apartment on my days off or whenever I felt too tired to make dinner.  Since coming back to Michigan, the ability to purchase vegan "meats" isn't as easy, so whenever I get the chance, I stock up.  I've also been making several batches of seitan and freezing small portions of them so I can prepare a quick, tasty meal.  This meal came together very fast thanks to that prepared seitan.  Yum!


Tasty, Crispy Yummy Sesame Seitan


2-3 Servings of seitan, homemade or store bought
Canola or refined coconut oil for shallow frying

Broccoli or other veggies to have on the side, steamed

White or brown rice to serve.

Sauce:
1/2 cup filtered water
1 cup unchicken broth
2-4 tablespoons rice vinegar (I used 3)
1 tablespoon tapioca starch
1/2 cup organic sugar or agave
2 tablespoons tamari
2 tablespoons sesame oil (un-toasted)
1 teaspoon chili paste
1 garlic clove, minced
2 tablespoons sesame seeds, plus additional to garnish
1/4 teaspoon onion powder
1/8 teaspoon garlic powder


1.  Prepare the sauce: in a medium sauce pan add all of the ingredients.  Whisk together well. 
2.  Turn the heat on medium and cook until the sugar dissolves and the sauce thickens considerably.  Set aside to cool slightly until ready to use.
3.  Cut the seitan into small pieces, dry well.  Briefly pan fry in a small amount of canola or refined coconut oil until crispy.  Place on a paper towel lined plate to drain.
4.  Once all of the seitan is cooked, place in a bowl with a generous amount of the sesame sauce.  Toss well.
5.  To serve, place a portion of the rice on the plate, followed by a serving of the sesame seitan and the steamed vegetable.  Top the seitan with additional sesame seeds.  That's it!


A close-up of the deliciousness.


Enjoy!

Koko

Thursday, February 27, 2014

Moro with Gandules, Beet Salad, Fried Yucca & Salad with Chipotle Dressing

I go through periods of really missing NY.  Or at least lots of things about it.  I loved that there was amazing ingredients on every corner to make the Dominican food that makes my hubby so happy.  There are a couple places here that sell a few of these ingredients thankfully, so I can make food that makes him happy (and myself-I have grown to love Dominican food!).  There were a couple items I was able to bring back with me from NY, because I wasn't sure if the ingredients would be here.  One of those was about 15 lb. of yucca (which is loooong gone!) and a couple packages of frozen gandules (pigeon peas).  You can get the dried gandules here, but they are not the same as the fresh-frozen ones.  I opened up our last package for this meal, which makes me sad, but made our bellies oh so happy!  I'll just have to figure out a place where I can get them, either online, or through explorations of other cities than Traverse City.  We've not really had the opportunity to venture outside of this area yet.  I've heard there are several vegan/vegetarian restaurants throughout the state, which I am super excited about exploring!  And hopefully not too far into the future, we will be adding another one!   


Giant plate of food for the Hubbs


Chipotle Dressing:
1/2 cup vegan mayonnaise
1 tablespoon lime juice
1 chipotle in adobo sauce, minced or pureed
pinch black pepper
sea salt to taste
(Mix everything together in a bowl until well combined.  Season to taste.)

Fried Yucca:
2 large yucca, waxy outer peels removed, sliced in half lengthwise and cut into large rings
canola oil to fry
sea salt
granulated garlic

1.  If you are going to prepare everything in the meal, now would be a good time to get started on the rice.  You can also get the beets cooking, because they take the longest amount of time.
2.  The yucca must be cooked by boiling before it can be fried - that's just the nature of the beast.  Bring a large pot of salted water to a boil.  Carefully place the yucca inside and cook just until is cooked through.  You do not want to overcook it, or it will become water logged and mushy.  Drain the yucca and allow it to cool for at least half an hour, or until it is dry to the touch and cool enough to handle. 
3.  Trim the yucca.  Yucca has a thick stem in the very center - you want to be sure to remove that because it is very unpleasant to bite into, and poses a choking hazard.  Cut the yucca into more manageable pieces.  Sprinkle the yucca all over with the granulated garlic.
4.  Place a thin layer of canola oil into a large saute pan and place over medium-high heat.  Allow the oil to become hot.  Once the oil is hot, carefully add the yucca and allow to cook for a couple minutes per side, or until nicely crispy.  Remove the yucca from the pan and place on a paper towel lined plate.  Immediately sprinkle with sea salt.  Be sure to serve warm.
5.  To serve, place a serving of each of the items on your plate. 


Enjoy!

-Koko

Wednesday, January 1, 2014

Vegan Chicken & Broccoli


 Happy New Year!


Hubby & I last night in a beautiful condo my mom
surprised us with for the night.  Fun!


I hope everyone had a great New Year's and is as excited as I am about this coming new year.  2013 was a very bittersweet year for me - one of the most difficult I have been through in recent years, but I know it has and will continue to make me grow into a better person.  I came to some interesting realizations about myself and have just really been forced to become stronger.  I have so many goals for this coming year, but unlike many New Year's past, I have not written them down or described them as "New Year's Resolutions".  So perhaps here is a good opportunity to write them down so I can remember them later, although I will not be going as crazy about them this year as I usually do.
 
  • Focus on bettering my Spanish - hopefully I will be able to have more of a complete conversation with my mother-in-law by the end of the year

  • Eat more cleanly - less snacking - that's my problem.  And use up a lot of the pantry items I brought back from Brooklyn with us- make more food items out of what we have - not going out and buying new things every time I decide to cook something

  • Be more open to trying new things that usually make me uncomfortable: singing in front of others, dancing, saying "ok, sure, let's do it", rather than "uh ..."

  • Focus on being healthy - yes exercise more, but not letting "weight loss" be the main focus

  • Work on our business

What are some things you guys are wanting to do differently this year?  They don't have to be resolutions per se, just some things you want to focus more on. 


Going along with my concept of eating well and using the ingredients I have on hand (not too many fresh ingredients left - definitely have to go shopping!) I decided on this vegan chicken and broccoli that I served with brown rice.  So delicious and simple enough to make on this day of feeling tired after not getting much sleep last night.


Serves 4
 
Steamed Brown Rice, to serve
 
Vegan Chicken and Broccoli:
1 8 oz. pkg. vegan chicken, thawed
1 1/2 tablespoons untoasted sesame oil
2 tablespoons minced garlic, about 2 large cloves
1/2 teaspoon red pepper flakes
4 cups broccoli florets (I used the stems too, just peeled them first)
6 tablespoons unchicken broth, separated
1 tablespoon sesame oil
sea salt and black pepper to taste
5 scallions, sliced on the diagonal
1/4 cup organic hoisin sauce
3 tablespoons mushroom oyster sauce
Sesame seeds, for garnish
 
 
1.  Place a wok over medium-high heat and add the 1 ½ tablespoons of sesame oil.  Once the oil is hot, add the garlic and dried red pepper flakes.  Stir fry for 30 seconds, or until fragrant.  Add the broccoli florets (and stems if you would like) and 4 tablespoons of the unchicken broth. Stir fry broccoli for 2 minutes, or until desired doneness is achieved.  Remove from the pan and set aside.
2.  Add a little more sesame oil to the wok (about 1 tablespoon).  Add the thawed out chicken to the wok and cook just until heated through, and slightly browned if desired (keep in mind that this chicken is fully cooked and could even be eaten as is, although I wouldn't recommend that!).
3.  Add in remaining 2 tablespoons of unchicken broth, oyster mushrooms sauce, and hoisin sauce.  Add the cooked broccoli back into the pan and move around just until the mixture is heated through.
4.  Serve over top of the steamed brown rice.  Sprinkle with sesame seeds if desired.


Enojy!

Koko

Tuesday, December 17, 2013

Eggplant and Soy Chicken with Brown Rice and Mixed Green Salad

The one thing I miss a lot about being away from NY, is the ease in finding vegan "meat" products.  There is a really great food coop here in Michigan that carries a ton of amazing, healthy, organic products, which I love, but I sometimes just really crave vegan chicken and other "fake" meats!  And they only carry veggie burgers, seitan, etc.  I remembered that there was this tiny, funky little health food store called Edson Farms that I literally had not been to for over ten years, and after finding out that it was still in business, I rushed over.  I remember that store carrying a ton of soy meat products.  After running over to the freezer section where those fake meats used to be, I was shocked to discover the same selection of veggie burgers and loaves that the coop carried.  There were only two packages of vegan "chicken strips" left in the freezer, which I immediately grabbed, for fear someone would take them, and rushed home. 

This just all goes to show how much I took for granted living in NY and the accessibility of really anything I wanted at any point.  Oh sure, I can and likely will order some fake meats online, but it was so much more fun and so much more interesting to be able to walk into a vegetarian supermarket and be able to purchase almost every item in there replicating all kinds of meats.  I was soooooo spoiled!  The whole reason I was wanting the soy chicken anyway was to make soy chicken and eggplant, a dish I used to get delivered to my apartment in Brooklyn all the time - pretty much every day I had off.  It was so delicious and I miss the ease and freedom of being able to pick up the phone and have something literally delivered right to my door.  So I found the soy chicken, had a couple Japanese eggplants in my fridge and made this dish.  It was out of control good!  Now I'll just have to have some soy chicken delivered and make this delicious dish again!  Yum!


Looks just like it did from Zen Vegetarian!


Omg, crazy good!


The whole delicious meal.  Just like in Brooklyn!


8 oz. soy chicken strips
2 tablespoons olive oil
4 small Japanese eggplants, halved and sliced on the diagonal
1/2 red onion, julienned
1 clove garlic, minced
4 tablespoons mushroom soy sauce
1/4 teaspoon black pepper
1/2 cup filtered water
1/4 teaspoon red pepper flakes

1.  Place one tablespoon of the olive oil in a medium sized saute pan over medium heat.  Once the pan is hot, add the soy chicken strips and saute till browned and crispy.  Set aside.
2.  In the same pan over medium heat, add the remaining tablespoon of olive oil.  Once the pan is hot, add the onion  and garlic and cook, stirring frequently until beginning to soften.
3.  Add the eggplant and saute, stirring frequently for several minutes.
4.  Place the lid on top of the pan and lower the heat slightly, allowing the eggplant to steam.
5.  After about 5 minutes of steaming, the eggplant should have softened.
6.  Add the mushroom soy sauce, filtered water, black pepper and red pepper flakes.  Cook for a couple minutes, or until the water evaporates about halfway and the sauce has thickened.
7.  Season to taste.  Serve over brown rice.  Enjoy with a nice side salad.  That's it!


Enjoy!

Koko

Saturday, July 20, 2013

Gardein Mandarin Orange Crispy Chicken with Sauteed Rice & Green Salad

Hubby and I are officially moving out of NY in a little over a week.  Needless to say, things are quite busy here.  Packing, packing and more packing.  Seriously, where did all of this stuff come from?!  Also, the weather here, as I'm sure it is in most places, is hideously hot.  I love being in the kitchen, but this weather makes me want to take a nice long break.  I would be absolutely happy to eat giant salads everyday, but I have a hubby that works like crazy and goes to the gym everyday and needs some heartier food.  Also, since we are really getting down to the wire, I am trying to use up all of the ingredients in my fridge and freezer.  Have I ever mentioned that I have the refrigerator that came with the apartment, plus an additional refrigerator/freezer combo and a small chest freezer I bought a couple years ago?  So there was quite a bit of stuff to go through. 

I discovered a package of Gardein Mandarin Orange Crispy Chicken that I bought a couple months ago when it was on special hanging out in the freezer.  I usually like to save those kinds of items, silly as it seems, for when I feel like I'm going to need them.  Today was definitely one of those days! Way too hot to deal with being in the kitchen for an extended period of time.  So I just cooked the chicken according to the package directions, made a big green romaine lettuce salad and sauteed some leftover rice I had in the refrigerator with some olive oil, onions, broccoli, tamari and red pepper flakes.  Simple, quick and filling.  Just what the hubby wanted.  I'm in trouble though - as soon as he finished his dinner, he decided he wants pizza tomorrow.  Really babe?  I'm wondering if he realizes I'm going to have to turn the oven on to like 450 degrees for an extended amount of time.  We'll see if that really happens!


Gardein Mandarin Oreange Crispy Chicken with Sauteed Rice & Green Salad:


I love how I didn't notice till now that hubby is standing in the
back of the picture.  Too funny!


Koko


Tuesday, April 30, 2013

Chickpeas and Spinach (Chole Palak)

I love Indian food, although I don't really make it at home all that often.  I've made channa masala for the hubby before and he really liked it, so I thought this would be a great dish to make.  I was browsing through recipe ideas to make for dinner and came across this chickpeas and spinach dish.  I had all of the ingredients in the refrigerator (which rarely happens!) so decided to make it.  It made the house smell amazing and as I was cooking it, I was thinking how much the Hubbs was going to love it. 

This recipe even caused me to have an accident with my chef knife, which rarely, rarely, rarely happens.  I was so into chopping the spinach I happened to look away while I was chopping and chopped off 1/3 of the nail (+ skin) on my index finger.  The. most. painful. thing. ever.  It took a good week+ for me to be able to type properly and put any kind of pressure on it.  This accident did make me realize that Hubby is good in stressful situations where wifey is crying hysterically with a bloody bloody finger.  He has always told me he feels sick/weak at the sight of blood, so this was reassuring.  I'm not telling you this to gross you out, only just that I gave this recipe everything.  And the (not so) funny part?  Hubby didn't like it.  Not really at all.  Sigh.  I thought it was great.  It caused him to realize that he doesn't like garam masala, so if I had made it without (I wouldn't though because it added such flavor!) he probably would have liked it.  So I have two small deli containers of it in the freezer because I couldn't eat all of it when I made it.  But hey, now I have a tasty meal ready to go for my lunch when I don't feel like cooking!  Try it.  Just be careful when chopping the spinach!


Chickpeas and Spinach (Chole Palak):


So delicious!

Serves: 4-6

3 tablespoons olive oil

1 large onion, diced
4 cloves garlic, minced
1" piece ginger, peeled and minced
2 teaspoons cumin
1 tablespoon coriander
1 teaspoon turmeric
1/4 teaspoon red pepper flakes
1 teaspoon sea salt
1 teaspoon garam masala
1/4 teaspoon black pepper
3 cups cooked chickpeas
28 oz. can fire roasted diced tomatoes

8 oz. bag baby spinach, chopped


1.  Place a large pot over medium-high heat, add the olive oil and allow it to become hot.   Once it is hot, add the onions, garlic and minced ginger.  Cook, stirring frequently for 3-5 minutes, or until the garlic and ginger become fragrant. 
2.  Add the spices: cumin, coriander, turmeric, red pepper flakes, sea salt, garam masala and black pepper.  Stir to coat the onion mixture.  Cook for 1-2 minutes, or until fragrant. 
3.  Add the chickpeas and diced tomatoes, stirring to coat.  Lower the heat and allow ingredients to simmer for about 15-20 minutes, stirring periodically, until liquid thickens. 


Look at that deliciousness!


4.  Add the chopped spinach and stir to coat.  Stir periodically until the spinach wilts.  Season to taste.  Serve over rice.  That's it!

Enjoy!

Koko

Friday, April 26, 2013

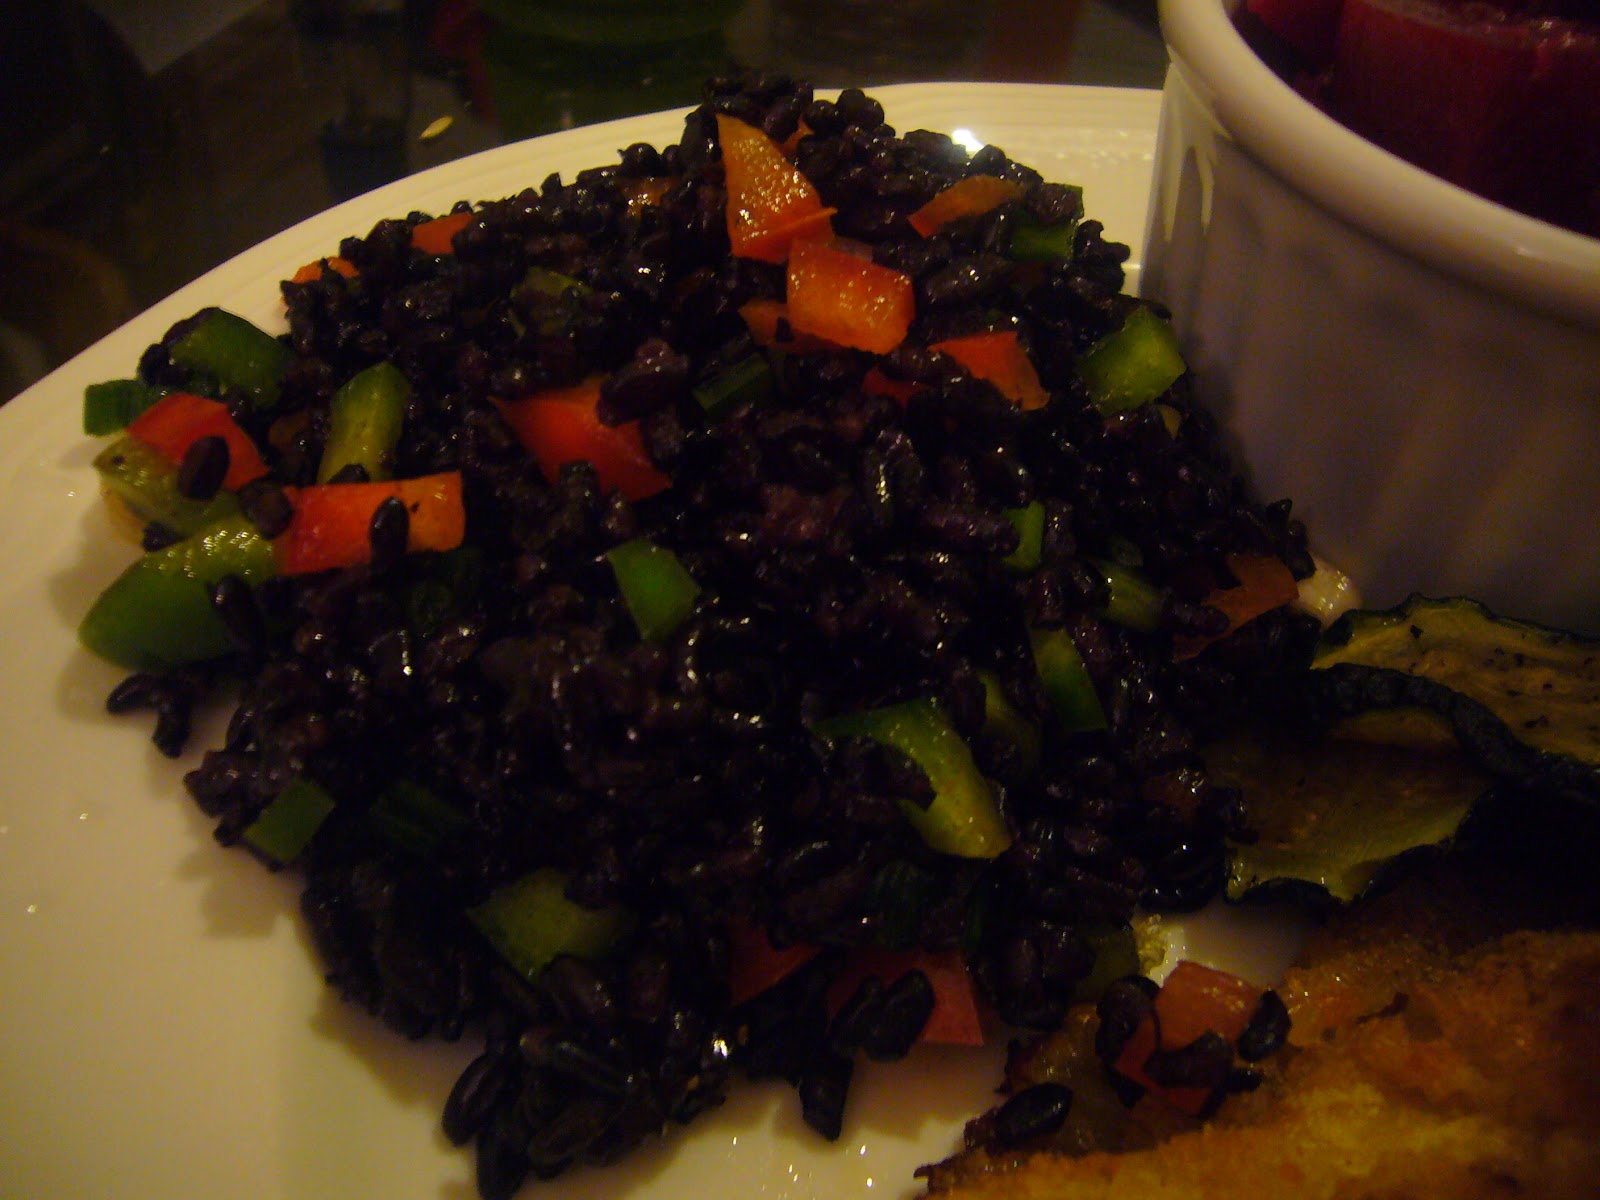
Unchicken Cutlet, Forbidden Rice Salad, Roasted Zucchini, Beet Salad

Today was a nice day weather-wise and I was craving something fresh, with tons of colors.  In came today's dinner complete with forbidden rice, beet salad and roasted zucchini.  It was so tasty and even though there were several components that had to be put together, I organized everything nicely and it came together pretty quickly.  Today was a strange day for work though, something that has made me appreciative that I spend my days on my feet for 10 hours a day, sometimes more when I have a class to teach.  Today I had to go to upstate NY with one of my bosses to renew a health certificate, which involved about 4 hours driving in the car total (on my butt the whole time!). 

Makes me even more appreciative that I either use my bike to get where I need to go, or the subway when the location is farther away.  We sat down for an additional 4 hours for the class.  My butt was literally asleep and when the class was finished, I felt more exhausted than when I am on my feet lifting 50-80 lb. things for 10 hours straight.  How does that make sense?  I actually fell asleep mid-sentence on the way back to work while my boss was driving because the traffic was so heavy, the car was so warm and we were basically stationary, while he went on and on about his accomplishments in life.  Sorry, but a little boring. 

I got home only an hour and a half later than I usually do and even though I didn't physically do anything today other than bike to and from work, I am more exhausted than ever!  Strange.  So I feel like taking a nap, which I did not give into - instead I am writing this post and made a beautiful dinner.  Then off to work on the business, waiting for the Hubby to get home from work, then off to bed and awake at 4 am to start it all over again.  But this time all day on my feet.  Yay!  (Funny to think that I complained when my feet hurt after a long day.  Appreciative now!)


Crispy Roasted Zucchini


The contrast in colors of the peppers and the rice is amazing!


My standard marinated beet salad.  Yum.


 Roasted Zucchini:
2 large zucchini, ends trimmed, cut into circles on the diagonal
1 1/2 tablespoons olive oil
heaping 1/4 teaspoon sea salt
1/8 teaspoon black pepper
1/8 teaspoon dried oregano

Forbidden Rice Salad:
1 1/2 cups dry forbidden (black) rice, cooked
1 small green bell pepper, small diced
1 small red bell pepper, small diced
1 scallion, thinly sliced
2 teaspoons toasted seasame oil
2 teaspoons olive oil
3/4 teaspoon sea salt, or to taste
1/4 teaspoon black pepper

1.  Cook the rice.  Allow it to cool slightly.
2.  Prepare the roasted zucchini.  Preheat the oven to 400 degrees.  In a large bowl, toss together the zucchini, olive oil, sea salt, black pepper and dried oregano.  Place on a parchment-lined sheet tray and roast until cooked through and crispy. 
3.  Once the rice has cooled slightly, place in a large mixing bowl.  Add the green and red bell peppers, scallions, sesame oil, olive oi, sea salt and black pepper.  Toss very well to coat.  Season to taste with additional sea salt or black pepper as necessary. 
4.  Serve. Yum!


Such a tasty, colorful dinner!


Enjoy!

Koko

Thursday, March 28, 2013

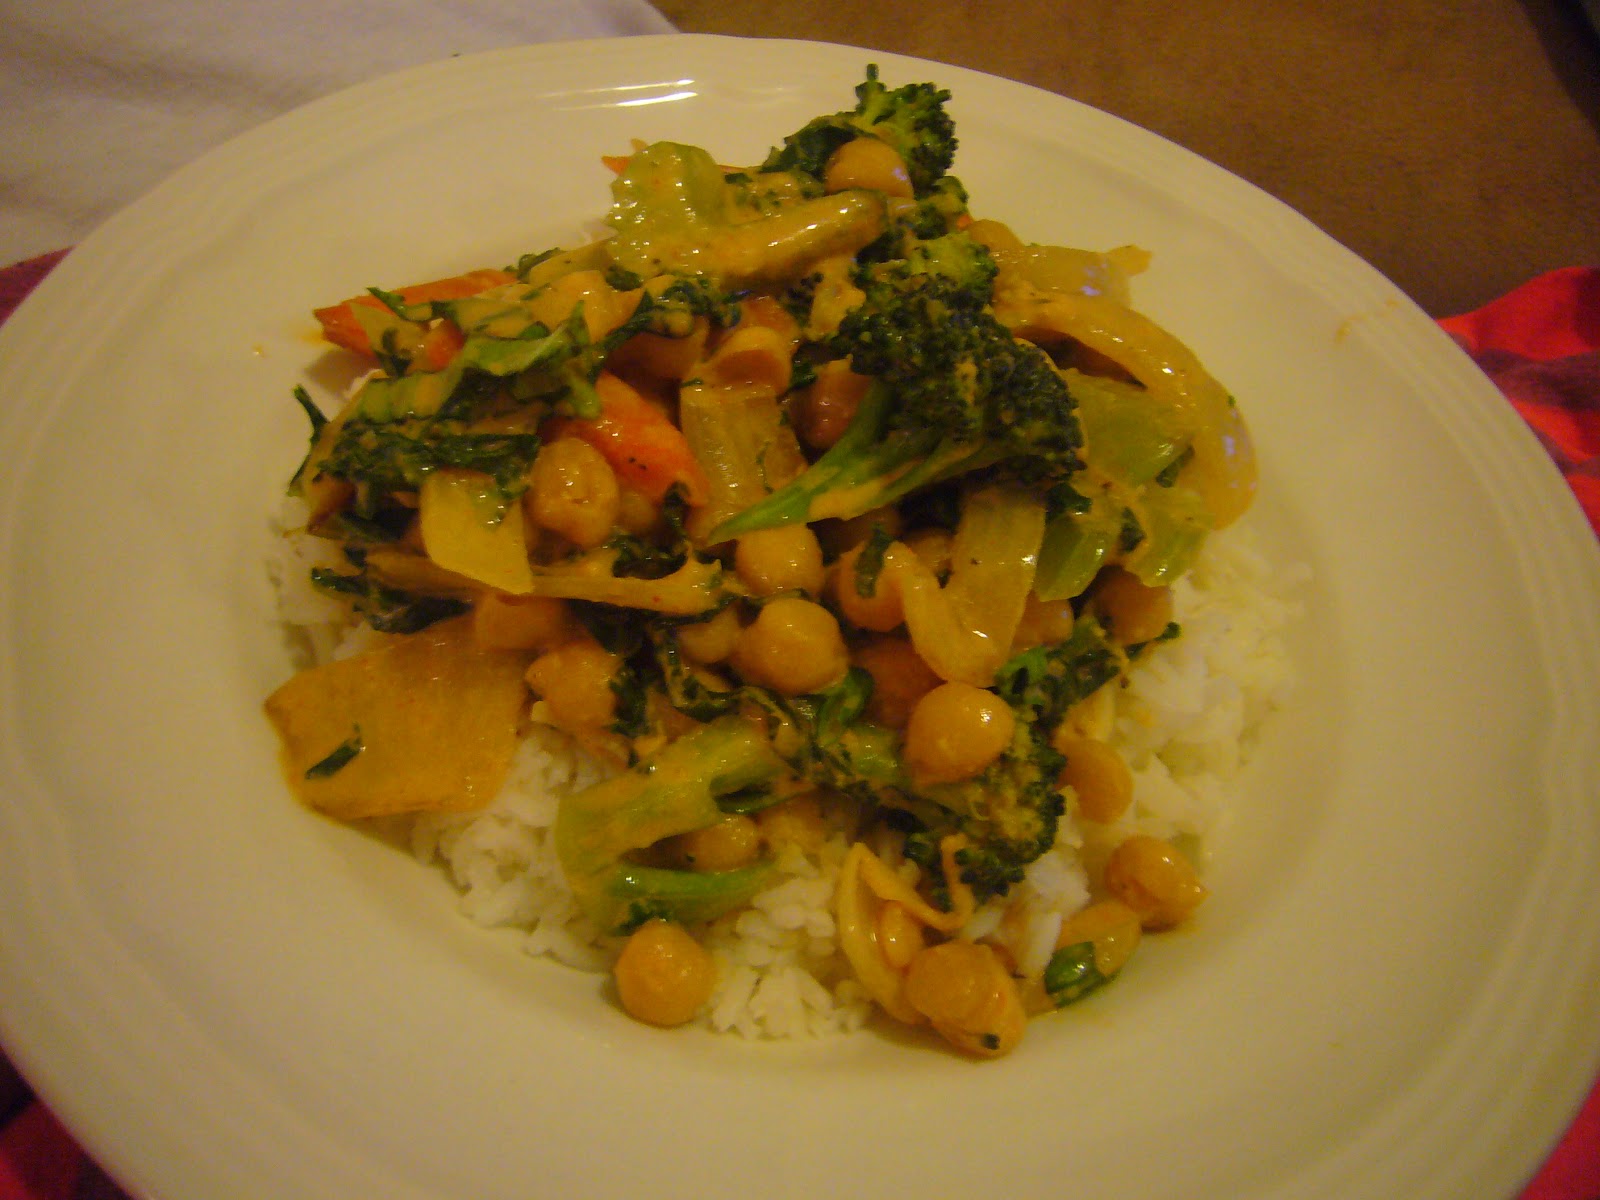
Veggies in a Curried Coconut Sauce

Today's dish was a clean out the fridge kind of meal.  I had cooked a batch of chickpeas a couple days ago and had a little over a cup of cooked beans left, plus some miscellaneous veggies and the first thing that came to mind was a stir fry.  I haven't made a stir fry/sauteed veggies in a while, and also had a little jarred curry paste in the fridge, so I immediately thought curried coconut sauce.  Can't get enough of that!  Once I chopped all the veggies and started the rice cooking, it all came together very quickly - in about half an hour or so.  Who said you can't have tasty, healthy meals in a short amount of time?  If you want to use brown rice instead, by all means do.  When I opened up the jar with my long grain brown rice, I realized I only had half a cup left, and that certainly wasn't enough for Hubbs and I.  Or you could even use quinoa or millet.  Super easy and super delicious.


Veggies in a Curried Coconut Sauce:


So flavorful and delicious!

Serves: 4

1 1/2 tablespoons olive oil
1 stalk celery, diced
1 carrot, sliced into matchsticks
1 head broccoli, cut into florets, stems peeled and chopped
1 small onion, cut into strips
2 cloves garlic, minced
1" piece ginger, peeled and minced
2 large leaves kale, chopped finely

1 1/2 cups cooked chickpeas
1 can coconut milk (lite or regular)
2 tablespoons red thai chili paste
1 teaspoon granulated garlic
1/4 teaspoon black pepper
1/2 teaspoon sea salt
a few fresh basil leaves, chiffonaded


1.  Prep all the veggies.
2.  Place a large saute pan over medium-high heat.  Add the olive oil and allow it to become hot. 
3.  Once the oil is hot, add the celery, carrot, broccoli and onion.  Saute for several minutes, or until the broccoli is crisp-tender.  Add the garlic and ginger and continue sauteing for a couple more minutes, or until the garlic is cooked through.  Season with sea salt and black pepper.


The Veggies Sauteing


4.  In a small bowl add the seasonings: the coconut milk, red thai chili paste, granulated garlic, sea salt and black pepper.  Whisk together until the chili paste is incorporated into the milk. 
5.  Add the milk to the sauteing veggies, as well as the garbanzo beans and chiffonaded kale.  Simmer, stirring frequently, until the kale has cooked slightly and the sauce thickens.  Season to taste with additional salt and pepper, as necessary. 
6.  Stir in the fresh basil.  Serve over rice (white or brown), quinoa or millet.


Enjoy!

Koko

Friday, November 30, 2012

Sauteed Snap and Snow Peas with Cashews

This is a really tasty, easy stir-fry (which I never make enough of!) recipe I found in Vegetarian Times.  I have been getting that magazine for so many years and even though I find myself oohing and aahing over so many of the pictures and recipes, I find that I rarely actually make any of the recipes, which drives my husband crazy.  After all, my hundreds of cookbooks are taking up so darn much space, I should be doing something with them, right??  Anyway, so I had several of these ingredients on hand already and it was a snap to come together.  Simple and tasty over some steamed rice.  Since my Hubbs isn't the biggest fan of brown rice, we did white rice.  I loved the idea of the cashews in the stir-fry, because I always see recipes and items on menus with cashews in them, but never think to order them or make them, not sure why, but I just never do.  Try this simple, quick, veggie-full dinner and have lots of time to do other things - like baking, what I'm doing now!  Yum!

Sauteed Snap and Snow Peas with Cashews:


So pretty, right?


Serves 4

1 tablespoon tamari
1 tablespoon toasted sesame oil
2 teaspoons arrowroot
1/4 teaspoon sriracha
2 pinches black pepper
1/4 teaspoon sea salt

1 tablespoon olive oil
1 medium red onion, julienned, about 1 cup
1 yellow bell pepper, julienned, about 1 cup
1 cup raw cashews
1 tablespoon fresh grated ginger
8 oz. sugar snap peas
8 oz. snow pea pods
8 green onions, cut into 1" pieces

Steamed white or brown rice to serve

1.  Whisk together the tamari, toasted sesame oil, arrowroot, sriracha, black pepper, sea salt and 1/2 cup filtered water into a small bowl.  Set aside.
2.  Heat the olive oil in a wok over high heat and add the onion, pepper, cashews and ginger.  Stir-fry for about 3 minutes, or until the onion and cashews begin to brown.
3.  Add the snap peas and stir-fry for one minute. 
4.  Add the snow peas and green onions.  Stir fry for 2-3 minutes.
5.  Add the sauce mixture and cook 1-2 minutes, stirring continuously, until the sauce has thickened and the vegetables are well coated with the sauce. 
6.  Serve over white or brown rice with additional tamari, if desired. 


Close Up of the Tastiness!  I loved the cashews!


Enjoy!

-Koko

Thursday, October 25, 2012

Vegan Shrimp Sushi

Sometimes my husband really surprises me with the food items he likes and really wants me to cook for him.  Of course, being Dominican, most of the time he craves Spanish food.  Which is great for me, because I love learning about his food and culture.  But he has been on this sushi kick lately, which is just very funny to me.  I'm not even sure where he tried it the first time, but I decided to make it once and he ate like literally 4 whole rolls of it.  I was stunned, even more so when several weeks later, asking him what he wanted for dinner, his response was "sushi".  Hmm.  I'm very glad he likes it because it is such fun making and of course eating!  It is also such a pretty procedure, and I have never taken pictures of the process, which I thought would be fun this time around.  So, enjoy the nice pictures and make some.  It is sooo delicious.  Maybe I'll make it again for dinner tomorrow!


Vegan Shrimp Sushi:


Topping the nori with the seasoned rice.

Seasoned Rice:

1 1/2 cups sushi rice
3 cups filtered water

4 tablespoons rice vinegar
1 1/2 tablespoons agave
1/4 teaspoon sea salt

Suggested Fillings:
peppers
scallions
vegan shrimp
carrot shavings

Suggested Toppings:
pickled ginger
shoyu or tamari
wasabi paste


1.  Rinse the rice well.  Place in a saucepan with the water and bring to a boil over medium heat.  Once the water boils, lower flame to low and place the lid on top of the pot, with a small space for the air to vent.  Cook rice till completely cooked through, about 15 minutes. 
2. Once the rice has cooked and the flame has been turned off for about five minutes, add the rice vinegar, agave and sea salt.  Stir well to coat.
3.  Allow the rice to cool slightly.  I like to use it when it is still warm, but not hot, or it will kind of "melt" the nori. 
4.  Place about 1 cup of the prepared sushi rice in the middle of the nori, and press out with dampened hands, leaving about 1" from the top without rice.  Place goodies like veggies and vegan shrimp in the center of the rice, being careful not to overload even though it may be almost impossible not to. 
5.  Roll the nori roll tightly toward the end, sealing the nori with some water. 
6.  Place the nori seam-side down while preparing the rest of the rolls.  Using a sharp knife, slice the nori into bite sized pieces, wiping off the knife after every pass through the roll.
7.  Arrange on a plate and garnish with your favorite toppings.  


The giant mound of rice & all the goodies ready to go.


Rice pressed out, about 1" bare at the top.


The veggies and vegan shrimp


Beautifully rolled up!


Sliced, Topped with wasabi & pickled ginger.  Yum!!


Enjoy!

Koko

Sunday, July 1, 2012

Dominican Okra Stew Over Steamed Rice with Fire Roasted Eggplant & Salad

This was a very simple recipe that came together quickly in this hot hot heat, which I really appreciated, because although I usually absolutely love the kitchen and want to spend hours upon hours there, it has been unbearably hot and uncomfortable.  Today the kitchen must have reached over 100 degrees, and I wanted to spend as little time as possible in there.  So before I started cooking of any kind, I prepped all the veggies for the okra stew and eggplant and made the entire salad and dressing.  Every couple of minutes I ran sweating for the ac in the living room, gulped some ice water and ran back into the kitchen.  Then I got the rice cooking, started roasting the eggplant and cooking the okra stew all at the same time so that everything would be done as close to the same time as possible.  It got really hot in there, but all finished within half an hour, then hubbs and I had a beautiful dinner.  Yum! 

That's the one thing I don't like about the summer - relying more on take out because it is just too miserable to cook.  But I'm not the biggest fan of places I don't really know or workers I don't know cooking my food - I'm weird like that.  I also don't like that I don't know exactly what is going in my food.  I might have sweat a lot, but damn did we enjoy a delicious dinner!  I think for dinner tomorrow I'm going to be making a tomato and tofu salad with a balsamic marinade.  My work is going through so much organic produce and throwing away thousands of pounds of food a day, which is sickening, and I am taking home as much of it as I can use.  So I have a lot of tomatoes, berries and eggplant (hence tonight's dinner!).  I made pico de gallo yesterday and had some nachos loaded with veggies and kalamata olives. Yum.  I could almost eat the pico as a soup it's that good, seriously.  I'll have to put the recipe up soon.


Green Salad with Balsamic Vinaigrette, Okra Stew over White
Rice, Fire Roasted Eggplant


Fire Roasted Eggplant

Serves 2-3

1 eggplant, well washed
2 tablespoons olive oil
2 tablespoons sofrito
1 tablespoon tomato paste
2 teaspoons adobo with cilantro
1/8 teaspoon black pepper
1/2 teaspoon boullion
1/2 cup filtered water


1.  Place washed eggplant on the stovetop directly over the flame.  Allow the eggplant to cook on all sides, turning frequently, until blackened all over.  (Keep a window open-it gets a little smoky.)
2.  Place the eggplant in a medium bowl and cover with plastic wrap.  Allow the eggplant to sweat for 10 or so minutes.
3.  Once the egggplant sweats, bring it to the sink and begin removing all of the blackened skin.  If a few pieces remain, that's ok, it will only mean more flavor.  Remove any tough spots, as well as the very top.  Use your hands to mash up the eggplant as much as possible. 
4.  Place the olive oil in a medium saute pan over medium heat and allow to become hot.  Once the oil is hot, add the sofrito and tomato paste and "fry" for several minutes, stirring frequently.  Once the mixture becomes fragrant, add the eggplant, adobo, black pepper, bouillion and water.  Bring to a simmer, and cook, stirring frequently, until the eggplant is very well flavored and some of the water has evaporated. 


Fire Roasted Eggplant
(Not the prettiest thing I know, but crazy delicious!!)

Enjoy!

Koko

Friday, April 6, 2012

Spicy Lime Tofu with Roasted Mushroom Risotto, Green Peas & Salad

Hello everyone out there.  Hope everyone is doing well.  I have been insanely busy with my new job - it's taking up the vast majority of my time, and what little time I have left is taken by the Hubby either by cooking dinner for him (well, us really), working on our cafe plans together or trying to have enough time to go on a date.  This unfortunately leaves me little time left to blog about all of the tasty things I am still making on basically a daily basis.  I definitely still want to share the delicious things I am doing, and I hope you are still wanting to see them, however, there is no way with the way things are currently going, that I will be able to write as thorough of posts as I have in the past.  I am thinking of doing something similar to the blog What The Hell Does a Vegan Eat Anyway, in that I would share menus and pictures, and when time, recipes and stories.  I think that is what is going to work the best for now, but it could always evolve from there and maybe eventually go back to a recipe for each post.  We'll see.  Until then, thanks for checking out my blog and enjoy through pictures the tasty things I am making for the Hubbs and I, or what I am preparing professionally or privately.


Dinner Tonight: Roasted Mushroom Risotto, Spicy Lime Tofu,
Mixed Green Salad and Green Peas.  Tasty and simple,
though the risotto was definitely time consuming!


Friday, March 23, 2012

Country Fried Seitan, Sesame Kale, Fried Zucchini & "Fried" Rice

This is one of the many times the Hubby has come home and said "Mucho Hambre Mami", meaning "I'm very hungry honey!".  Insert roll of the eyes here.  Since when is he not hungry?  Seriously?  It's scary thinking what it's going to be like if/when there's another guy added to the family - like a son!  They would eat me out of house and home!  I always tell people I have to cook for at least 3 people (Hubby counting as 2 people)!  Anyway, knowing that he loves rice and can literally eat it everyday, I made some fried  - more like sauteed - because I already had some cooked rice in the fridge.  And since I was making country fried seitan, which takes a while to make, I'm not going to lie, I wanted to make something that would be a little simpler.  I got this recipe idea from the Vegan Yum Yum cookbook.  The original recipe wasn't exactly super tasty, so after messing around with the spices a few times, I hit it and now it's amazing.  Since the thing that takes the longest time is mixing together the spiced flour, I have wised up a little and made a giant batch of it and now keep a Ziploc of it in the refrigerator at all times so that whenever Hubbs or I have a craving, it's not as far away.  Also always having a batch of homemade boiled seitan in the freezer definitely helps.  (After I finish with this recipe, I will have emptied my supply and am going to have to replenish it soon.)  I've also got the fried zucchini down and can whip that up ridiculously easily.   I have figured out that the key to making a quick meal is to have things ready before hand to help you out and save time for those days when you're really busy.

Country Fried Seitan, Sesame Kale, Fried Zucchini & "Fried" Rice:


Country Fried Seitan, Sesame Kale, Fried Zucchini, Fried Rice


Serves about 4, with extra seitan left over

Fried Zucchini


Fried Rice:
2 cups cooked rice, cold
1/4 cup shredded carrots
1/4 cup green peas, cooked
2 tablespoons olive oil
1/4 teaspoon sea salt
1/8 teaspoon black pepper
1 tablespoon tamari/shoyu
1/4 teaspoon toasted sesame oil
1/2 small onion, small diced, about 1/2 cup
2 green onions, sliced

Country Fried Seitan:
1/2 - 3/4 lb. homemade seitan steaks

Spiced Flour Mixture:
1 1/2 cups unbleached flour
4 teaspoons baking powder (yes, baking powder!  It will make the seitan crispy)
1 teaspoon dried parsley
1 teaspoon seasoned salt
1/2 teaspoon black pepper
1/2 teaspoon onion powder
1/2 teaspoon garlic powder
1/2 teaspoon boullion powder
1/4 teaspoon dry mustard powder
2 pinches cayenne, optional, but a good idea

Wet Seasoned Mixture:
1/3 cup seasoned flour
1/2 cup filtered water
3 tablespoons prepared yellow mustard

1.  Begin by getting everything ready for the fried seitan.  Mix together the flour and all the spices.  Set aside.
2.  Begin making the rice.  In a wok over medium-high heat, add the olive oil and let it become hot.  Once it's hot, add the onion and carrot and saute until the onion is fragrant, about 3-4 minutes.  Add the peas and stir for a minute.  Add the rice and "fry" aka saute for about 10 minutes, letting the grains become a little crispy.  Add the rest of the ingredients, being sure to combine thoroughly.  Continue to cook for an additional couple of minutes.
3.  Back to the country fried seitan.  Set up a station: 1 bowl will have the wet seasoned mixture, the second bowl will have some seasoned flour and a clean plate should end this assembly line. 
4.  Place a large pan over medium heat and cover the bottom with a layer or no-taste oil, like canola.  Allow the oil to become hot.  In the meantime, prepare the seitan.
5.  Assembly line:  keep one hand for the wet mix and the other hand for the dry mix.  Squeeze out any liquid that may be in the seitan into the sink.  Dip the seitan pieces into the wet mixture, coating well.  Shake off excess liquid.  Now place the seitan into the spiced flour.  Cover every surface of the seitan with the flour.  Shake off excess flour and place on clean plate.  Repeat with remaining seitan. 
6.  The oil should now be hot.  Carefully place the coated pieces of seitan into the oil, cooking for several minutes on each side, until browned and crispy.  Once browned on both sides, drain on paper towel covered plates. 
7.  To serve, place portions of each item on the plates, and be prepared to serve seconds.  Delicious!

Enjoy!

-Koko

Thursday, March 8, 2012

Tofu with a Tahini Sauce, Rice, Brazilian Braised Kale, Hominy

This is certainly not the prettiest of dishes I have ever made, but damn was it tasty!  I am by no means a Southerner.  I am from pretty much as high north as you can go in Michigan.  Therefore, I have never eaten Southern food, nor have I ever really felt the need to eat any kinds of Southern looking foods in the past.  This has changed recently once I started working with B, a lovely intern from the Natural Gourmet Institute, the culinary school I graduated from in NYC.  She happens to be from Charlotte, North Carolina, and is the sweetest person ever!  She also helped disabuse me of all of my preconceived notions I hadn't even realized I had about Southern people.  Weird, right?  Anyway, she was always telling me about foods her mother would prepare for her and things that are typically Southern.  Keep in mind though that she is a culinary graduate living in NYC, so she certainly has creative, delicious ideas, but still talks about the foods she ate.  So this was my tribute to her in a not-really Southern way, but a Southern-inspired way, with the greens and hominy.  I'm not even sure where I came up with the idea for the tahini baked tofu, but there it is, and it was a tasty meal. 

Tofu with a Tahini Sauce, Rice, Brazilian Braised Kale, Hominy


Yields enough to coat 1 lb. tofu

Tahini Sauce:
1/4 cup tahini
1/4 cup water
1 tablespoon tamari
1 teaspoon agave
1/4 teaspoon sea salt
2 pinches black pepper
1 1/2 teaspoons lemon juice
pinch cayenne, or to taste

1.  Preheat oven to 400 degrees.  Lightly oil a baking tray with spray oil and set aside until ready to use.
2.  Remove the tofu from the package, carefully squeezing out some of the water and being sure not to break the tofu.  Cut in half the hamburger way, then cut each half into 4 slices. Lay each slice on the prepared sheet tray and drizzle with olive oil.  Sprinkle with sea salt and black pepper.
3.  Bake for about 15 minutes, or until the top has browned.  Use a spatula to flip over the tofu.  Sprinkle with additional sea salt and black pepper and continue to bake for an additional 10-15 minutes. 
4.  While the tofu is continuing to bake, prepare the tahini sauce. 
5.  In a medium saucepan, add all of the ingredients except for the water and tahini.  Mix together the water and tahini in a separate small bowl until smooth and the tahini has thinned.
6.  Add the thinned tahini to the rest of the ingredients in the pan.  Whisk everything together and turn the heat to medium-low.  You only want to heat the sauce.  Be sure to stir the contents continuously. 
7.  Once the sauce is simmering, add the tofu into the pot, flipping each piece to coat. 
8.  Serve with additional sauce on top. 

Enjoy!

-Koko


Friday, February 17, 2012

Baked Tofu with Wine, Lemon & Caper Sauce with Dirty RIce

This dinner was all about cooking quickly and getting to eat quickly.  Hubby and I were both very hungry, and I was able to get this dish from start to finish, on the table in an hour.  Pretty good.  Sometimes when I'm feeling more like testing and trying new things, I could spend several hours in the kitchen preparing one meal.  Organization is what really allowed me to get this bad boy into our bellies really quickly.  Since I didn't have any seitan prepared and know that it can take a while to make something with tempeh (I like to bake it in a flavorful sauce for at least 45 minutes covered, uncover and bake another 15-20 minutes - way too long for our hungry bellies!), I decided on tofu, because you can bake that in the oven, forget about it, make the sauce and everything else at the same time, then the tofu is done and just needs to simmer for a little while in the sauce.  Done.  Easy. 

The idea for this sauce came from the Vegan Yum Yum cookbook which I am slowly making my way thorough, and as I am sure I have said before, the recipes are great bases, but generally need some reworking to suit the Hubby and my tastes.  But hey, it makes it so that dinner is never boring and there is always something different on the table.  This dinner turned out very well, so much so that between the Hubby and I (and I only ate 2 slices of tofu and less than a cup of the rice), it was literally all gone!   ALL of it!  Hubby was disappointed, because since he ate it all, there was none left for him to take to work the next day, so he had to settle on something uninteresting to take with him.  Serves him right for almost eating a whole pound of tofu by himself!   

Baked Tofu with Wine, Lemon & Caper Sauce:


Steamed Broccoli, Tofu over Rice, Simple Salad

Serves 2-3

1 lb. tofu, drained, sliced into 6-10 slabs
olive oil, to drizzle
sea salt and black pepper

Sauce:
2 tablespoons extra virgin olive oil
1/4 cup shallots, minced
2 cloves garlic, minced
1/4 cup white wine
1 lemon, ends removed and sliced into 4, seeds removed
1 cup filtered water mixed with 1 teaspoon Better than boullion
1 tablespoon capers, chopped
sea salt and black pepper to taste
Parsley, minced, to serve

Dirty Rice:
2 cups cooked white rice
1 tablespoons extra virgin olive oil
1/4 cup small diced onion
1/4 cup small diced celery
1/4 cup small diced green pepper
1 green onion, minced
2-3 teaspoons Cajun seasoning, preferably homemade

1.  Start with the tofu - it is going to take the longest because it needs to bake.  Preheat the oven to 400 degrees.  Line a baking sheet with parchment paper or aluminum foil.  Drizzle a small amount of olive oil over the tray, lay the tofu on the sheet, drizzle with a small amount of olive oil and sprinkle each piece of tofu with sea salt and black pepper.  Place in the oven and bake for about 15-20 minutes.  Turn over, sprinkle with a small amount of olive oil, sea salt and black pepper.  Return to oven and bake for an additional 15-20 minutes, or until the edges are golden and the tofu is firm.  Remove from baking tray and place on a plate, so the tofu doesn't continue to cook.
2.  Prepare the sauce.  In a large saute pan over medium-heat, add the olive oil and allow it to become hot.  Add the shallots and garlic and cook until softened and fragrant.  Add the wine and allow it to evaporate about halfway.  Add the water and boullion and stir mixture.  Add the lemon slices, being careful not to move them too much or they will break.  Add the capers, sea salt and black pepper and taste.  Wait to adjust seasonings unless it clearly needs more salt.  Once the sauce mixture comes to a boil, lower the heat to a simmer and stir periodically. 
3.  Place the baked tofu in the simmering sauce, turning the heat down even more.

Tofu Simmering in the Sauce.  Beautiful isn't it?

4.  Now you can get started on the rice, but keep an eye on the tofu in the sauce.  After the tofu has been simmering for about ten minutes, turn it over so that the other slice can have an equal amount of time absorbing the deliciousness! 
5.  Back to the rice:  place the olive oil in a wok over medium-high heat and allow the pan to become hot.  Once the pan and oil are hot, add the onion, celery and green pepper.  Saute for several minutes, stirring periodically.  Add the cooked rice and stir pretty frequently - you don't want it to stick to the bottom of the wok.  Once the rice has cooked and separated, add the white part of the scallion and stir into the rice mixture. 
6.  You can turn the heat down now to medium.  Add the Cajun seasoning, being sure it coats each individual piece of rice.  Taste the rice and add more of the Cajun seasoning if you would like.  Add the green part of the scallion just before serving. 
7.  To serve, place a couple pieces of the baked tofu on your plate and generously add the sauce.  Place a nice helping of the rice on the plate as well.  You can do what my hubby did - lean the tofu pieces against his pile of rice and drizzle the entire thing with the sauce.  So delicious!  It's nice to have tofu with a fresh, light sauce for a change.  I will definitely make this again!


A Close-Up of the Tofu with the Wine, Lemon & Caper Sauce

Enjoy!

-Koko

Saturday, January 14, 2012

Rice and Garbanzo Bean Stuffed Peppers

I love stuffed peppers.  I really do.  I'm sure I would love other stuffed foods like tomatoes, zucchini, etc.  I know I like stuffed mushrooms and cabbage too.  Stuffed foods are really fun and homey and so simple to make.  I have always thought that my mom used to make them, which is why I love them so much and make so many different varieties.  I was making a variation of them for the family I cook for about a week ago, and I was running late and wanted to expedite the process.  So I called my my mum and asked her advice.  I was very surprised when she informed me that she never made us stuffed peppers or stuffed anything as kids, yet I distinctly remember eating them at home.  Of course, at the time they were filled with white rice and ground beef.  I asked her several times if she was sure she wasn't mistaken, but she was adamant.  I'm just wondering where or whom the hell I ate these peppers with that I distinctly remember eating as a child. 

It's so strange how you have memories of things that happened when you were a kid that actually didn't happen as you remember them.  Such a strange thing.  There is one particular incidence I have in mind that happened when I was about five.  I have an older sister who is over 10 years older than me and shared a room with me for several years when I was very young.  Have I ever mentioned that I am one of 6 kids?  I know it sounds crazy in this day and age, but I loved and still love every moment of it.  Well, one day my sister was cleaning our room, tossing all of my/ "our" toys into the toy boxes in the closet.  I was in the closet, going after a Cabbage Patch doll (did those things really ever exist?!) she had just thrown in the box, and I had the misfortune to stand up as she was tossing in a Barbie doll horse with sharp hooves.  Of course the hoof gashed the side of my head and cut it open.  I didn't cry until I saw that my hand came away covered in blood.  My mom took me to the hospital and I remember being a very good girl, and being rewarded by the doctors with a small stuffed smiley face and then later with some bubble gum by the foot from my mom.  When I brought up the incidence many many years later, my mom told me I was actually the worst in the hospital - screaming at the top of my lungs, crying, making a huge fuss, and just generally being a hideous pain.  Funny right?  Because I truly remember it happening that I was a good girl.  Long way of saying it's funny how you remember things differently than they actually happened, right?  I'll have to figure out where it is that I first ate those stuffed peppers.  It's driving me crazy that I don't know how it is I fell in love with them!

Stuffed Peppers:


The Cooked Pepper Filling


Serves 4

Stuffed Peppers:
4 medium peppers, assorted colors tops removed, insides scraped out and tops reserved
1/2 cup green pepper, small diced (from reserved tops of peppers)
1/4 cup orange pepper, small diced (reserved from top of peppers)
1 medium onion, small diced, about 1 cup
2 stalks celery, small diced, about 3/4 cup
2 small carrots, small diced, about 3/4 cup
1 jalapeno pepper, minced
2 cloves garlic, minced
2 cups cooked white or brown rice
1 cup cooked chickpeas
2 tablespoons sofrito
2 teaspoons vegetable bouillion powder
1/4 teaspoon cumin
1/8 teaspoon black pepper
1/8 teaspoon chipotle pepper powder
Daiya, for top of pepper, optional

1.  Place a wok on the stove over medium-high heat.  Add the oil and allow it to become hot.  Once it is hot, add the green, orange and jalapeno peppers, onion and celery.  Saute for several minutes, or until veggies are crisp-tender.  Add the minced garlic and cook until fragrant.
2.  Add the sofrito, boullion, cumin, black pepper and chipotle pepper powder.  Stir to coat the veggies.  Add the cooked rice and cooked garbanzo beans.  Stir all ingredients to coat.  Season to taste. 
3.  Place the empty peppers into a pan that has been lightly oiled.  Portion out the filling into the peppers, really packing it tightly into the pepper.  Only three of my peppers could fit into a square 8" baking pan, and my 9x13" pan was busy with a casserole, so I baked my peppers in batches.
4.  To help the peppers cook faster and more thoroughly, place about 2/3 cup of water in the bottom of the baking pan.  Cover the pan tightly with aluminum foil and bake for 25-35 minutes, or until the peppers can be easily pierced with a fork. 


The Raw Stuffed Pepper, Bottom of Pan Covered in Water


5.  If you would like, once the peppers are soft, remove the foil, top with daiya and return to the oven for about 5 minutes, or until the cheese melts.  These, you really should let cool for at least 10 minutes, because the peppers themselves will retain a lot of heat.  Once these cooled, I put them into leftover plastic 1 lb. deli containers - they fit perfectly, and were an easy, secure way for the Hubby to transport them to work for lunch the next day.

Enjoy!

-Koko