Showing posts with label Mushrooms. Show all posts

Sunday, April 6, 2014

Breaded Seitan, Roasted Garlic Mashed Potatoes, Sauteed Onions and Mushrooms, Green Beans

I try to cook everyday.  For at least 1-2 meals.  Sometimes I feel more excited about cooking and sometimes I feel like throwing something together.  For this meal I felt like throwing something together, but had several ingredients to use up before another grocery shopping trip with the hubby.  The meal ended up taking a while to make, but was so worth it.  So tasty and comforting!


Such a pretty and tasty meal!


Roasted Garlic Mashed Potatoes:
2 1/2 lb. russet potatoes, peeled and large cubed
 
4 tablespoons earth balance
sea salt and black pepper to taste
unsweetened almond milk or soymilk
 
1 head garlic, top cut off
olive oil
 sea salt and black pepper
 
Sauteed Onions and Mushrooms:
1 large red onion, sliced thinly
4 oz. crimini mushrooms, sliced
1 1/2 teaspoons olive oil
sea salt and black pepper
1/4 cup filtered water
 
1.  Preheat the oven to 375 degrees.  Place the head of garlic in a small piece of aluminum foil.  Drizzle with olive oil and sprinkle with sea salt and black pepper.  Close the foil tightly.  Roast for about 30 minutes, Place potatoes in a pot and cover with cold water.  Cook for about 30 minutes, or until the garlic has softened and darkened in color.  Set aside until cool enough to handle.
2.  Place the potatoes in a pot covered with cold water.  Cook until just tender. 
3.  Prepare the sauteed onion and mushrooms: place the olive oil in a large saute pan over medium heat.  Add the onion and mushrooms and cook for several minutes.  Add the sea salt and black pepper and cook until the mushrooms begin to release their juices.  Lower the heat and add the filtered water.  Cook until most of the water has evaporated and the mixture is very flavorful.
4.  Finish the potatoes: add the earth balance, sea salt, black pepper and prepared roasted garlic.  Mash very well.  Add the almond milk or soymilk until the desired consistency is achieved. 
5.  Serve with a veggie protein and a side. 


So delicious!


Enjoy!
 
 
Koko

Thursday, March 27, 2014

Homemade Vegetable Stock

I have been making homemade vegetable stock for years.  Years and years actually.  I've gone through different systems of making the stock with varying degrees of success, but I've perfected the stock over my years of living in New York in all kinds of tiny kitchens and spaces.  The best method that I have come up with by far is freezing all of my vegetable scraps in a gallon Ziploc bag and placing it in the upright freezer on top of our refrigerator in our tiny kitchen.  Whenever the bag would get completely full, I would toss it all in a large pot and make stock.  Then I would use whatever stock I needed that day and freeze the rest of it in pint and quart deli containers.  Several food blogs that I follow have suggested freezing in glass jars, but I have never had success, even when waiting for the food/liquids to cool completely, then sitting in the refrigerator for a couple hours and cooling it even more before putting it in the freezer.  I have had too many jars break on me to want to try it again.  So I have been storing it in deli containers and it has been working very well.  It's also super convenient. 


Veg Stock ready to go in the fridge and freezer
 
 
There is nothing better than making homemade vegetable stock.  It is super easy, costs almost nothing and gives tons of flavor and extra nutrients to your soups, sauces, stews, etc.  I also love that you have complete control of what goes in, how you prepare it, and therefore the end result.  There are no unnecessary added ingredients.  And if you are organized about it, you can make different kinds of stock for different purposes.  Several kinds I have made before include:


1.  Roasted Onion Stock for French Onion Soup:  Keep the onion ends, papers and outer layer of skins separate.  If I remember, I throw the ends of garlic in there as well - frozen of course.  Once I have a good amount, I roast the contents of the bag with some peppercorns until golden and dark.  Then I will simmer that mixture until fragrant and use it to make my delicious, super tasty soup.  Yum!
 
2.  Mushroom Stock:  I save all of the stems of the mushrooms I cook with and place them separately in a Ziploc bag in the freezer.  Once it's full, I'll simmer the stems along with a couple dried shiitake mushrooms, black peppercorns, dried thyme (or be even thriftier by freezing the stems from fresh thyme in the same bag with the mushroom stems).  Use the stock to make a killer Green Bean Casserole for Thanksgiving, a crazy flavorful mushroom soup or a delicious sauce to go with tempeh, tofu or seitan.
 
3.  Roasted Vegetable Stock:  Instead of placing the frozen veggies directly into the pot and covering with water, roast for 30 minutes or so at 400 degrees, then simmer.  Add a handful of lentils, black peppercorns and bay leaves for extra deliciousness.  Then use this tasty stock for more strongly flavored soups or a seitan pot roast or something equally amazing!


Frozen veggies in the pot, getting ready for some filtered water


Suggested Veggies:

Onion ends and peels (get rid of the papery outer-skins: they will make the stock bitter)
Carrots peels and ends
Garlic ends
Celery ends and leaves
Mushroom stems
Parsley Stems
Fresh thyme stems
Tomato cores and ends


Veg Stock Working


Homemade Veggie Stock:

Yields: 1 Gallon Stock


1.  Take the contents of the gallon Ziploc bag and place it in a large pot. Cover with at least 1-1 1/2 gallons of filtered water. Add several black pepper corns, a couple bay leaves and dried thyme if you would like. 

2.  Bring the contents to a boil, then reduce heat to a simmer.  Simmer for 45-60 minutes, or as desired.  The longer the stock simmers, the darker in color and stronger in flavor it will be. 

3.  Allow the veggies to sit in the cooking liquid for about 10-15 additional minutes, or until the stock is more manageable to handle (temperature-wise). 

4.  Strain the veggies out of the stock, pressing to release as much liquid as possible.  Discard the stock veggies - preferably in a compost pile. 

5.  Cool the stock, package and be sure to date clearly.   Don't fill the containers completely full or they may explode in the freezer  - the liquid expands as it freezes. 


Labeled and frozen!
I've been doing this for years!
(And don't worry this picture was taken years ago & the stock long since used up.)


Fresh veggie scraps getting ready to go in the freezer.


Now save those organic veggie scraps and make your own homemade stock!


Enjoy!


Koko

Sunday, January 19, 2014

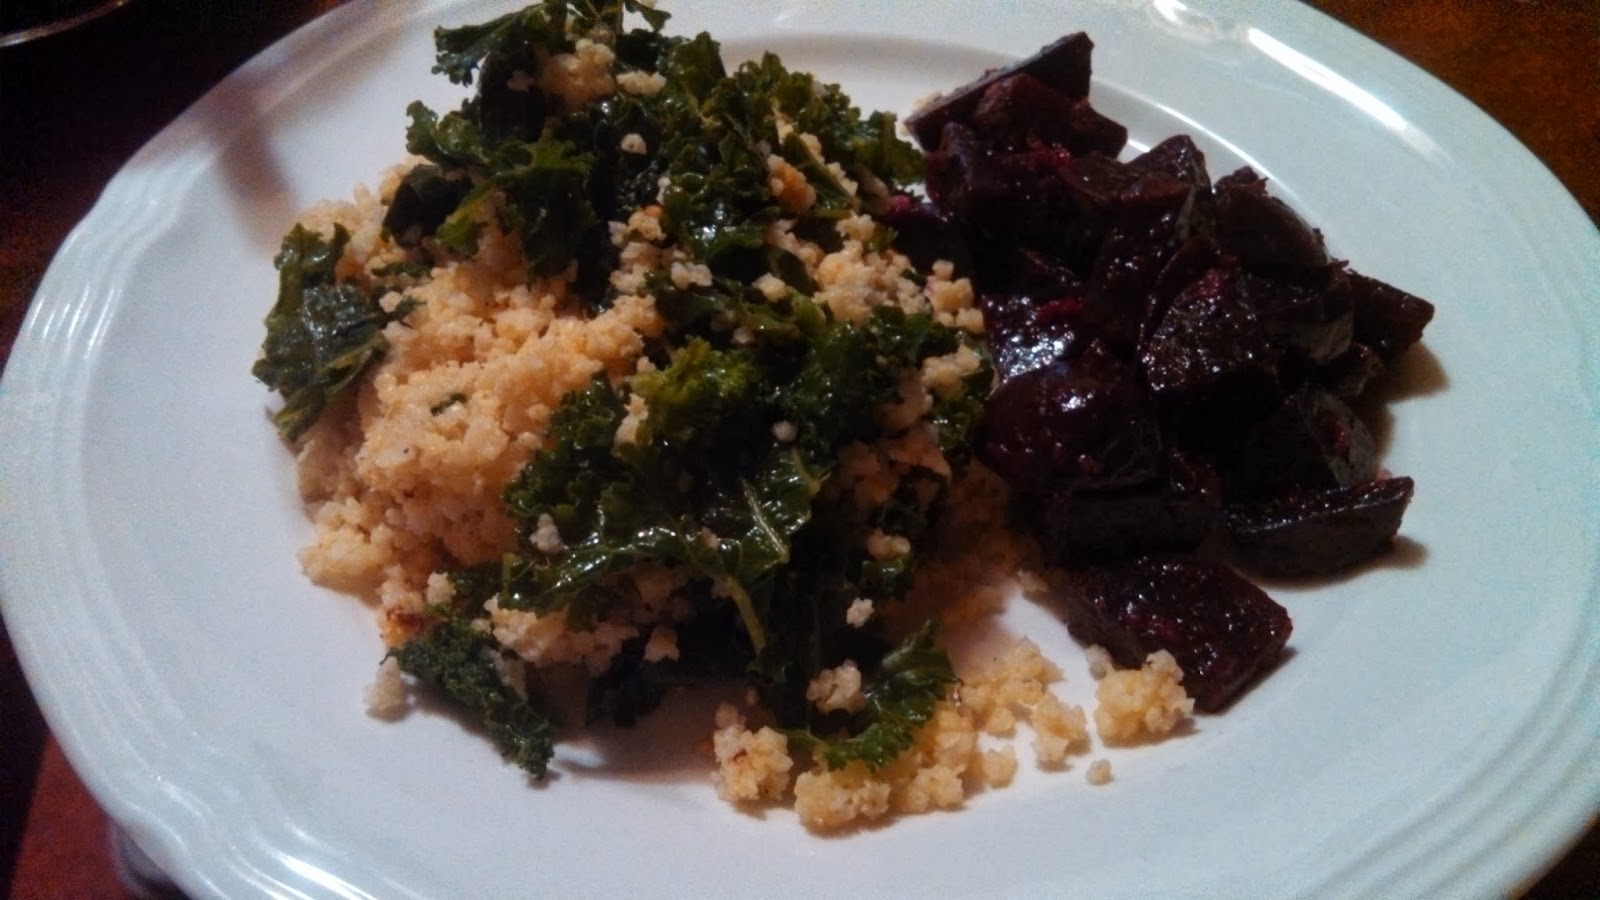
Millet with Kale, Mushroom Gravy and Beet Salad

I love the website Oh She Glows.  I follow it quite religiously and am always so impressed how Angela Liddon makes all of the food just look so amazing and healthy.  Pretty much every picture I see, I say to myself "I am so going to make this!"  The reality, of course is that I have so many recipes that I just have to make, and trying as of this point to keep to a budget, but still eat healthfully, is challenging, and I can't make every dish if I don't have the ingredients at home.  I think most of the ingredients in this dish people with a well stocked fridge and pantry should pretty much have on hand at all times.  This is one that seemed pretty easy to make, healthy, but also very much a "comfort food" item.  Sometimes the hubby can be finicky about creamy sauces and gravies, but I thought this would be great.  He ended up loving it, but didn't want to take it to lunch the next day, because in his words it was too light for a hardworking, strong man like him.  Insert good-humerdly crossing of the eyes here.  It ended up being a bonus for me because I ended up taking it for my lunch and was very satisfied!  Try making it and go over and take a look at what Angela ended up doing for the same dish over at Oh She Glows.  I didn't follow her recipe exactly, but used it as a guideline to make my own dish.


Super Comfort-Foody and Delicious!


Gravy:

Yields: 2 1/2 cups

2 tablespoons canola oil
2 cloves garlic, minced
1 onion, small diced
4 oz. criminis, small diced
4 tablespoons unbleached flour
2 cups filtered water
1/2 teaspoons sea salt
1/8 teaspoon black pepper
1/4 teaspoon dried thyme, crushed with the fingers
2 tablespoons nutritional yeast
1 tablespoon tamari
1/4 teaspoon unchicken boullion

Garlic Kale:
12 cups kale, blanched
1 1/2 tablespoons olive oil
4 cloves garlic, minced
sea salt and black pepper

Millet:
1 1/2 cups millet, rinsed
1 teaspoon olive oil
3 cups filtered water
1/2 teaspoon sea salt

1.  Cook the millet in the oil until toasted and most of the water has evaporated.  Add the filtered water and sea salt.  Bring the millet to a boil, reduce heat to a simmer, cover, and cook till the water has absorbed and the millet is fluffy,
2.  Prepare the gravy:Add the oil over medium heat.  Once it is hot, add the onion, criminis and garlic, stirring frequently until they begin to color.  Add the unbleached flour and stir well to coat. 
3.  Allow the flour to cook for a couple minutes so that the raw flour taste goes away.  Add the water all at once, whisking immediately so the gravy does not clump.
4.  Add the remaining in gredients to the gravy: the sea salt, black pepper, thyme, nutritional yeast, tamari and unchicken boullion.  Whisk well to combine all the ingredients.  Continue cooking till the gravy has thickened to your liking.  Season to taste.
5.  Prepare the garlic kale:  blanch the kale just until it turns a bright green color - about 30 seconds.  Drain.
6.  In a small pan over medium heat, cook the garlic in the olive oil until it becomes golden and cooked through.  Season to taste with sea salt and black pepper.
7.  To serve, place a mound of the millet on the plate, followed by a generous serving of kale, then top it all off with gravy.  Healthy comfort food at its best!


The millet mixed with the garlic kale.


The plate before adding the gravy.  Yum!


Enjoy!

Koko

Wednesday, July 3, 2013

Mushroom Barley Soup ala Risotto

The countdown is on for Hubbs and I to move.  It is officially 4 weeks from today that we will make the drive from Brooklyn to Michigan.  Now is the time to start going through things and getting rid of stuff that isn't going to make the journey with us.  Since living in NY, I've invested in a small chest freezer as well as an additional refrigerator/freezer combo other than the one that comes with the apartment.  I have been teaching so many classes and doing so much testing that I simply needed more space.  Now that the time is drawing near, I'm trying to empty out the freezers and use up everything in there.  Mostly we have a lot of frozen fruit left and some baking chips, gluten free flours, etc.  That is until I discovered a ziploc baggie of mushroom stems.  Soup - the perfect answer!  Now I realize that this is not the perfect weather for soup (high 80's and crazy humid), but I could literally eat soup everyday, multiple times a day.  So I decided to make mushroom stock from the mushroom stems I saved every time I purchased a package of mushrooms.  It makes an amazingly delicious stock.  After going through my pantry as well, I came across half a bag of barley that needed to be used up.  What better way to use the mushroom stems and barley then by making Mushroom Barley Soup? 

I think the last time I ate this soup, that I can recall anyway, was in second grade when we made stone soup, which was actually a barley soup with stones speckled throughout.  Pretty gross to think of now, but it was pretty awesome back then!  This recipe, which I used the Candle Cafe's cookbook as a reference, turned out very tasty, but stupid me got busy packing more and more stuff into boxes, left the pot on the stove over low heat, and ended up not with a soup, but rather, almost a risotto.  But it was still quite tasty!


Mushroom Barley Soup ala Risotto:


Quite tasty.

Serves: 4-6

1 tablespoon olive oil
1 1/2 cup medium diced carrots, about 3 medium
11/2 cups chopped celery, 2 stalks
1 cup medium diced onion, 1 medium
1 1/2 cups sliced crimini mushrooms
3 cups mushroom stock
3 cups filtered water
2 1/2 teaspoons sea salt
1/2 teaspoon black pepper
1 cup barley, rinsed
2 bay leaves

1.  In a large pot over medium heat, add the olive oil.  Allow it to become hot, then add the carrots, celery and onions.  Stir and allow to cook for about 5 minutes, till softened. 
2.  Add the mushrooms and gently stir, trying to keep them whole. 
3.  Add the rinsed barley, stirring to coat with all of the ingredients.  (This is to keep the grains separate.  If you were to add them with the stock at the same time, they would clump together more.)  Once the barley is dry, add the stock, water, salt and pepper and bay leaves. 
3.  Allow the soup ingredients to come to a boil.   Reduce the heat and allow the soup to simmer for about half hour, stirring periodically, until the barley is cooked all the way through. 
4.  To make it into the "risotto" I ended up with, cook it for about double the time over low heat.  ;)
Enjoy!

-Koko

Sunday, January 6, 2013

Mashed Potatoes & Gravy, Roasted Portabella Mushroom, Pepper Steak & Garlic Kale

I'm loving mushrooms right now, even the funky white ones.  Well, ok, I'm loving all of them except for straw  mushrooms.  Those have always and probably always will freak me out.  I've never eaten them and never intend to.  Ugh!  I just really think they look like mini people and that is creepy.  My sister-in-law Debbie used to always get Moo Goo Gai Pan whenever we went to get Chinese back home and loved those things.  Every time she popped one in her mouth, I cringed, thinking she was eating people.  Strange I know, but they really look like people to me!  Besides those, I love the mushrooms that I have tried thus far.  Especially morels!  Seriously delicious! 

I was just talking to my Mum the other day, who lives in Michigan and she was telling me that hopefully this coming spring will be a good time to go hunting for mushrooms in the woods.  The last few years have not been great and she has not found a ton of morels, but even finding one is so worth it!  She usually dries them at home and then will send them to me because they're too fragile to be shipped all the way from Michigan to New York fresh.  But damn, I remember them being the most amazing thing in the world when they were fresh picked from the woods behind our house.  I remember seeing small containers of dried morel mushrooms at Whole Foods Bowery for over $200 per pound.  Yes that is $200 / lb!  No thanks!  And where the heck where they picked?  I'll stick to my Mum's home picked morels, thanks!  Unfortunately, since it is still a little early for morels, I had to settle on portabellas, even though that is not really settling because portos are super tasty too.  Waiting (not so) patiently for those morels! 


Mashed Potatoes & Gravy, Roasted Portabella Mushroom, Kale & Pepper Steak:


Sauteed Kale, Roasted Portabella, Pepper Steak & Mashed Pots


Mashed Potatoes & Gravy, prepared
Sauteed Kale, prepared
Pepper Steak, prepared

Roasted Portabella Mushroom:

2 portabella mushrooms, large stem removed
Extra Virgin Olive Oil
Sea Salt
Black Pepper
2 cloves garlic, minced
2 pinches onion powder
2 pinches garlic powder

1.  Preheat oven to 400 degrees. 
2.  In the meantime, prepare the mushrooms.  Line a baking sheet with parchment paper or aluminum foil.  Get your spices and fresh garlic ready.  Drizzle the mushrooms on one side with the oil and immediately sprinkle with the sea salt, black pepper, fresh minced garlic, and garlic and onion powder.  Flip the mushroom over and do the same to the other side.  Place the seasoned mushrooms in the oven and roast for about 10 minutes on each side, flipping the mushrooms over half-way through the baking.
3.  The mushrooms are finished when the edges are browned and crispy and the very center is soft and juicy.
4.  Allow the mushroom to cool for at least 5 minutes for the juices to distribute.  If you try to cut the mushrooms right away, all the juice will immediately come out and the flavor will not be as good.  It's worth the wait. 
4.  To serve, place a portion of the potatoes and gravy, pepper steak, sauteed kale and sliced portabella mushrooms on the plate.

Enjoy!

-Koko

Friday, April 6, 2012

Spicy Lime Tofu with Roasted Mushroom Risotto, Green Peas & Salad

Hello everyone out there.  Hope everyone is doing well.  I have been insanely busy with my new job - it's taking up the vast majority of my time, and what little time I have left is taken by the Hubby either by cooking dinner for him (well, us really), working on our cafe plans together or trying to have enough time to go on a date.  This unfortunately leaves me little time left to blog about all of the tasty things I am still making on basically a daily basis.  I definitely still want to share the delicious things I am doing, and I hope you are still wanting to see them, however, there is no way with the way things are currently going, that I will be able to write as thorough of posts as I have in the past.  I am thinking of doing something similar to the blog What The Hell Does a Vegan Eat Anyway, in that I would share menus and pictures, and when time, recipes and stories.  I think that is what is going to work the best for now, but it could always evolve from there and maybe eventually go back to a recipe for each post.  We'll see.  Until then, thanks for checking out my blog and enjoy through pictures the tasty things I am making for the Hubbs and I, or what I am preparing professionally or privately.


Dinner Tonight: Roasted Mushroom Risotto, Spicy Lime Tofu,
Mixed Green Salad and Green Peas.  Tasty and simple,
though the risotto was definitely time consuming!


Saturday, November 19, 2011

Vegetable Fried Rice, Grilled Veggies, Seitan & Steamed Broccoli

I feel like lately, a lot of my meals are about using up the ingredients I have in my refrigerator.  But then again, isn't that kind of the purpose of having food in the fridge - to use it?  Anyway, hubby and I were very hungry tonight  (when are we not???) and wanted dinner very quickly.  I had some leftover cooked rice, some seitan I prepared from Viva Vegan (we were not fans!  Too garbanzo-y!) and a mushroom sauce I had prepared a couple days ago.  Fried Rice came to mind very quickly, as well as the mushroom sauce over the seitan, and I really wanted something grilled - so I slapped a few veggies on my panini machine, which gives amazing grill marks, great flavor, and a very nice texture.  I also put the seitan on the machine for a few minutes for good measure, to heat it back up and try to make it look a little nicer - it was pretty ugly.  Surprisingly, dinner came together very quickly, in about 30 minutes and hubby and my bellies were both very satisfied (although we still didn't like the seitan, even smothered in the mushroom sauce!).  Any thoughts on what to do with the seitan, which was steamed, not boiled?

Vegetable Fried Rice:


(I must have been starving when I was taking these pictures -
they are all so blurry!  This was the best one!)
Grilled Seitan with Sauteed Mushrooms, Vegetable Fried Rice,
Grilled Veggies & Steamed Broccoli


Serve 2-3

3 tablespoons olive oil, separated
3 cups cooked, cooled rice (leftover rice works beautifully here)
1 cup snap peas, tough ends removed
1 medium onion, small diced, about 1 cup
1 medium orange pepper, small diced, about 3/4 cup
1/2 cup shredded purple cabbage
1/2 stalk broccoli, chopped finely
2 tablespoons tamari
1 tablespoon mirin (rice cooking wine)
3/4 teaspoon vegetable boullion powder
1/4 teaspoon black pepper
Red Pepper flakes and additional tamari, for serving

1.  Place a wok over medium -high heat.  Add the oil and allow it to heat up.  Once it is hot, add the peas, onion, pepper, cabbage and broccoli.  Saute, stirring frequently, until tender-crisp. 
2.  Break apart the cold rice with your hands into the hot wok and continue stirring.  You may have to add an additional 1-2 tablespoons of oil to keep everything from sticking.  Continue to fry for a few minutes, until the rice is hot and has colored slightly. 
3.  Add the tamari and mirin at the same time, being sure to drizzle it around the contents in the wok.  (If it is deposited at the same spot, it will cause the rice to absorb too much of the salty flavor and the seasonings will not evenly distribute throughout the rice.)  Quickly stir the rice mixture to coat.  Add the boullion powder and black  pepper and stir again.  Continue to cook for a few more minutes to allow the rice to dry out again.  Season to taste
4.  To serve, sprinkle the rice with additional tamari and as many red pepper flakes as you would like.  So quick and so delicious!

Enjoy!

-K

Saturday, April 23, 2011

Artichoke Stuffed Crimini Mushrooms

My coworker and friend M was married, now a couple months ago, funnily enough, the same day the hubby came back from DR.  After taking a cab home, we hurried, changed, and took another cab over to the wedding.  Of course the cabbie didn't speak ANY English and got us terribly lost and we missed the part where she walked down the aisle!  So bummed!  Still hoping someone made a video of it and I can see it. 

Anyway, for her big day, she was doing all the work, including cooking a bunch of things.  I'm seriously not sure how she did it and stayed sane.  Not sure I would have been able to!  To help her out, she had several people come up with ideas and make some appetizers and accompaniments.  My app was Artichoke Stuffed Crimini Mushrooms.  I was lucky to be able to test this at work while she was there and got the thumbs up.  It turned out to be so delicious, not difficult at all, though a little time consuming.  In the end, I ended up making about 7 packages of mushrooms.  It seemed like so many when I was at Trader Joe's with one bag full of mushrooms and the other filled with marinated artichoke hearts.  The cashier looked at me pretty strangely, as though I had some form of ocd, because everything I bought, I bought in multiples.  7 packages crimini mushrooms, 4 jars marinated artichoke hearts, 3 packages frozen edamame, 3 packages tempeh, 2 packages tofu, etc.  The point is, TJ's is really out of my way and always makes me hit the rush hour on the train on the way back home which is so less than fun in ny!  So I go as few times as is humanly possible. 

Back to the subject - these were super delicious.  And with about 50 or so people at the wedding, they were gone in about 1/2 hour.  It always makes you feel good when all your food is gone!  This is definitely something to make when you are feeling like impressing someone or when you're having a nice dinner and want to do all apps.  Forgot to take pics as I was making these - the stress of making them beautiful and delicious got to me!  So the pics aren't great because they were already packed in their container to be transported to the wedding, but I think you get the idea.  Make them - they are yummy!

Artichoke Stuffed Mushrooms:


Packaged and Stacked up for the Wedding!


Makes about 30 (they're small - don't worry)

2 10 oz. packages crimini mushrooms, the bigger, the better
1/4 cup olive oil
1 8 oz. jar of marinated artichoke hearts (Trader Joe's makes a tasty one)
1/4 cup gluten free breadcrumbs (or regular if it doesn't have to be gf)
2 cloves garlic, minced
2 tablespoons minced parsley
2 tablespoon homemade vegan Parmesan cheese
Sea salt and pepper to taste

Topping:
1/2 cup gluten free breadcrumbs
1/4 cup homemade vegan Parmesan cheese

1.  Preheat oven to 350 degrees. 
2.  Clean the mushrooms - remove the stems (I like to keep a bag of cleaned mushroom stems in my freezer so when I want to make mushroom stock, I have extra help).  Rinse the mushroom caps and drain carefully.  Place on a couple sheets of paper towel and use another paper towel to blot off the excess water from the top.  This will prevent the mushrooms from becoming rubbery.
3.  Line a sheet tray with aluminum foil.  Place the mushrooms in a large bowl and add the oil.  Working quickly, toss to coat, until the oil has absorbed into the mushrooms.  Sprinkle with black pepper - do not add the salt at this point.  Line them cap side up on the sheet tray. 
4.  Bake mushrooms for about 10 minutes.  Remove, flip over so the rounded part is on the bottom, and sprinkle with sea salt and allow to cool.
5.  Make the filling.  Chop the artichoke hearts and place in a medium bowl.  Add the breadcrumbs, garlic, parsley, vegan parm, salt and pepper.  Toss to coat.  Season to taste. 
6.  Once the salt was added to the mushrooms, the mushrooms will have released water, dump the water from the center into the sink and begin filling the mushrooms. 
7.  Each mushroom will fit about 1-2 teaspoons of filling in the center, depending on the size.  Really try to squish the filling into the center, but be careful not to split the mushroom.  Lay all the mushrooms back on the sheet tray. 
8.  In a small bowl, mix together the breadcrumbs and the vegan parm for the topping.  Sprinkle a small amount on top of each of the mushrooms - it's ok if some of it falls onto the pan. 
9.  Return mushrooms to the oven and bake for an additional 5 minutes, or just until heated through. 
10.  Try to allow them to cool for a minute before eating.  I was too excited and almost burned my tongue!


Look at that Delicious Detail!


Enjoy!

-K

Sunday, April 3, 2011

Pasta Vegetable Casserole with Mushroom Sauce

I love casseroles.  Seriously.  They are the easiest and most delicious things to make.  My mom really never made them when I was a kid, but I definitely foresee myself making them all the time.  In fact, at one point several months ago, the Hubby actually would groan and say "another casserole"?  The great thing about casseroles is that really you can make them into anything- cheesy, tomatoey, light, hearty, the list goes on and on.  Today was one of the times when I had to make lunch, rather than dinner for the hubby, which meant I had to hurry up.  After looking in the fridge to see what I had to work with, I found some leftover cooked pasta, tons of veggies and two pieces of homemade seitan, as well as a package of mushrooms that needed to be used up.  The perfect idea came to me: a casserole with pasta, lots of veggies, seitan and a creamy mushroom sauce. 

A few months ago, I made this dark hearty mushroom stock from an issue of Vegetarian Times and after some tweaking, was amazed at how completely flavorful it was and how amazing it made everything I put it in.  I made about 2 gallons of it, froze it all in quart containers and have been enjoying it for the past several months.  I knew there was one container left in the freezer, so I put it in a small saucepan and thawed it out.  Then I set about making the sauce, sauteing the veggies, tossing it all together and baking it - voila! an amazingly delicious and easy casserole! 

Pasta Vegetable Casserole with Mushroom Sauce


Casserole with Cabbage Tomato Salad


Serves 6-8

1 16 oz. pkg. pasta, cooked according to package directions

2 large pieces seitan, sauteed then chopped, about 2 cups

1 cups frozen peas, cooked
2 tablespoons olive oil
4 cloves garlic, chopped
2 stalks celery, chopped, about 3/4 cup
1/2 large green pepper, chopped, about 3/4 cup
1/2 orange pepper, chopped, about 1/2 cup
1 large red onion, chopped, about 1 1/2 cups
2 carrots, peeled and shredded, about 3/4 cup
1 large jalapeno, minced, about 1/4 cup
1 large handful frozen spinach
Breadcrumbs, as needed

Mushroom Sauce
1/4 cup olive oil
1 8 oz. package baby portabella mushrooms, rinsed, cut in half and sliced
1 medium onion, minced, about 1 1/2 cups
6 tablespoons unbleached flour
3 cups dark mushroom stock
1/4 cup red wine
1 teaspoon sea salt
1/4 teaspoon black pepper

1.  In a large wok, add the oil over medium-high heat.  Add the onions and garlic and saute for 1-2 minutes, or until fragrant.  Add the remaining vegetables, except the frozen spinach and continue to cook, stirring frequently until crisp-tender.  Stir in the frozen spinach.  Turn off the heat and set aside.
2.  In the meantime, prepare the mushroom sauce.  In a medium saucepan, add the olive oil and heat over medium heat.  Add the onions and saute till lightly golden.  Add the mushrooms and cook until reduced in size.  Add the flour and stir to coat. 
3.  Using a whisk, whisk in the red wine and the mushroom stock.  Periodically whisk mixture, until very thick.  Season to taste with sea salt and black pepper.  This will be very thick and salty, but we want this because it needs to season the entire casserole. 
4.  To prepare the casserole, place the pasta, seitan and green peas in a large mixing bowl.  Add the sauteed veggies and the mushroom sauce.  Stir together until everything is well coated.  Season to taste.
5.  Place this mixture in a lightly oiled 9x13" pan, using a spatula to flatten the top.  Top with desired amount of breadcrumbs.  Bake at 350 degrees for 15-20 minutes or until heated all the way through.  The finished product should resemble the picture below.


Giant Casserole Dish Topped with Breadcrumbs


Cabbage Tomato Salad

Serves 4

1 small head cabbage, shredded, about 4 cups
1 roma tomato, small diced
1 1/2 tablespoons extra virgin olive oil
2 tablespoons apple cider vinegar
1/2 teaspoon sea salt
1/4 teaspoon black pepper

1.  Place all ingredients in a medium mixing bowl and toss well to coat.  Season to taste.  For best flavor, allow flavors to marinate before serving.

Enjoy!

-K

Sunday, March 27, 2011

Forbidden Rice and Baked Seitan with Mushroom Sauce

I really do enjoy my job most of the time, especially all the people I work with.  As an added bonus, working for a natural foods store, we are able to get lots of samples.  When merchandisers have new product lines or simply new products, they always bring in tons of samples, trying to encourage us to sell their products/lines.  A lot of the time we cannot accommodate them because we have such a limited space, but that means we still get to keep all the samples.  Not sure about everyone out there, but I definitely appreciate some free food, especially when it's organic, vegan and sometimes raw! 

I receive samples and distribute them among the ladies in bakery at least once a week, and sometimes when I come home, I find myself looking in the pantry and seeing all this sample food, some of it a little strange, and requiring me to really think about what I am going to make out of it, which a lot of the time discourages me from cooking it.  I've had a package of forbidden rice (a black short grain rice from China) for about three months now and was struggling thinking of what to make with it.  I was browsing online and discovered that people make fried rice out of it using bacon, soy sauce, onions, etc., and frankly it did not appeal to me in the least.  I just wanted to make a basic rice dish.  I remember eating it once or twice before at the Natural Gourmet Institute at a Friday Night Dinner and really enjoyed it.

So I set off to make a nice dish to go along with a baked seitan I made.  I will post a recipe for the baked seitan on a later date, because although it came out okay, Hubby and I both agreed that it needed some work - definitely some more flavor.  Once I make it again and I like how it turns out, I'll give you guys the recipe.  However, for this meal, we decided to make a mushroom sauce that I will share, because the seitan was pretty plain on its own.  We both really enjoyed the meal, especially with the Forbidden Rice, which had a texture and taste similar to brown rice- a nice chewy, somewhat nutty flavor. 


Forbidden Rice, Baked Seitan with a Mushroom Sauce,
Steamed Carrots, Side Salad


Forbidden Rice

Serves 4-6

2 cups Forbidden Rice, rinsed well
1 medium onion, small diced, about 1 cup
2 cloves garlic, minced
1 tablespoon olive oil
4 cups filtered water
1 1/2 tablespoons Better Than Bouillion, No-Chicken Base
Pinch sea salt
1/4 teaspoon black pepper

1.  Place a medium pot over medium-high heat and add the olive oil, allowing it to heat.  Once it is hot, add the onion and garlic and cook for 2-3 minutes, or until fragrant. 
2.  Add the rinsed rice and cook, stirring regularly, until it is dried and the grains have separated.  Add the boullion, sea salt and black pepper and stir to combine.
3.  Add the 4 cups of water and turn heat down.  Simmer, covered for about 20 minutes or until cooked all the way through.

Mushroom Sauce

 Serves 2

3 tablespoons olive oil, separated
2 tablespoons earth balance, separated
4 cloves garlic, minced
7-8 large baby bella mushrooms, stems removed, rinsed and thinly sliced
2 tablespoons marsala wine
sea salt and black pepper to taste

1.  Place 2 tablespoons of the olive oil and 1 tablespoon of the earth balance in a medium saute pan over high heat.  Once earth balance has melted, add garlic and cook for about 1 minute.
2.  Add the mushrooms and continue cooking, stirring around in the pot continuously until they first wilt, then become crispy.  By now most of the oil will have absorbed.  Add the remaining tablespoon of olive oil to continue cooking.
3.  Add the marsala wine, being careful when pouring it into the pan.  Deglaze the pan - use your wooden spoon/spatula to scrape up any of the bits that have adhered to the bottom of the pan.  Add the salt and pepper to taste, turning the heat down.
4.  Once the alcohol has cooked out and the liquid has reduced halfway, add the remaining tablespoon of earth balance, allowing it to melt.  Season to taste.  Serve on top of seitan, tofu or tempeh.

The Hubby and I, like usual, were a little short on veggies, so we served steamed carrot slices with a salad and a homemade lime vinaigrette (our favorite!).  I'm sure this would be absolutely delicious with some sauteed kale or collards.  This meal turned out to be really delicious.

Enjoy!

-K

Monday, January 3, 2011

Roasted Portabella Mushroom with Sherry Sauce

Lately I have felt inspired to cook pretty much every night this week, which, truth be told, doesn't happen too often.  Teaching classes, working full time and hanging out with the Hubby sometimes makes it difficult to get up the energy to go back into the kitchen and make a nice full meal.  (Thankfully though we do not yet have children, or on top of everything else, we would have to cook every night!)  Well, happily for the Hubby's belly, I have been in the mood lately to make nice dinners, and tonight was no exception. 

I have been going through my tons of cookbooks lately to get inspiration for cooking fun things for dinner.  If I do not periodically go through these books, I feel like I'm making and serving the same thing over and over again and get tired of it very easily.  I'm sure the Hubby feels the same although he would never say anything of the sort.  So, I was going through a cookbook, and saw a roasted portabella mushroom dish that called for a sherry sauce, and used it as a base to create the delicious dinner we had.  It included white rice (the Hubby is Dominican and is against any kind of rice other than white), some leftover baked seitan, sesame kale and the roasted portabella mushrooms with the sherry sauce.  Two of the recipes are outlined below:

Roasted Portabellas with Sherry Sauce:


Roasted Portabella Mushroom, Sesame Kale, White Rice & Seitan


2 portabella mushrooms, destemmed and rinsed
2 tablespoons olive oil
sea salt and black pepper to taste
garlic powder to taste

Sherry Sauce:
1 tablespoon olive oil
1/2 small onion, minced
6 garlic cloves, minced
1 teaspoon dried rubbed sage
1/4 cup sherry
1 1/2 cups roasted mushroom stock
1 tablespoon unbleached flour
1/4 teaspoon dried rosemary, crushed with fingers
1/4 teaspoon dried thyme
sea salt and black pepper to taste

Sesame Kale:
1 bunch kale, washed, deveined and chopped into bite sized pieces
1 1/2 tablespoons toasted sesame oil
2 pinches of sea salt - do not add more

1.  Start roasting the mushrooms.  Line a sheet pan with aluminum foil and place mushrooms on top.  Drizzle both sides with the olive oil and sprinkle the top and bottom of each mushroom with sea salt, black pepper and garlic powder at 400 degrees.  This will take about 15 minutes.
2.  Make the sherry sauce.  Heat the olive oil in a saute pan over medium heat.  Add the onions and garlic, cooking for about 2-3 minutes, then add the rubbed sage, dried rosemary and thyme, sea salt and black pepper, continuing to cook for an addition 2-3 minutes.  Deglaze with the sherry- do not pour directly from the bottle.  Allow the sherry to reduce by half before continuing onto the next step.
3.  Once half of the sherry has evaporated, add the flour and whisk until it is completely smooth and thick.  Add the stock and whisk continuously until everything is well mixed.  Bring to a boil and reduce heat.  Continue simmering until sauce is thick and has reduced slightly.  Season to taste with sea salt and black pepper.
4.  Make the sesame kale.
5.  Place the kale on a sheet tray and drizzle with the oil, using your fingers to massage it in.  Sprinkle the sea salt evenly over the kale and stick in the oven with the roasted mushrooms.  This needs to cook for 10-12 minutes and will become nicely crisp on top. 
6.  Once the mushrooms are done, drizzle the sauce over top (or you can do what I did and eat the mushrooms as they are because they're so tasty that way and use the sauce for something else).  Serve the kale on the side.  Yum!

Enjoy!

-K

Friday, December 10, 2010

Seitan Portabella Pot Roast

I always make my own seitan, and I made a ton of it a few weeks ago from this cookbook  called The New Now and Zen Epicure, written by Miyoko Nishimoto Schinner.  I am always trying new seitan recipes and this was a really fun one.  After the Hubby and I ate it for like three days straight, I froze the rest of the seitan and thawed it out last night.  There is still so much of it left, and now I have to come up with creative ways to use it because it cannot be refrozen.  The Hubby loves seitan the most over other meat replacers because it tastes and feels so "meaty".  I have a ton of ideas for it and came up with this delicious one, which came together really quickly since I already had so many of the ingredients prepared. 

Seitan Portabella Pot Roast:


Gigantic Dish of Pot Roast!

1 cup baby carrots
1 medium onion, chopped (1 1/2 cups)
1 jalapeno, chopped
5 small potatoes, unpeeled and chopped (2 1/2 cups)
2 medium portabellas, chopped
5 cloves garlic, minced
1 lb. seitan, preferably homemade, chopped into 1" pieces
4 tablespoons olive oil, separated
1/4 cup marsala wine
2 cups roasted mushroom stock
1 teaspoon dried rosemary, crushed with fingers
1 teaspoon dried thyme
1 1/2 teaspoons sea salt
1/2 teaspoon black pepper

1.  Place 2 tablespoons olive oil in a nonstick pan and heat over medium-high heat.  Carefully place seitan into hot oil and cook until browned on all sides, about 2-3 minutes each.  Drai on paper towels.  Set aside.
2.  In the same nonstick pan with the same oil, lower the heat to medium and place the chopped garlic cloves inside.  Allow to cook for about 30 seconds before adding the chopped portabellas and cook for about 2 minutes, or until fragrant.  Add a sprinkle of sea salt and black pepper.  Place garlic and mushrooms in a medium bowl with all the remaining ingredients.  Toss all ingredients to coat.  Season the liquid to taste. 
3.  Cover tightly with foil and bake at 450 degrees for 45 minutes.  Remove foil and carefully taste the broth for seasoning, adding more sea salt and black pepper as needed.  Spoon the broth over top of the vegetables and seitan and return to oven, baking for an additional 10-15 minutes.
4.  Remove from oven, allow to cool for about 10 minutes and serve.
5.  Goes great with a fresh crusty bread and a nice side salad