Saturday, February 25, 2012

5 Pounds of Daiya!

I have been lucky enough lately to work in a place where I can buy supplies directly from the chef.  I generally get a 25% discount on all purchases I make in the store, but if I buy something from the chef, I do not get a discount.  That's more than fine, because she charges me her purchase price.  So, for example, she purchases the Daiya cheese for $5.95 per pound, so that's what she charges me.  The same thing for tofutti vegan cream cheese, nutritional yeast, vital wheat gluten and silken tofu - all things I buy from her.  She has been a life saver, because she has also allowed me to purchase large quantities of things I need for testing my Gluten Free recipes for both my public and private classes that would be way too expensive to purchase at any store at retail price.  I have purchased from her a gallon of pure vanilla extract, 5 gallons of organic agave, 2 gallons of maple syrup, a 5 pound container of baking powder - the list goes on and on, although the agave was definitely the most memorable to take home - imagine carrying a giant bucket of agave on the train - everyone!!! was staring!  And it was so heavy it was ridiculous!  But it's been over a year and I still have a good gallon or so left! 

Anyway, knowing I was leaving this job soon, I knew I had to stock up on nutritional yeast, vital wheat gluten and Daiya.  I knew that all of those things would last a while, especially if I froze the Daiya.  So, that's what I did, and now I will have it for quite some time to come!  So, expect some nice cheesy recipes coming your way!


5 lb. Block of Daiya Cheese!  $5.95/lb!  What a Deal!


5 lbs. of Daiya: Sliced, Chunked & Shredded!


Look Forward to Many Cheesy Dishes to Come!

Enjoy!

-Koko

Friday, February 17, 2012

Baked Tofu with Wine, Lemon & Caper Sauce with Dirty RIce

This dinner was all about cooking quickly and getting to eat quickly.  Hubby and I were both very hungry, and I was able to get this dish from start to finish, on the table in an hour.  Pretty good.  Sometimes when I'm feeling more like testing and trying new things, I could spend several hours in the kitchen preparing one meal.  Organization is what really allowed me to get this bad boy into our bellies really quickly.  Since I didn't have any seitan prepared and know that it can take a while to make something with tempeh (I like to bake it in a flavorful sauce for at least 45 minutes covered, uncover and bake another 15-20 minutes - way too long for our hungry bellies!), I decided on tofu, because you can bake that in the oven, forget about it, make the sauce and everything else at the same time, then the tofu is done and just needs to simmer for a little while in the sauce.  Done.  Easy. 

The idea for this sauce came from the Vegan Yum Yum cookbook which I am slowly making my way thorough, and as I am sure I have said before, the recipes are great bases, but generally need some reworking to suit the Hubby and my tastes.  But hey, it makes it so that dinner is never boring and there is always something different on the table.  This dinner turned out very well, so much so that between the Hubby and I (and I only ate 2 slices of tofu and less than a cup of the rice), it was literally all gone!   ALL of it!  Hubby was disappointed, because since he ate it all, there was none left for him to take to work the next day, so he had to settle on something uninteresting to take with him.  Serves him right for almost eating a whole pound of tofu by himself!   

Baked Tofu with Wine, Lemon & Caper Sauce:


Steamed Broccoli, Tofu over Rice, Simple Salad

Serves 2-3

1 lb. tofu, drained, sliced into 6-10 slabs
olive oil, to drizzle
sea salt and black pepper

Sauce:
2 tablespoons extra virgin olive oil
1/4 cup shallots, minced
2 cloves garlic, minced
1/4 cup white wine
1 lemon, ends removed and sliced into 4, seeds removed
1 cup filtered water mixed with 1 teaspoon Better than boullion
1 tablespoon capers, chopped
sea salt and black pepper to taste
Parsley, minced, to serve

Dirty Rice:
2 cups cooked white rice
1 tablespoons extra virgin olive oil
1/4 cup small diced onion
1/4 cup small diced celery
1/4 cup small diced green pepper
1 green onion, minced
2-3 teaspoons Cajun seasoning, preferably homemade

1.  Start with the tofu - it is going to take the longest because it needs to bake.  Preheat the oven to 400 degrees.  Line a baking sheet with parchment paper or aluminum foil.  Drizzle a small amount of olive oil over the tray, lay the tofu on the sheet, drizzle with a small amount of olive oil and sprinkle each piece of tofu with sea salt and black pepper.  Place in the oven and bake for about 15-20 minutes.  Turn over, sprinkle with a small amount of olive oil, sea salt and black pepper.  Return to oven and bake for an additional 15-20 minutes, or until the edges are golden and the tofu is firm.  Remove from baking tray and place on a plate, so the tofu doesn't continue to cook.
2.  Prepare the sauce.  In a large saute pan over medium-heat, add the olive oil and allow it to become hot.  Add the shallots and garlic and cook until softened and fragrant.  Add the wine and allow it to evaporate about halfway.  Add the water and boullion and stir mixture.  Add the lemon slices, being careful not to move them too much or they will break.  Add the capers, sea salt and black pepper and taste.  Wait to adjust seasonings unless it clearly needs more salt.  Once the sauce mixture comes to a boil, lower the heat to a simmer and stir periodically. 
3.  Place the baked tofu in the simmering sauce, turning the heat down even more.

Tofu Simmering in the Sauce.  Beautiful isn't it?

4.  Now you can get started on the rice, but keep an eye on the tofu in the sauce.  After the tofu has been simmering for about ten minutes, turn it over so that the other slice can have an equal amount of time absorbing the deliciousness! 
5.  Back to the rice:  place the olive oil in a wok over medium-high heat and allow the pan to become hot.  Once the pan and oil are hot, add the onion, celery and green pepper.  Saute for several minutes, stirring periodically.  Add the cooked rice and stir pretty frequently - you don't want it to stick to the bottom of the wok.  Once the rice has cooked and separated, add the white part of the scallion and stir into the rice mixture. 
6.  You can turn the heat down now to medium.  Add the Cajun seasoning, being sure it coats each individual piece of rice.  Taste the rice and add more of the Cajun seasoning if you would like.  Add the green part of the scallion just before serving. 
7.  To serve, place a couple pieces of the baked tofu on your plate and generously add the sauce.  Place a nice helping of the rice on the plate as well.  You can do what my hubby did - lean the tofu pieces against his pile of rice and drizzle the entire thing with the sauce.  So delicious!  It's nice to have tofu with a fresh, light sauce for a change.  I will definitely make this again!


A Close-Up of the Tofu with the Wine, Lemon & Caper Sauce

Enjoy!

-Koko

Tuesday, February 14, 2012

Vegan Russian Salad

I love this salad.  I really do.  From the first time I tried it when I worked at Lifethyme Natural Market in the Village when one of the cooks made it and put it on the salad bar, I  was intrigued.  He is from Peru and thus called it Peruvian Salad of course, but it is really a Russian Salad.  Once I told the Hubby about it, he was excited because it is actually one of this favorite salads ever.  His mom used to make it for him when he was a kid growing up in the Dominican Republic (I'd really like to know how that came about- Russian Salad in DR!?), and once he knew I knew what it was, he started asking for it.  I'm not sure why, but once I figured out how to make it, I just never really wanted to make it when he asked for it.  It's not that it's a difficult thing to make at all, but I always feel kind of like, ugh, I guess I can make it.  I think it's the beets.  I love beets, I'm sure you know that by now, but they always take forever! to cook, and when I make them, I like to make a healthy amount so I can have them for several days. 

This time, thankfully, I had cooked the beets the night before, so when he asked for the Russian salad, his request wasn't met with my usual "ugh, I guess", but more, "ok, sounds good".  He was very excited and was actually hanging out with me in the kitchen while I made it.  Usually I make it the same every time, but this time he wanted me to add some really finely chopped carrots for a nice change of texture.  He loves onions probably as much as I do, but after making this salad with onions in it a couple times, I realized that the onions become very overpowering and kind of ruin it when you have leftovers and go to eat some the next day.  If you want to add the onions though, you could separate a little bit of the salad and add them to that section.  Either way, this salad is so tasty, especially when chilled.

Russian Salad:


Delicious Creamy, Crunchy Salad.  Tasty!

Yields 6 Servings

4 medium potatoes, peeled and medium diced, about 3 cups
1 cup frozen green peas
2 small carrots, peeled and small diced, about 1 cup
1 cup cooked beets, medium diced
1/2 cup vegan mayonnaise
1/2 teaspoon sea salt
1/2 teaspoon black pepper
1/2 cup blanched & small diced extra firm tofu (mimicing diced egg whites)

1.  Fill a medium pot 2/3 of the way with warm water and place the peeled, diced potatoes inside.  Turn the heat to medium and cook just until potatoes are barely fork tender.  They will continue to cook even after you drain them, so it is best to remove them from the water even a little crisp.  Drain and set aside in a large bowl to cool.
2.  Using the same pot filled 1/4 of the way with hot water, place the pot over high heat and bring to a boil.  Once the water comes to a boil, add the frozen peas and cook until the peas are just tender.  Drain and add to the bowl with the potatoes. 
3.  Allow both the potatoes and peas to cool  until they are no longer warm at all.  Once cool, add the remaining ingredients: the finely chopped carrots, cooked beets, mayonnaise, sea salt, black pepper and blanched, diced tofu (which we are using to mimic the texture of boiled egg whites, which are usually added to this salad).  Stir thoroughly until all ingredients are well combined and the salad becomes a nice pale pink color.  Season to taste, adding more sea salt or black pepper as needed.  Refrigerate until ready to use - this salad is best when it is served very cold. 

Enjoy!

-Koko

Tuesday, February 7, 2012

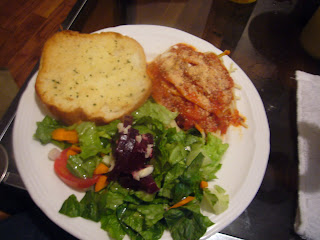
Pasta with Marinara,Garlic Bread, Green Salad, Marinated Beet Salad

This meal came together very quickly, which makes me quite happy!  Lately I have been craving white sauce to go over my pasta, but Hubby is very traditional in that sense - he loves his "red sauce" aka marinara sauce.  It's a good thing too, because whenever I made marinara, I always make a huge batch and freeze the leftovers, putting them in labeled deli containers in my freezer.  Now that I barely have two seconds to squeeze together, this is the best thing I could have done!  It works very well, because all I have to do is place it in a bowl of hot water for a couple minutes to loosen the contents from the container, then place the contents into a medium pot over low heat, put the lid on and stir it occasionally while the pasta and the rest of the ingredients cook.  What could be easier?!  In this case, I had luckily also had some already cooked beets in the fridge, so this meal came together even faster- basically in the time it took for the water to boil and the pasta to cook.  Because in the meantime, I washed the romaine, put the salad together and toasted the garlic bread.  Gotta love simple and quick!

Pasta with Marinara Sauce, Garlic Bread, Green Salad, Marinated Beet Salad:


Serves 2-3


Pasta with Marinara Sauce:
8 oz. spaghetti, broken in half
Vegan Parmesean Cheese

Garlic Bread
1/2 baguette, sliced thickly
6 tablespoons earth balance
1 teaspoon garlic powder
1/4 teaspoon sea salt, or to taste
2 pinched black pepper

Green Salad:
Romaine Lettuce
Sliced Roma Tomatoes
Shredded Carrots

1.  Prepare the marinara sauce and the beet salad as indicated in the links.
2.  Preheat the oven to 450 degrees. 
3.  Cook the pasta in a large pot of boiling, salted, oiled water until al dente.  Drain.
4.  Prepare the garlic bread: place the earth balance, garlic powder, sea salt and black pepper in a small pot and melt over medium heat, stirring until completely smooth.  Using a pastry brush, generously brush the garlic butter over the slices of baguette.  Place on a baking tray and place in the preheated oven.  Bake for 10-15 minutes, or until the bread is golden and crispy. 
5.  Prepare the green salad:  toss together the chopped romaine lettuce, roma tomato slices and shredded carrots.
To serve, place a serving of pasta on the plate.  Top with marinara sauce and vegan parmesean.  Place a serving of the beet salad and green salad on the plate as well.  Place the toasted garlic bread on the plate.  Serve!

Enjoy!

-Koko

Saturday, February 4, 2012

Any Suggestions for Using Bell Peppers?

Hello everyone.  As I'm sure you are all aware now, I have started a new job.  The crazy and long hours are keeping me tremendously busy, so much so that I have to be back to work in about six hours from now, and I still have yet to go to sleep!  However, there is an issue I have come across at work and would love some input.  I am working within a natural foods co-op where there is a produce department that goes through tons of produce everyday and will throw away hundreds of pounds of produce per day unless my department can do something with it.  Now, nothing has been done before I came in, and most of the produce went into the dumpster, not even to the homeless shelter.  So, after closing last night and throwing away 8 baguettes, 6 loaves of organic crusty bread, bagels, cookies, croissants, and so many more things it will make you ill, I have decided I absolutely must do something about it.

So I am doing the obvious thing of making croutons and bread crumbs out of the bread and making marinara sauce out of the tomatoes or using the barely bruised ones for sandwiches and salads.  The peppers, however is another thing entirely.  Right now there is about 60+ pounds of peppers in the walk-in: red, green, yellow and orange bell peppers.  I made a roasted red pepper and kalamata olive salad this afternoon, which used up 24 of the peppers, but there are still so many left.  Tomorrow I am making baked eggplant Parmesan to use up many slightly imperfect eggplants, which will be served with the marinara I made from the fresh tomatoes. 

Short of making stuffed peppers and Greek salad, I'm not sure what else to make with the tons and tons of peppers that are in the cooler.  Any suggestions would be greatly appreciated, because seeing those dumpsters filled with all of those fruits and vegetables is sickening and anything I can do to use them, and make a buck for my department in the process is great. 

Ideas are greatly appreciated. 

Thanks and take care.  Until I'm a little less hectically busy,

-Koko

Friday, February 3, 2012

Vegetable Chow Mein & My New Job

So I recently started a new job.  Very recently in fact.  On Wednesday to be precise.  I haven't wanted to say anything because everything was so overwhelming and stressful.  I'm still not going to say very much because it is still very stressful and overwhelming, but I'm going to start my 3rd day today.  Let me start first by saying that I lost my job at the beginning of the year as a private chef.  I had worked for the family for 6 months as their private chef and  had a good time doing it.  I loved the people in the family- they are all very nice.  It was just very far away - 1 1/2 hours each direction from Brooklyn to Queens.  I had to take the train from my house, transfer to another train at Times Square, take that train to the end of the line in Queens and then take a bus to get to their house.  I was only working there 4 hours a day, four days a week, which was great, but the commuting was atrocious, especially if the train was operating on a weekend schedule.  I had to wake up at 5 am to get there by about 7:00 am and by the time I got home, it was like putting in a full 8 hour day, but getting paid for 4.  It was nice to have a lot of free time when I did get home, but also very tiring.  We decided to temporarily stop the cheffing because the family was having too many outside commitments that would keep them out of the house for too long, and they consequently wouldn't be home enough to eat the food I prepared.  It was all very sudden and I panicked about not having a constant source of income and living in nyc.  It's damned expensive here!  So I started looking immediately. 

On the 5th I found an ad on Craigslist (where I've found most of my jobs since moving to ny), responded, and heard back within a couple days.  It took 1 1/2 weeks to actually fit our schedules together (I was of course starting on my dreaded jury duty at the time!), I heard back from them several days later and was offered the position!  Yay!  It's at a co-op in Brooklyn, is a 15 minute walk away (no $104 metro card per month!) and pays competitively.  I am of course managing the food departments.  There has never really been a supervisor there before, so there is a TON of stuff that has to be fixed and discussed as well as policies and procedures created and implemented.  It is also a salary position that requires long hours (Hubbs doesn't like that!).  So believe me, I have my work cut out for me. 

Also, during the next couple weeks, I have to familiarize myself with the department, which means I have to work all of the shifts, from opening at 6 am, to closing at midnight.  Once this is done, my schedule will stabilize and I can get back to some semblance of normality.  Tonight is closing.  And let me tell you, I have not worked so late in over 6 years, so we'll see how the walk back home through Brooklyn is at midnight (grimace).  It's a lot lot lot of work, but I'm sure it will all work out.

Anyway, my reason for saying all of this is that I likely will not be putting up complicated or involved recipes lately because this new job is exhausting.  So, I'll be putting up some simple recipes or other recipes, I've partially typed up and neglected lately.  So, this is a simple recipe I had the Hubby start (meaning bringing the water for the pasta to a boil) when I worked the mid shift yesterday (finishing at 8 pm).  So it came together very quickly, which was much appreciated by both of us!

Vegetable Chow Mein:

 
Tasty and Simple!


Serves 4

1/2 bunch chow mein noodles, cooked in salted water until al dente

1 1/2 tablespoons olive oil
1/2 bunch broccoli, separated into florets
1 celery stalk, julienned
1 carrot, julienned
1 medium onion, julienned
3 tablespoons tamari
1 1/2 tablespoons mirin
1 teaspoon toasted sesame oil
1/8 teaspoon black pepper
2 pinches cayenne pepper
sesame seeds, for garnish

1.  In a large wok over high heat, add the olive oil.  Once the oil is hot, add the broccoli and saute, stirring frequently for 2 minutes.  Add the celery, carrot and onion and saute for another 2 minutes, stirring frequently. 
2.  Lower the heat to medium.  Add the cooked chow mein noodles and toss to coat with the veggies.  Add the tamari, mirin, toasted sesame oil, black pepper and cayenne pepper.  Toss very well to coat.  Season to taste with more tamari if desired.
3.  To serve, place a portion of the chow mein on a plate, top with the sesame seeds and more tamari if desired.

Enjoy!

-Koko