Showing posts with label Garlic. Show all posts

Sunday, September 7, 2014

Polenta with Mushroom Sauce and Sauteed Spinach

Hello everyone.  Today is the first chance I've had since beginning my job earlier this year running a food truck to sit down and open my blog back up.  I admittedly haven't been doing as much cooking or baking outside of my two jobs in the past several months, simply because I haven't had a lot of time.  Hubbs is also working two jobs, so it's been ok - we've both been crazy busy.  I think it's safe to say that the summer season has come to an end in Traverse City - I am seeing a lot less tourists, and business has slowed down considerably.  But that's ok.  Everyone has been running nonstop since the season began, and it is a nice break.  I have a lot of things coming up to work on relating to the vegan cafe hubbs and I are going to open, so we will definitely be staying busy!  Hopefully I will have time here and there to do a few blog posts and put a couple recipes up.  Until then, enjoy this tasty recipe I made a few weeks ago with the over-abundance of organic spinach I had in our garden.  


Grilled Polenta with a Mushroom Sauce and Sauteed Spinach with Pinenuts


Seriously so delicious!


Polenta:
4 cups filtered water
1 teaspoon sea salt
1/4 teaspoon black pepper
1/4 teaspoon dried thyme
1 cup cornmeal
3 tablespoons earth balance

Place all ingredients in a medium sized pot and whisk together well.  Cook over medium heat till thickened, stirring frequently.  Pour into an oiled pan and refrigerate until set up (several hours).

Once the polenta has set up, slice it into pieces and either pan fry or grill (I used our panini grill).

Mushroom Sauce:
1 tablespoon olive oil
8 oz. crimini mushrooms, sliced
1 large onion, sliced
 4 tablespoons white wine
3 tablespoons tamari
1/4 teaspoon sea salt
1/4 teaspoon black pepper
1/4 teaspoon dried thyme
2 cups filtered water mixed with 3 tablespoons arrowroot

Place the olive oil in a large saute pan over medium-high heat.  Add the onion and mushrooms and saute till softened.  Deglaze the pan with the white wine - be sure to scrape up all the tasty little bits that have stuck to the pan.  Add the remaining ingredients and cook till well seasoned and thickened.

Sauteed Spinach:
1/2 cup pinenuts, toasted
1 tablespoon olive oil
2 cloves garlic, minced
8-10 cups baby spinach
1/2 teaspoon sea salt
1/8 teaspoon black pepper
1/8 teaspoon red pepper flakes
2 tablespoons white wine

In a separate large saute pan, add the olive oil over medium-high heat.  Add the garlic and cook till fragrant, but not browned.  Add the baby spinach and white wine, allowing it to wilt.  Once the spinach begins to wilt, add the sea salt, black pepper and red pepper flakes to taste.  Right before serving add the pinenuts.


Enjoy!

Koko

Wednesday, April 16, 2014

Vegan Spicy Cheesy Potato Patties

On Sunday I made lasagna for lunch and also a full dinner, including mashed potatoes.  Hubbs always takes the leftovers from dinner with him to work for his lunch the next day.  But since he had two choices, he of course chose lasagna (who wouldn't?).  I convinced myself that I would eat the potatoes over the next couple days, but there they have continued to sit.  We have a rule that we don't eat any cooked food 7 days after being prepared and even though it has been only 4, I knew if I didn't do something with those potatoes soon, they would get thrown out.  Hubbs and I both hate wasting food, so I decided to use them to make something tasty, if a little unusual, for breakfast this morning.  How about potato patties?  I made some when we were in Brooklyn, but with sweet potatoes.  They were amazing!  Of course "regular" potatoes would be just as delicious, so that's what I did.  And they were crazy delicious!  Super simple too since the main component was already prepared.  This came together in like 10 minutes, and was on the table within half an hour - good for the hubby since he had to be to work early.  I think this would be a nice accompaniment to a dinner also.  Super quick and tasty!


Crispy on the outside, creamy on the inside.  Yum!


Spicy Cheesy Potato Patties:
 
2 cups of leftover mashed potatoes
1/4 cup minced red onion
1 jalapeno, minced
1 roma tomato, seeded and minced
handful cilantro leaves, chopped
1 tablespoon ground golden flax seed
2 tablespoons superfine ground rice flour
sea salt and black pepper
unsweetened almond milk, as needed
1/2 cup shredded daiya cheese
 
 
Canola or refined coconut oil to fry
 
To Serve:
Vegan Sour Cream
Sriracha
 
 
1.  Place the potatoes and the remaining ingredients into a large mixing bowl: red onion, jalapeno, tomato, chopped cilantro, flax, brown rice flour, sea salt and black pepper.  Mix well until all the ingredients are combined.  Add enough almond milk so that the mixture is easily moldable, but not too thin.  Season to taste and add the shredded daiya.
2.  Place a layer of refined coconut oil or canola oil in the bottom of a saute pan over medium heat.  Allow the oil to become hot.
3.  In the meantime, portion the the potato mixture into small patties, setting on a clean plate until ready to begin frying.
4.  Once the oil is hot, place 3-4 of the patties carefully into the pan.  Cook for several minutes, or until crispy and browned.  Carefully flip and cook the other side for several more minutes.
5.  Remove the cooked patties from the pan and place on a paper towel lined plate. 
6.  To serve, place a spoonful of vegan sour cream on top and drizzle with sriracha. 
7.  Continue with remaining patties. 
 
 
Enjoy!
 
Koko

Monday, April 14, 2014

Vegan Enchilada Casserole, Roasted Vegetables, Salad

I follow several vegan (or mostly vegan) food blogs on a regular basis, including OhSheGlows, NeverHomeMaker and FatFreeVegan, among others.  I have made many recipes or used the recipes as a basis for dishes I make.  This idea for an enchilada casserole, or a Mexican Lasagna came from FatFreeVegan.  I made the casserole with a few changes that I think made the dish delicious.  This is definitely a fun and interesting change of pace as far as lasagnas go.  Hubbs keeps telling me of a Dominican Lasagna that he wants me to make, utilizing ripe plantains, a layer of "beef" and cheese with sauteed onions and garlic.  Sounds great to me.  The only issue with making that is waiting patiently for the plantains to ripen fully without eating them first.  ;)


Such a fun and tasty dinner!


Enchilada Casserole:
12 organic corn tortillas
2 1/2 cups homemade or store bought Enchilada Sauce
3 cups homemade or store bought refried beans
2 cups cooked black beans
Vegan Daiya Cheese
Sliced Black Olives
 
Veggie Layer:
1 tablespoon olive oil
1 large onion, julienned
1 green bell pepper, julienned
1 jalapeno, minced
2 cloves garlic, minced
2 roma tomatoes, diced
sea salt and black pepper to taste
1 tablespoon chili powder
2 teaspoons cumin
1/4 teaspoon cayenne (optional)
 
 
1.  Preheat oven to 375 degrees.  Oil a 9x13" baking pan and set aside until ready to use.
2.  In a saute pan over medium-high heat add the olive oil and allow it to become hot.  Add the onion, green pepper and jalapeno.  Cook, stirring frequently for about 5 minutes.  Add the garlic and tomatoes.  Cook for a couple minutes more, until fragrant.  Add the seasonings: sea salt and black pepper, chili powder, cumin and cayenne pepper.  Stir to coat.  Season to taste.
3.  Place a layer of the corn tortillas on the bottom of the prepared pan.  Spread a layer of enchilada sauce, followed by refried beans, sauteed veggies, black beans and vegan daiya cheese.  Continue with the same layers until all of the ingredients have been used.  Top with the sliced olives.
4.  Place the pan in the oven and bake for about 35-45 minutes, or until warmed all the way through.
5.  Serve with roasted veggies (I used broccoli and cauliflower) and a simple salad. 
 
 
Enjoy!
 
Koko


Sunday, April 6, 2014

Breaded Seitan, Roasted Garlic Mashed Potatoes, Sauteed Onions and Mushrooms, Green Beans

I try to cook everyday.  For at least 1-2 meals.  Sometimes I feel more excited about cooking and sometimes I feel like throwing something together.  For this meal I felt like throwing something together, but had several ingredients to use up before another grocery shopping trip with the hubby.  The meal ended up taking a while to make, but was so worth it.  So tasty and comforting!


Such a pretty and tasty meal!


Roasted Garlic Mashed Potatoes:
2 1/2 lb. russet potatoes, peeled and large cubed
 
4 tablespoons earth balance
sea salt and black pepper to taste
unsweetened almond milk or soymilk
 
1 head garlic, top cut off
olive oil
 sea salt and black pepper
 
Sauteed Onions and Mushrooms:
1 large red onion, sliced thinly
4 oz. crimini mushrooms, sliced
1 1/2 teaspoons olive oil
sea salt and black pepper
1/4 cup filtered water
 
1.  Preheat the oven to 375 degrees.  Place the head of garlic in a small piece of aluminum foil.  Drizzle with olive oil and sprinkle with sea salt and black pepper.  Close the foil tightly.  Roast for about 30 minutes, Place potatoes in a pot and cover with cold water.  Cook for about 30 minutes, or until the garlic has softened and darkened in color.  Set aside until cool enough to handle.
2.  Place the potatoes in a pot covered with cold water.  Cook until just tender. 
3.  Prepare the sauteed onion and mushrooms: place the olive oil in a large saute pan over medium heat.  Add the onion and mushrooms and cook for several minutes.  Add the sea salt and black pepper and cook until the mushrooms begin to release their juices.  Lower the heat and add the filtered water.  Cook until most of the water has evaporated and the mixture is very flavorful.
4.  Finish the potatoes: add the earth balance, sea salt, black pepper and prepared roasted garlic.  Mash very well.  Add the almond milk or soymilk until the desired consistency is achieved. 
5.  Serve with a veggie protein and a side. 


So delicious!


Enjoy!
 
 
Koko

Thursday, March 27, 2014

Homemade Vegetable Stock

I have been making homemade vegetable stock for years.  Years and years actually.  I've gone through different systems of making the stock with varying degrees of success, but I've perfected the stock over my years of living in New York in all kinds of tiny kitchens and spaces.  The best method that I have come up with by far is freezing all of my vegetable scraps in a gallon Ziploc bag and placing it in the upright freezer on top of our refrigerator in our tiny kitchen.  Whenever the bag would get completely full, I would toss it all in a large pot and make stock.  Then I would use whatever stock I needed that day and freeze the rest of it in pint and quart deli containers.  Several food blogs that I follow have suggested freezing in glass jars, but I have never had success, even when waiting for the food/liquids to cool completely, then sitting in the refrigerator for a couple hours and cooling it even more before putting it in the freezer.  I have had too many jars break on me to want to try it again.  So I have been storing it in deli containers and it has been working very well.  It's also super convenient. 


Veg Stock ready to go in the fridge and freezer
 
 
There is nothing better than making homemade vegetable stock.  It is super easy, costs almost nothing and gives tons of flavor and extra nutrients to your soups, sauces, stews, etc.  I also love that you have complete control of what goes in, how you prepare it, and therefore the end result.  There are no unnecessary added ingredients.  And if you are organized about it, you can make different kinds of stock for different purposes.  Several kinds I have made before include:


1.  Roasted Onion Stock for French Onion SoupKeep the onion ends, papers and outer layer of skins separate.  If I remember, I throw the ends of garlic in there as well - frozen of course.  Once I have a good amount, I roast the contents of the bag with some peppercorns until golden and dark.  Then I will simmer that mixture until fragrant and use it to make my delicious, super tasty soup.  Yum!
 
2.  Mushroom Stock:  I save all of the stems of the mushrooms I cook with and place them separately in a Ziploc bag in the freezer.  Once it's full, I'll simmer the stems along with a couple dried shiitake mushrooms, black peppercorns, dried thyme (or be even thriftier by freezing the stems from fresh thyme in the same bag with the mushroom stems).  Use the stock to make a killer Green Bean Casserole for Thanksgiving, a crazy flavorful mushroom soup or a delicious sauce to go with tempeh, tofu or seitan.
 
3.  Roasted Vegetable Stock:  Instead of placing the frozen veggies directly into the pot and covering with water, roast for 30 minutes or so at 400 degrees, then simmer.  Add a handful of lentils, black peppercorns and bay leaves for extra deliciousness.  Then use this tasty stock for more strongly flavored soups or a seitan pot roast or something equally amazing!


Frozen veggies in the pot, getting ready for some filtered water


Suggested Veggies:

Onion ends and peels (get rid of the papery outer-skins: they will make the stock bitter)
Carrots peels and ends
Garlic ends
Celery ends and leaves
Mushroom stems
Parsley Stems
Fresh thyme stems
Tomato cores and ends


Veg Stock Working


Homemade Veggie Stock:

Yields: 1 Gallon Stock


1.  Take the contents of the gallon Ziploc bag and place it in a large pot. Cover with at least 1-1 1/2 gallons of filtered water. Add several black pepper corns, a couple bay leaves and dried thyme if you would like. 

2.  Bring the contents to a boil, then reduce heat to a simmer.  Simmer for 45-60 minutes, or as desired.  The longer the stock simmers, the darker in color and stronger in flavor it will be. 

3.  Allow the veggies to sit in the cooking liquid for about 10-15 additional minutes, or until the stock is more manageable to handle (temperature-wise). 

4.  Strain the veggies out of the stock, pressing to release as much liquid as possible.  Discard the stock veggies - preferably in a compost pile. 

5.  Cool the stock, package and be sure to date clearly.   Don't fill the containers completely full or they may explode in the freezer  - the liquid expands as it freezes. 


Labeled and frozen!
I've been doing this for years!
(And don't worry this picture was taken years ago & the stock long since used up.)


Fresh veggie scraps getting ready to go in the freezer.


Now save those organic veggie scraps and make your own homemade stock!


Enjoy!


Koko

Wednesday, March 19, 2014

Vegan Breakfast Sandwich: Tofu Egg Hollandaise

It is definitely no secret now that my Hubby and I plan to open our own vegan cafe here in Michigan.  We are working hard on it everyday it seems like.  In theory it doesn't seem so hard or involved - people open restaurants and other food businesses everyday.  But do they do it well?  Do they open simply because they like to eat?  Or because they see themselves as good cooks?  It definitely takes more than that to open a food establishment!  I have known since I was a teenager that I wanted to open up my own place.  It has certainly evolved over the years in regards to the theme.  I didn't always want to open up something vegan.  But I definitely know what I want now and have been working so hard over the last 10+ years to build experience and make it happen. 
 
 
I test recipes pretty much everyday.  Some days that means baking and decorating like 6 whole cakes, 10 different kinds of cookies, 5 different sandwiches, etc.  Some days that means only testing a smoothie or soup recipe.  Some are very involved, some are pretty simple and straightforward.  This is a recipe I tested recently.  As simple as it may look, it took quite a bit of time because each component was homemade.  And it was very tasty.  Hubbs and I had our own critiques, but both thought it was a great idea and definitely warranted further testing.  After I finish this post, it's time to work on the business some more.  Phew!  A lot of work, but it is going to be so worth it once we are open!  Can't wait!!


Crazy delicious!  And awesomely messy!
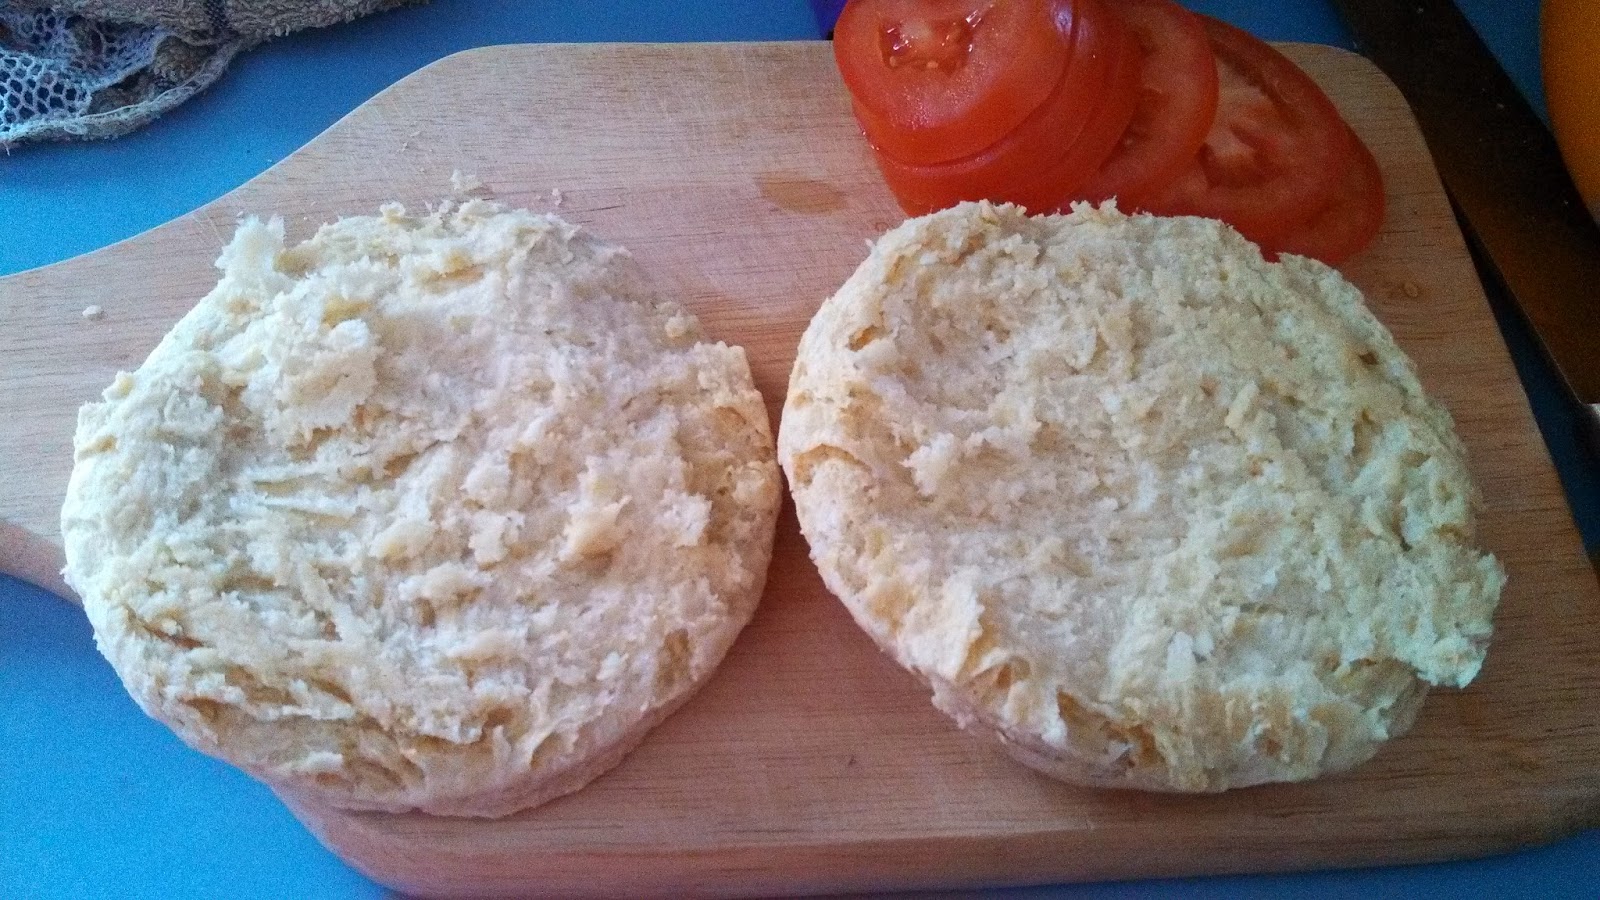
On a fresh baked vegan biscuit.


Fresh Baked Biscuit - it ended up being a bit too big for the sandwich.


Biscuit cut in half  - it looks so fresh!
And a juicy sliced tomato.


Tofu Egg cooking.


Almost done - just needs the sauce!  So pretty!


Hope you enjoyed the pics of the tasty sandwich!

Koko

Monday, March 17, 2014

Mostly Raw Pad Thai

I love the blog Oh She Glows!  I visit it several times a week and love looking at all of the gorgeous photos of tasty vegan food.  Everything Angela makes always looks so beautiful and healthy.  It makes vegan food really approachable and showcases how delicious it is, which I absolutely love.  I have made many of the savory recipes and a couple baked goods from her blog -they've turned out well.  I periodically go on the website and browse through the pictures, saving the ones that look especially delicious, telling myself that of course I'm going to make all the recipes.  When I saw the Rad Rainbow Pad Thai recipe, it was just so beautiful and I knew I had to make it.  Super healthy, light and gorgeous - I just made it.  And it was great.  I made a tasty peanut sauce to go with it and ate it for a couple days - giant bowls of it!  It really did make quite a lot.  So, after a couple days, there was still quite a bit of it and I was a little tired of eating it raw, so I decided to simply saute it in a little bit of olive oil, add a splash of tamari - and it turned out so delicious!  Yum! 


A tasty plate of the Pad Thai.  Before topping with the peanut sauce.


I made my mostly raw Pad Thai a little different than Angela, just based on the fresh veggies I had in my refrigerator.  I'm not huge on raw zucchini, so I only used a super small one and added more cabbage.  I felt in the mood to use my knife skills so I chopped and julienned everything by hand.  It took a while, but was very rewarding and very tasty! 


It really made a lot!


Mostly Raw Pad Thai:

Serves: 4-6

1/2  head green cabbage, julienned
1 carrot, julienned
1 small zucchini, julienned
1 red bell pepper, julienned
4 scallions, sliced on the diagonal
3/4 cup shelled edamame, steamed
2 tablespoons raw sesame seeds

Spicy Peanut Sauce:
2/3 c. smooth organic peanut butter
1/4 - 1/3 cup filtered water to thin out, or as needed
3 tablespoons maple syrup or agave
2 tablespoons tamari
2 large cloves garlic, minced
1 1/2" piece ginger, peeled and minced
1/8 teaspoon black pepper
1/2 teaspoon sriracha

1.  Prepare the Pad Thai: place all of the prepped veggies in a large bowl, along with the edamame and sesame seeds.  Toss well to mix.  Set aside.
2.  Prepare the peanut sauce: place all of the ingredients for the sauce in a medium sized mixing bowl and whisk like crazy until everything is well combined.  Season to taste, adding more sweetener or tamari as desired.
3.  To serve, place a giant portion of the Pad Thai on a plate and drizzle with desired amount of spicy peanut sauce. 

So good! Hubbs loves anything with peanut sauce on it.  He was doubtful about eating this because he didn't think it would be substantial enough to keep him full.  He ended up really liking it - and used about half of the sauce on his portion!


Enjoy!

Koko

Saturday, March 15, 2014

Green Dinner: Gluten Free Pesto Pasta, Garlic Broccoli & Simple Green Salad

Finally went shopping.  Yay fresh veggies!  Hubby was helping me bring in the groceries and hung out with me while I was putting everything away.  He had insisted we purchase some beer and went to put it in the freezer  to chill it down quickly.  Imagine his surprise when he couldn't fit even one bottle in the freezer.  Oops!  I am a huge proponent of not throwing things away, so when I make a big batch of soup of a big batch of some other kind of meal, I don't like to throw any of it away, so I put it in a deli container, label it and freeze it.  It makes for some really easy, quick meals down the road too.  So he asked me to try to use up a couple things so his cervezas could chill.  Out came the last couple packages of pesto I made with the basil from our garden last summer.  It turned out great, because then I knew exactly what I was making for dinner.  Yummy pesto pasta!  I have been craving broccoli for a while so I decided to make that and a super simple green salad.  It was a nice tasty meal, not too heavy, and Hubbs was happy about his nice, cold cervezas!


Tasty GF Pesto Pasta and Fresh Veggies!


Serves: 2, with a little extra for leftovers
 
 
8 oz. desired pasta - I used Trader Joe's GF Brown Rice Penne Pasta
 
Pesto:
 
Yields: 2 1/2 cups (use what you need and freeze the rest)
 
1 1/2 cups toasted walnuts
3/4 cup olive oil
2-3 cloves garlic, chopped
2 tablespoons white miso
1 teaspoon sea salt
1/2 teaspoon black pepper
8 oz. basil, rinsed and spun very well

Extra Virgin Olive Oil, for drizzling
 
Garlic Broccoli
1 bunch broccoli, separated into florets, stems peeled and diced
1 tablespoon olive oil
4 cloves garlic, chopped
sea salt and black pepper to taste
 
1.  Prepare the pesto sauce.   Toast the walnuts and allow to cool.  Place in the bowl of a food processor along with the following: olive oil, garlic, miso, sea salt and black pepper.  Blend until relatively smooth.  Add in the basil and blend until combined, scraping down the sides of the bowl several times.  Set aside until ready to use.
2.  Prepare the pasta.  Bring a large pot of salted water to a boil.  Cook the pasta according to package directions.  Drain the pasta, but keep the water in the pot.
3.  Briefly blanch the broccoli until it is tender-crisp. 
4.  Saute the garlic in the olive oil until crispy.  Toss with the cooked broccoli.  Add sea salt and black pepper to taste.  Mix well. 
5.  Toss desired amount of pesto with the pasta.  Drizzle with a small amount of olive oil.  Serve with the broccoli and a simple green salad.
 
 
Enjoy!
 
Koko
 

Wednesday, March 12, 2014

Potatoes and Broccoli in a Creamy Sauce

This is a recipe I made using up the last of the ingredients I had in the fridge to tide us over until we were able to schedule a time to go shopping.  I just took what I had and came up with a simple, hearty, comforting dish and it came out really tasty.  Reminds me of the peas and potatoes my mom used to make for us when we were kids, that her mother used to make for her children as a way to make an inexpensive meal stretch out to feed many.  It always makes me happy to be eating meals similar to those my grandmother served her children during those difficult times.  Shopping sometime soon and then more creative and fun meals coming up!


Hearty and Comforting


1 tablespoon olive oil
1 yellow onion, small diced
2 cloves garlic, minced
2 tablespoons superfine brown rice flour 
4 cups unsweetened almond milk
4 large potatoes, peeled and diced
1 head broccoli, cut into small florets, stems peeled and diced
1 red bell pepper, medium diced. or other vegetable
 
1.  Place the potatoes in a medium pot and cover with cold water.  Cook until the potatoes are just tender.  Add the broccoli and red bell pepper into the same pot and cook for about a minute, or until tender-crisp.
2.  Meanwhile, in a large pot over medium heat add the olive oil.  Allow it to become hot.  Add the onion and garlic.  Saute for about 5 minutes, until lightly browned.  Add the brown rice flour.  Continue cooking for several minutes.
3.  Lower the heat to medium.  Add the almond milk, stirring immediately so it does not clump.   Stir until the mixture has thickened.  Season with sea salt and black pepper.
4.  Add the cooked potatoes, broccoli and red peppers.  Season to taste.

I always top this with lots of sriracha.  Yum!


Enjoy!

Koko

Saturday, March 8, 2014

Mashed Potatoes & Gravy, Steamed Peas, Baked Glazed Tofu

Do you ever have those days when you really need to go to the grocery store, but for whatever reason, you can't?  I'm having one of those weeks!  Since moving back to Michigan, Hubbs and I have had to buy a car to get around, which has definitely been an investment (but such a freeing one!), so we have only been able to afford one for the time being.  It has worked very well for us, especially since both of my parents and my younger brother work within a couple miles of each other downtown, so it's easy to get a ride.  For one reason or another this week, it has not worked out that I am able to take the car and go shopping.  Hubbs has never liked grocery shopping, so I always go.  Which is totally fine since I always have fun shopping.  Needless to say, since we haven't been shopping in a couple weeks (just getting a couple random ingredients from the coop here and there), we just have a couple fresh ingredients, though lots of pantry and frozen items.  That is how this meal came about.  I baked a package of firm tofu, boiled some potatoes, made a nutritional yeast gravy, tossed the baked tofu in some spicy bbq sauce and served it with some steamed frozen peas.  It was simple and tasty.  Now we basically just have a half of a head of green and red cabbage and a couple other random fresh ingredients.  I think I'll make a tasty stir-fry with edamame (frozen) and some black sesame seeds.  Yum!


Simple tasty dinner!


Enjoy!
 
 
Koko

Saturday, March 1, 2014

Breaded Seitan Cutlets from the Vegan Diner Cookbook

I have this crazy thought that I will make most of the recipes out of the hundreds of vegan/vegetarian cookbooks I have.  I'll be honest, there are several recipes out of each cookbook that I would likely never make, simply because I do not like some of the ingredients, but lots of them look good and really make me want to make them.  That is the point of having a cookbook, right?
 
A couple years ago I purchased a cookbook called the Vegan Diner Cookbook.  All the pictures look great and I loved the theme.  Upon further investigation of the book, once it was delivered, I realized it had tons (and I mean tons!) of typos.  Really ridiculous ones too, like turn to this page for this sub-recipe, and the page it says is 000, as if they were going to go back and add it in once the book was completed, and just forgot.  Plus, I have been cooking for so many years that most of the time I am able to look at a recipe and realize if it will or will not work.  And there are quite a few in there that make no sense.  This really in-depth exploration of the book came after making several recipes, thinking that the recipe itself didn't make a lot of sense, then trying it and having it fail.  I cannot recommend this book for purchase, and after making several things from it that did not work, I put it on the shelf and haven't opened it in years.  But, like all meals that I cook, I took pictures of it (these are pics from Brooklyn) and felt I should post it.  So here are the breaded seitan cutlets from the book.  


Breaded Cutlets - baked and topped with melty vegan cheese


Spaghetti with Homemade Marinara and the Breaded Cutlet.


Koko

Thursday, February 27, 2014

Moro with Gandules, Beet Salad, Fried Yucca & Salad with Chipotle Dressing

I go through periods of really missing NY.  Or at least lots of things about it.  I loved that there was amazing ingredients on every corner to make the Dominican food that makes my hubby so happy.  There are a couple places here that sell a few of these ingredients thankfully, so I can make food that makes him happy (and myself-I have grown to love Dominican food!).  There were a couple items I was able to bring back with me from NY, because I wasn't sure if the ingredients would be here.  One of those was about 15 lb. of yucca (which is loooong gone!) and a couple packages of frozen gandules (pigeon peas).  You can get the dried gandules here, but they are not the same as the fresh-frozen ones.  I opened up our last package for this meal, which makes me sad, but made our bellies oh so happy!  I'll just have to figure out a place where I can get them, either online, or through explorations of other cities than Traverse City.  We've not really had the opportunity to venture outside of this area yet.  I've heard there are several vegan/vegetarian restaurants throughout the state, which I am super excited about exploring!  And hopefully not too far into the future, we will be adding another one!   


Giant plate of food for the Hubbs


Chipotle Dressing:
1/2 cup vegan mayonnaise
1 tablespoon lime juice
1 chipotle in adobo sauce, minced or pureed
pinch black pepper
sea salt to taste
(Mix everything together in a bowl until well combined.  Season to taste.)

Fried Yucca:
2 large yucca, waxy outer peels removed, sliced in half lengthwise and cut into large rings
canola oil to fry
sea salt
granulated garlic

1.  If you are going to prepare everything in the meal, now would be a good time to get started on the rice.  You can also get the beets cooking, because they take the longest amount of time.
2.  The yucca must be cooked by boiling before it can be fried - that's just the nature of the beast.  Bring a large pot of salted water to a boil.  Carefully place the yucca inside and cook just until is cooked through.  You do not want to overcook it, or it will become water logged and mushy.  Drain the yucca and allow it to cool for at least half an hour, or until it is dry to the touch and cool enough to handle. 
3.  Trim the yucca.  Yucca has a thick stem in the very center - you want to be sure to remove that because it is very unpleasant to bite into, and poses a choking hazard.  Cut the yucca into more manageable pieces.  Sprinkle the yucca all over with the granulated garlic.
4.  Place a thin layer of canola oil into a large saute pan and place over medium-high heat.  Allow the oil to become hot.  Once the oil is hot, carefully add the yucca and allow to cook for a couple minutes per side, or until nicely crispy.  Remove the yucca from the pan and place on a paper towel lined plate.  Immediately sprinkle with sea salt.  Be sure to serve warm.
5.  To serve, place a serving of each of the items on your plate. 


Enjoy!

-Koko

Wednesday, February 19, 2014

Vegetable Shepherd's Pie with Spicy Vegan Chorizo and Mesclen Greens Salad

For the last two weeks I have been trying to follow the idea of writing down all of the dinners I am going to prepare for the week on a white board I have on my refrigerator.  So far I have followed 4 out of the 5 items for the two weeks I have done it.  The other three days of the week I either didn't make a big "meal" for the Hubbs and I or I ate leftovers, and one of the days we ate out (Valentine's!).  I think it is definitely a good idea and something I can manage to stick to if I don't get too crazy and rigid about it.  This was not one of the meal ideas for the week, but after looking through my fridge, I realized I had tons of miscellaneous items that needed using up (half used onions and bell peppers - thanks to the Hubby for doing that) as well as some spicy vegan chorizo I made for breakfast, but didn't finish up.  So was thinking of making a pot pie, but was feeling too lazy to make a crust.  I have been testing tons of recipes the last couple days, and the last thing I feel like doing is following another recipe to make the crust.  I decided on a Shepherd's Pie - easy and very tasty to make.  I was able to clean up the fridge and make room for preparing the rest of the dishes on the white board.


Delicious Shepherd's Pie with Spicy Vegan Chorizo


Shepherd's Pie:

Potato Topping:
4-6 medium red skinned potatoes, washed well and diced
3 tablespoons earth balance
unsweetened soy or almond milk
sea salt and black pepper to taste
granulated garlic or a couple cloves of roasted garlic

Filling:
1 cup veggie protein - I used spicy vegan chorizo, but could use seasoned tofu, seitan, etc.
1 tablespoon olive oil
1 carrot, diced
1 onion, diced
2 stalks celery, small diced
1/2 bell pepper - or whatever vegetables you need to use in the fridge
2 cloves garlic, minced
Nutritional Yeast Gravy
handful organic frozen corn or peas
sea salt and black pepper to taste

1.  Cover the potatoes with cold water and bring to a boil.  Cook till just tender.  Drain.  Put back in pot - add earth balance, desired amount of nondairy milk, sea salt, black pepper and granulated garlic or roasted garlic.  Mash till desired consistency.  Season to taste.
2.  Prepare the filling: have the gravy ready and set aside.
3.  In a large saute pan over medium-high heat, add the olive oil and allow to become hot.  Add the veggies: the carrot, onion, celery and bell pepper.  Cook for several minutes until the veggies begin to brown.  Add the garlic and cook for a couple minutes. 
4.  Place the veggies in a large bowl.  Add the veggie protein and enough gravy to cover the mixture.  Stir in frozen peas or corn if desired.  Season with sea salt and black pepper.
5.  Oil a glass pie plate or baking dish.  Place the veggie-gravy mix into dish and smooth out with a spatula.  Top with the mashed potatoes and bake in a 375 degree oven for about 35 minutes, or until the potatoes are golden and the filling is bubbly.


Enjoy!

Koko


Thursday, January 30, 2014

Day 4: Fresh Juice Fast

Hubby and I are on our fourth day of fresh juice fasting.  Overall it has gone very well.  The first two days were the most difficult.  I had a bit of a headache Monday, that lasted throughout Tuesday morning, which was sucky.  I think it may have had to due with exercising while fasting - Hubbs is a maniac when it comes to that.  So we've decided to lay off the exercising while doing the fast, or at least keep it to a minimum.  I've been spending a lot of time with that juicer and blender, which is good.  It's been months since I've really juiced so much.  I used to juice back home in Brooklyn all the time.  When I finish with this fast, I'd definitely like to continue with the juicing - I've forgotten how great it is. 

I've taken some pictures of the juices, but not a ton, because the first few days I didn't have a lot of energy.  I also was so sure going into it that I would save the pulp for something and reuse it.  All of that pulp going into the compost bin makes me crazy.  And we're talking about a lot of pulp!  We've been making on average 1-1 1/2 gallons of fresh juice per day!  But the reality of using it all when there are gallons of it is a bit crazy and unrealistic.  I did, however, save most of the green pulp (from kale and spinach) and dehydrate it.  When I'm done, I'm going to grind it in the food processor and use it to add to smoothies or other dishes for some additional fiber and nutrition.  It's gonna look crazy on the shelf with all of my spices! 

Another thing I've noticed today is that my hunger is mostly gone, which is a relief, believe me!  The past three days have revolved around me thinking about food, hungering for it and just basically desiring it every second of each day.  When I didn't think about it for 5 minutes, I was ecstatic!  But I feel like I can go so much longer without even thinking about it right now.  And not having to worry about cooking every day and having a complete meal ready for when the Hubby comes home from work is such a great treat.  But I know it will likely begin again next week, just differently.  The main reason for me doing this is to rethink the way I think about food.  I definitely have my problems with it that I need to fix and would just love to eat so much healthier and feel better about myself.  I'm hoping that by doing this fast I will be able to focus more on eating good for me stuff and not junk.  I realize this is not something that is going to change overnight and that I will occasionally slip up, but I'm at a point where I really want to change.  My husband and I want to open our business within the next year and hopefully a year after that, start our family.  And I definitely want to be the healthiest I can while expecting.  A lot of pressure riding on me, but I feel very positive about it right now.  And now enjoy some pictures and recipes of some of the juices I've been making over the last coupld days!


Before juicing: Grapefruit Green (the greens wouldn't fit
in the bowl - they were in the sink)


Finished Grapefruit Green Juice

Green Grapefruit:

Yields: 2 Quarts

6 grapefruit, peeled
6 small apples, quartered
2" ginger
1 English or 2 regular cucumbers
6 stalks celery (wash very well - I found a slug in my organic celery!)
8 oz. spinach
1/2 - 1 bunch kale


Koko's V-8 Juice, but so much better!


 Koko's V-8:

Yields 2 1/2 Pints

6 stalks celery
2 jalapenos
2 lb. tomatoes, quartered
3/4 lb. carrots
1 red pepper, seeded
2-3 cloves garlic, peeled
1 English or 2 regular cucumbers
8 oz. spinach
(can also add 1/2 bunch cilantro - makes it taste like you're drinking salsa!)


Fresh pineapples for juicing!


Heartbeet Juice before juicing - there are oranges, lemons and
ginger under there and spinach in the sink


Heartbeet:

Yields: 1 1/2 Quarts

3 lb. carrots
1 1/2 lb. beets
6 small apples
4 oranges, peeled
2 lemons, peeled
2" ginger
8 oz. spinach


The finished juices: V-8, Heartbeet, Pineapple (and that's 2 small pineapples!)


Enjoy!

Koko

Monday, January 27, 2014

Spinach Pie with Parsley & Artichoke Pasta

My hubby and I have decided to go on a 7-day juice fast.  In the middle of this freezing cold winter.  It seemed like a good idea a week ago when temperatures were warmer.  Our fridge is completely filled with fresh fruits and veggies, awaiting being juiced.  Even though we have officially gotten started on our cleanse today, I figured I would post a recipe I made last week.  Drool over the pictures and the memory a little bit.  I think we usually eat pretty well, although generally too many carbs - but we definitely will do well with a cleanse, especially after the holidays.  Enjoy this recipe and hopefully I'll post some pretty juice pictures and recipes in the next week or so, depending on how I feel.  I've been told by day three I'll be super cranky, but I'm going to be optimistic and think that each day will be great!


The spinach pie served with a simple parsley, artichoke pasta.


1 10 oz. box frozen spinach, thawed and squeezed mostly dry
mock vegan feta cheese
2 teaspoons olive oil
3 cloves garlic, minced
1 small onion, small diced
sea salt and black pepper to taste
couple pinches cayenne pepper
1/2 package silken tofu, blended
Filo dough
4 oz. earth balance, melted
1.  Place the thawed spinach and and handful of crumbled vegan feta in a large mixing bowl.  Set aside.
2.  Place a saute pan over medium heat and allow it to become hot.  Once it is hot, add the onion and garlic and cook, stirring frequently, until both have cooked through.  Season with a small amount of sea salt and black pepper.  Add into the bowl with the spinach and feta.
3.  Place half of the package of silken tofu into the bowl of a blender and blend until completely smooth.  Add to the mixture in the bowl, plus additional sea salt and black pepper.  Season to taste.
4.  Oil an 8"x8" baking pan with the melted earth balance.
5.  Take several sheets of the filo dough out of the package, together.  Brush the top sheet generously with the earth balance, fold in half, and place in the bottom of the pan.
6.  Place the seasoned spinach mixture on top of the filo, pressing firmly down.
7.  Take another 4-6 sheets, brush generously with the earth balance, carefully turn over, and brush the other side.  Fold in half and place firmly overtop of the spinach.
8.  Place in a preheated 350 degree oven and cook for about 35-40 minutes, or until the spinach mixture is holding together and the top sheet of phyllo is nicely browned. 
9.  Allow it to cool for several minutes before serving, or it will not hold together.


The top is nicely browned!


Simple, tasty filling.  Yum!


Enjoy!


Koko
Sunday, January 19, 2014

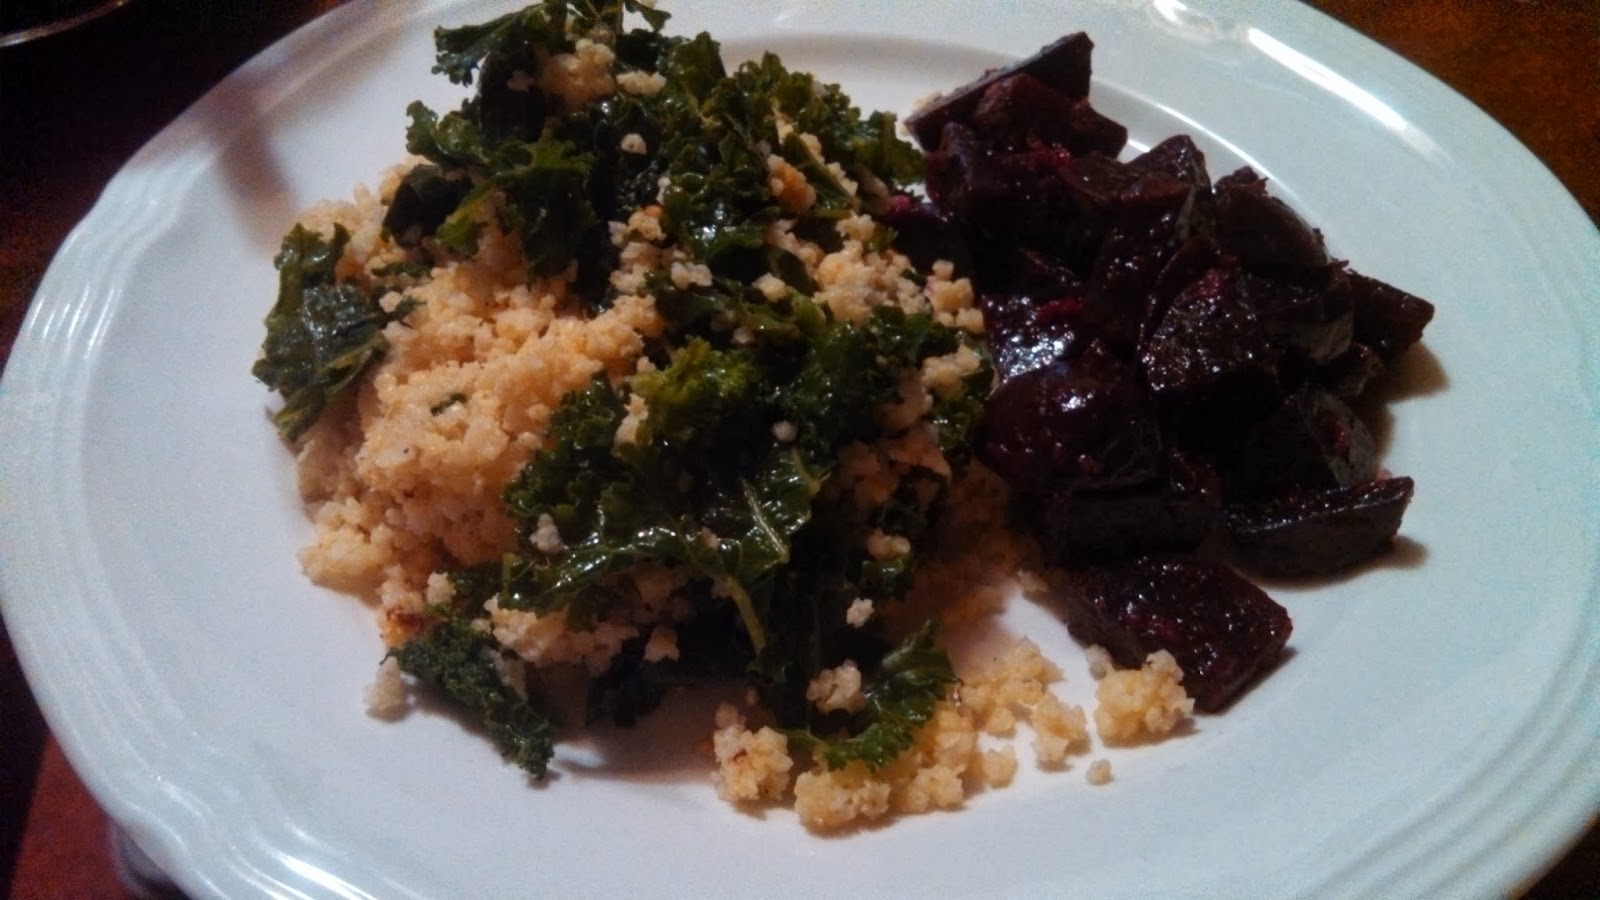
Millet with Kale, Mushroom Gravy and Beet Salad

I love the website Oh She Glows.  I follow it quite religiously and am always so impressed how Angela Liddon makes all of the food just look so amazing and healthy.  Pretty much every picture I see, I say to myself "I am so going to make this!"  The reality, of course is that I have so many recipes that I just have to make, and trying as of this point to keep to a budget, but still eat healthfully, is challenging, and I can't make every dish if I don't have the ingredients at home.  I think most of the ingredients in this dish people with a well stocked fridge and pantry should pretty much have on hand at all times.  This is one that seemed pretty easy to make, healthy, but also very much a "comfort food" item.  Sometimes the hubby can be finicky about creamy sauces and gravies, but I thought this would be great.  He ended up loving it, but didn't want to take it to lunch the next day, because in his words it was too light for a hardworking, strong man like him.  Insert good-humerdly crossing of the eyes here.  It ended up being a bonus for me because I ended up taking it for my lunch and was very satisfied!  Try making it and go over and take a look at what Angela ended up doing for the same dish over at Oh She Glows.  I didn't follow her recipe exactly, but used it as a guideline to make my own dish.


Super Comfort-Foody and Delicious!


Gravy:

Yields: 2 1/2 cups

2 tablespoons canola oil
2 cloves garlic, minced
1 onion, small diced
4 oz. criminis, small diced
4 tablespoons unbleached flour
2 cups filtered water
1/2 teaspoons sea salt
1/8 teaspoon black pepper
1/4 teaspoon dried thyme, crushed with the fingers
2 tablespoons nutritional yeast
1 tablespoon tamari
1/4 teaspoon unchicken boullion

Garlic Kale:
12 cups kale, blanched
1 1/2 tablespoons olive oil
4 cloves garlic, minced
sea salt and black pepper

Millet:
1 1/2 cups millet, rinsed
1 teaspoon olive oil
3 cups filtered water
1/2 teaspoon sea salt

1.  Cook the millet in the oil until toasted and most of the water has evaporated.  Add the filtered water and sea salt.  Bring the millet to a boil, reduce heat to a simmer, cover, and cook till the water has absorbed and the millet is fluffy,
2.  Prepare the gravy:Add the oil over medium heat.  Once it is hot, add the onion, criminis and garlic, stirring frequently until they begin to color.  Add the unbleached flour and stir well to coat. 
3.  Allow the flour to cook for a couple minutes so that the raw flour taste goes away.  Add the water all at once, whisking immediately so the gravy does not clump.
4.  Add the remaining in gredients to the gravy: the sea salt, black pepper, thyme, nutritional yeast, tamari and unchicken boullion.  Whisk well to combine all the ingredients.  Continue cooking till the gravy has thickened to your liking.  Season to taste.
5.  Prepare the garlic kale:  blanch the kale just until it turns a bright green color - about 30 seconds.  Drain.
6.  In a small pan over medium heat, cook the garlic in the olive oil until it becomes golden and cooked through.  Season to taste with sea salt and black pepper.
7.  To serve, place a mound of the millet on the plate, followed by a generous serving of kale, then top it all off with gravy.  Healthy comfort food at its best!


The millet mixed with the garlic kale.


The plate before adding the gravy.  Yum!


Enjoy!

Koko