Showing posts with label Beans. Show all posts

Monday, April 14, 2014

Vegan Enchilada Casserole, Roasted Vegetables, Salad

I follow several vegan (or mostly vegan) food blogs on a regular basis, including OhSheGlows, NeverHomeMaker and FatFreeVegan, among others.  I have made many recipes or used the recipes as a basis for dishes I make.  This idea for an enchilada casserole, or a Mexican Lasagna came from FatFreeVegan.  I made the casserole with a few changes that I think made the dish delicious.  This is definitely a fun and interesting change of pace as far as lasagnas go.  Hubbs keeps telling me of a Dominican Lasagna that he wants me to make, utilizing ripe plantains, a layer of "beef" and cheese with sauteed onions and garlic.  Sounds great to me.  The only issue with making that is waiting patiently for the plantains to ripen fully without eating them first.  ;)


Such a fun and tasty dinner!


Enchilada Casserole:
12 organic corn tortillas
2 1/2 cups homemade or store bought Enchilada Sauce
3 cups homemade or store bought refried beans
2 cups cooked black beans
Vegan Daiya Cheese
Sliced Black Olives
 
Veggie Layer:
1 tablespoon olive oil
1 large onion, julienned
1 green bell pepper, julienned
1 jalapeno, minced
2 cloves garlic, minced
2 roma tomatoes, diced
sea salt and black pepper to taste
1 tablespoon chili powder
2 teaspoons cumin
1/4 teaspoon cayenne (optional)
 
 
1.  Preheat oven to 375 degrees.  Oil a 9x13" baking pan and set aside until ready to use.
2.  In a saute pan over medium-high heat add the olive oil and allow it to become hot.  Add the onion, green pepper and jalapeno.  Cook, stirring frequently for about 5 minutes.  Add the garlic and tomatoes.  Cook for a couple minutes more, until fragrant.  Add the seasonings: sea salt and black pepper, chili powder, cumin and cayenne pepper.  Stir to coat.  Season to taste.
3.  Place a layer of the corn tortillas on the bottom of the prepared pan.  Spread a layer of enchilada sauce, followed by refried beans, sauteed veggies, black beans and vegan daiya cheese.  Continue with the same layers until all of the ingredients have been used.  Top with the sliced olives.
4.  Place the pan in the oven and bake for about 35-45 minutes, or until warmed all the way through.
5.  Serve with roasted veggies (I used broccoli and cauliflower) and a simple salad. 
 
 
Enjoy!
 
Koko


Sunday, April 6, 2014

Breaded Seitan, Roasted Garlic Mashed Potatoes, Sauteed Onions and Mushrooms, Green Beans

I try to cook everyday.  For at least 1-2 meals.  Sometimes I feel more excited about cooking and sometimes I feel like throwing something together.  For this meal I felt like throwing something together, but had several ingredients to use up before another grocery shopping trip with the hubby.  The meal ended up taking a while to make, but was so worth it.  So tasty and comforting!


Such a pretty and tasty meal!


Roasted Garlic Mashed Potatoes:
2 1/2 lb. russet potatoes, peeled and large cubed
 
4 tablespoons earth balance
sea salt and black pepper to taste
unsweetened almond milk or soymilk
 
1 head garlic, top cut off
olive oil
 sea salt and black pepper
 
Sauteed Onions and Mushrooms:
1 large red onion, sliced thinly
4 oz. crimini mushrooms, sliced
1 1/2 teaspoons olive oil
sea salt and black pepper
1/4 cup filtered water
 
1.  Preheat the oven to 375 degrees.  Place the head of garlic in a small piece of aluminum foil.  Drizzle with olive oil and sprinkle with sea salt and black pepper.  Close the foil tightly.  Roast for about 30 minutes, Place potatoes in a pot and cover with cold water.  Cook for about 30 minutes, or until the garlic has softened and darkened in color.  Set aside until cool enough to handle.
2.  Place the potatoes in a pot covered with cold water.  Cook until just tender. 
3.  Prepare the sauteed onion and mushrooms: place the olive oil in a large saute pan over medium heat.  Add the onion and mushrooms and cook for several minutes.  Add the sea salt and black pepper and cook until the mushrooms begin to release their juices.  Lower the heat and add the filtered water.  Cook until most of the water has evaporated and the mixture is very flavorful.
4.  Finish the potatoes: add the earth balance, sea salt, black pepper and prepared roasted garlic.  Mash very well.  Add the almond milk or soymilk until the desired consistency is achieved. 
5.  Serve with a veggie protein and a side. 


So delicious!


Enjoy!
 
 
Koko

Sunday, March 23, 2014

Savory Chickpea Pancake

I found this beautiful looking recipe from the OhSheGlows blog.  It looked so interesting, and I am always trying to find different kinds of recipes to make for breakfast to keep things interesting.  When I tried this the first time, I was surprised by how different it was, but in a good way.  Tasty.  It definitely needed some more spices, and when I made it a second time, it came out great!  This was from the second time I made it - one for Hubbs and one for myself.  Sometimes he is really good about allowing me to take pictures the food I make and sometimes he is pretty impatient and just wants to dig right in.  This was one of those days.  And most of the time I give him the prettier of the dishes.  So his of course was beautiful and I was left to take a picture of the funky looking one. ;(  It was equally delicious though!  Take a look at the one Angela makes on her blog and see what is should really look like!


The cooked chickpea pancake.  Sad looking, but so delicious!


One side cooked, waiting to flip!


Savory Chickpea Pancake

Serves: 1

1/2 cup chickpea flour
1 tablespoon nutritional yeast
1/4 teaspoon baking powder
1/4 teaspoon garlic powder
1/8 teaspoon black pepper
pinch red pepper flakes
1/2 cup filtered water
1/2 teaspoon unchicken boullion
1 green onion, sliced
1/4 cup red pepper, small diced
1/4 cup roma tomato, small diced


1.  Place the chickpea flour, nutritional yeast, baking powder, garlic powder, black pepper and red pepper flakes in a medium bowl and whisk to combine. 
2.  Add the filtered water and the unchicken boullion and whisk together for several seconds.
3.  Add the veggies and unchicken/water mixture to the dry ingredients.  Whisk together until a medium-thick batter forms.
4.  Place a medium sized saute pan over medium-low heat and allow the pan to heat.  Spray pan with nonstick spray and pour the batter into the pan.  Cook for 4-5 minutes, or until the top dries out and is able to be flipped over.
5. Flip pancake over and cook an additional 3-4 minutes.

Garnish with hummus, avocado and sriracha.


Enjoy!

Koko

Monday, November 4, 2013

Yucca, Brazilian Braised Kale, Chickpea Artichoke Salad

While deciding what to make for dinner, I decided to make a couple recipes out of the billions of cookbooks I have.  I found the chickpea artichoke salad from the Vegan Yum Yum cookbook, which I love.    The other recipe I got out of one of my many cookbooks was the braised kale, which came out of Viva Vegan.  I have made several of the recipes out of that cookbook, some successful and some not.  It's a beautiful collection of recipes, but I also have my Dominican Hubby here to give me ideas first-hand into traditional Spanish food.  The good thing about getting recipes/ideas from him is that his recipes are all meat-based.  (Hubbs is not vegan or vegetarian at all.)  This does force me to be a little more creative, yes, however, it makes me understand the food a little more and the flavors I am trying to mimic and create.  I am always asking him about new ideas he has for food his mom used to make for him back home, and he has been giving me great feedback lately.  So I have a lot more ideas for tasty Spanish food coming up.  Until then, I have Viva Vegan and a lot more time to experiment and test!  


Yucca, Brazilian Braised Kale, Chickpea Artichoke Salad:


So much delicious food!


2 medium yucca, waxy outer layer peeled, sliced in half lengthwise and cit into 2-3" lengths

Simple Salad:
romaine lettuce
scallions, chopped
carrots, peeled and julienned
croutons
lime vinaigrette or preferred dressing

Brazilian Braised Kale:
1/2 bunch large kale, chiffonnaded  (leaves rolled into cigar shape and thinly sliced)
2 tablespoons refined coconut oil (you can use whatever kind of oil you want)
4 cloves garlic, minced
1 small onion, small diced, about 3/4 cup
1/4 cup filtered water
1/2 teaspoon liquid smoke
3/4 teaspoon vegetable boullion powder
pinch black pepper

Chickpea Artichoke Salad:
1 tablespoon olive oil
2 cups cooked chickpeas
4 cloves garlic, minced
7 artichoke hearts, squeezed of excess moisture and cut in half
1/4 cup toasted sliced almonds
1 1/2 teaspoons lemon juice
1/4 teaspoon sea salt, or additional, as desired
2 tablespoons chopped parsley

1.  Prepare the yucca first.  Place yucca in a medium pot over medium-high heat and cover with water.  Bring to a boil and cook until yucca can be easily pierced with a fork.  Drain and return to pot, cover with lid and keep warm.
2.  While the yucca is cooking, prepare the Chickpea Artichoke Salad: in a large pan add the olive oil over medium heat and allow to become hot.  Once the oil is hot, add the chickpeas and cook for about 10 minutes, or until very browned and crispy, stirring periodically.  Add 1 teaspoon more of the oil and add the minced garlic.  Cook for a couple minutes, or until the garlic is fragrant.  Remove the pan from the heat and add the remaining ingredients:  the artichokes, toasted almonds, lemon juice, sea salt and parsley.  Stir to coat the chickpeas and season to taste. 
3.  Prepare the braised kale.  In a medium pot over medium-high heat, add the coconut oil and allow it to melt.  Once it melts, add the chopped onions and cook for several minutes, or until fragrant and lightly golden in color.  Add the minced garlic and cook for several minutes, or until fragrant.  Working in batches, add the chiffonaded kale to the pot, stirring constantly until it wilts and you can add more to the pot.  Continue until all of the kale fits in the pot and it has all wilted.
4.  Add the water to the kale and stir to coat.  Add the seasonings: the liquid smoke, boullion and black pepper, stirring to coat.  Season to taste. 
5.  Prepare the simple salad as desired.
6.  To serve, place a serving of each of the items on the plate: the cooked yucca, braised kale, chickpea artichoke salad and the simple salad.  Eat!  Yum!  (Keep in mind that once the kale is refrigerated, it will harden because of the coconut oil.  So, don't try to eat it cold out of the refrigerator like I sometimes do  - make sure to heat the kale thoroughly before eating, so that the coconut oil melts sufficiently.)

Enjoy!

-Koko

Wednesday, September 4, 2013

Last Hurrah in NYC with my Besties

Two days before I moved, I was very fortunate to have a last amazing, delicious vegan lunch and dinner with two of my besties, Kumiko and Eileen.  I have had the pleasure of knowing these beautiful, intelligent women for over  five years, and even though we were not always able to get together because of the ridiculously busy NY lifestyle, whenever we were able to get together, we had a blast.  And we would always be eating the tastiest vegan food!   Kumiko took me to a very classy, expensive Japanese restaurant in Manhattan called Kajitsu, which was "on her husband" - meaning we could spend as much as we wanted (love those two!).  We ate an amazing, gourmet meal.  It was such a different culinary experience for me, but also such a blast.  It is a kind of restaurant Kumiko has never been to.  She says that even Japanese people only go to a restaurant like that one or twice in their lives, so I was honored to share the experience with her.

After we ate, we walked around and around and around Manhattan, with me soaking up every little detail and trying to memorize everything.  We went to May Wah on Hester Street in Chinatown - the first time for Kumiko and likely the last time in a while for me (sad sad!).  I got a couple things that will hopefully last me a couple months into living in my new city and remind me of the city I'm leaving behind.  We parted ways very sadly, but with both of us promising to visit each other.

I had dinner with Eileen at Peacefood Cafe - Union Square.  Dinner was tasty, but not exactly picture-worthy, and we were too busy blabbing and blabbing to take the time out.  The cafe was mad busy and we had a great time.  It wasn't as homemade oriented as Kajitsu, but definitely tasty and a nice send off.  Enjoy the pictures of my last vegan meal in NYC.  I'll bring my awesome vegan tasty treats with me to Michigan and introduce everyone here to the tastiness!


Tomato and Bell Pepper "Tofu" in a delicious broth with
Basil Tempura.


All of the tastiness together - with Miso Tofu Skin Soup, Rice, etc.


The entree: zucchini in a yuzu broth with all kinds of delicious,
unfamiliar ingredients and herbs.    


Dessert: Mochi with Adzuki Bean Filling. Tasty!


The dessert out of the banana leaf.  Served with super strong
Green Matcha Tea.


We walked around and found a gf bakery. 
Not too impressed, sorry to say.


Blueberry Muffin, Spinach Sundried Tomato Muffin,
Vanilla Cupcake, Date Crumb Bar - all gf


Enjoy!

Koko

Tuesday, April 30, 2013

Chickpeas and Spinach (Chole Palak)

I love Indian food, although I don't really make it at home all that often.  I've made channa masala for the hubby before and he really liked it, so I thought this would be a great dish to make.  I was browsing through recipe ideas to make for dinner and came across this chickpeas and spinach dish.  I had all of the ingredients in the refrigerator (which rarely happens!) so decided to make it.  It made the house smell amazing and as I was cooking it, I was thinking how much the Hubbs was going to love it. 

This recipe even caused me to have an accident with my chef knife, which rarely, rarely, rarely happens.  I was so into chopping the spinach I happened to look away while I was chopping and chopped off 1/3 of the nail (+ skin) on my index finger.  The. most. painful. thing. ever.  It took a good week+ for me to be able to type properly and put any kind of pressure on it.  This accident did make me realize that Hubby is good in stressful situations where wifey is crying hysterically with a bloody bloody finger.  He has always told me he feels sick/weak at the sight of blood, so this was reassuring.  I'm not telling you this to gross you out, only just that I gave this recipe everything.  And the (not so) funny part?  Hubby didn't like it.  Not really at all.  Sigh.  I thought it was great.  It caused him to realize that he doesn't like garam masala, so if I had made it without (I wouldn't though because it added such flavor!) he probably would have liked it.  So I have two small deli containers of it in the freezer because I couldn't eat all of it when I made it.  But hey, now I have a tasty meal ready to go for my lunch when I don't feel like cooking!  Try it.  Just be careful when chopping the spinach!


Chickpeas and Spinach (Chole Palak):


So delicious!

Serves: 4-6

3 tablespoons olive oil

1 large onion, diced
4 cloves garlic, minced
1" piece ginger, peeled and minced
2 teaspoons cumin
1 tablespoon coriander
1 teaspoon turmeric
1/4 teaspoon red pepper flakes
1 teaspoon sea salt
1 teaspoon garam masala
1/4 teaspoon black pepper
3 cups cooked chickpeas
28 oz. can fire roasted diced tomatoes

8 oz. bag baby spinach, chopped


1.  Place a large pot over medium-high heat, add the olive oil and allow it to become hot.   Once it is hot, add the onions, garlic and minced ginger.  Cook, stirring frequently for 3-5 minutes, or until the garlic and ginger become fragrant. 
2.  Add the spices: cumin, coriander, turmeric, red pepper flakes, sea salt, garam masala and black pepper.  Stir to coat the onion mixture.  Cook for 1-2 minutes, or until fragrant. 
3.  Add the chickpeas and diced tomatoes, stirring to coat.  Lower the heat and allow ingredients to simmer for about 15-20 minutes, stirring periodically, until liquid thickens. 


Look at that deliciousness!


4.  Add the chopped spinach and stir to coat.  Stir periodically until the spinach wilts.  Season to taste.  Serve over rice.  That's it!

Enjoy!

Koko

Thursday, April 11, 2013

Dominican Style Pinto Beans

These are the most delicious beans I have ever made.  And there is a funny story behind their creation.  Hubbs and I have been married for almost four years now and we both love beans.  When we were first married, I could cook beans just fine, I just couldn't make them "saucy" like he wanted.  Oh he would eat them and really wouldn't say anything, but I knew he wasn't thrilled to be eating them.  I tried so many different recipes, but let's face it: I am American and the only beans I ever ate growing up where the canned variety in the chili my Mum would make, or cooked in her Ham and Bean Soup, where she would actually cook them from dry.  That's it.  Or maybe a can of refried beans or baked beans here or there.  Since attending culinary school in the city at NGI, I have learned to make beans from scratch for all kinds of dishes, but we never covered the "saucy" beans Hubbs so craves.  The kind of beans he was craving are cooked to perfection and accompanied by a thick, well seasoned sauce. poured over rice so that the sauce soaks into the rice.  I tried making the seasoned beans several times, listening and jotting down everything my Spanish coworkers would tell me.  And I would make it at home, and it would be tasty, in an American kind of way, and Hubby would eat it, but I knew it was never really that good.

Thankfully Hubby's cousin, a fellow Dominican named Wady moved here to Brookyn and was staying with us for a couple weeks while he got everything together.  And he did not speak a word of English.  Seriously.  Not. A. Word. And Hubby would leave us together for extended periods of time.  So, whenever I would finish with work, I would come home, and he would be there, and I would have to entertain him for hours until the Hubby got back, with me not really speaking much Spanish, although understanding quite a bit.  It was pretty awkward for several days, until I somehow learned that Wady could cook - and cook beans! 

So, he decided to teach me.  We went shopping together for the ingredients, using my pocket translator, and he bought everything we needed.  Then we went back home and he proceeded to teach me how to make Dominican Beans.  He talked the whole time, but I mostly watched his hands - and noticed he of course did not measure anything!  So, I judged how many teaspoons or tablespoons of whatever ingredient he was putting in the pot, and just basically watched the whole thing.  The beans were damn tasty!  So, a week later, I went into the kitchen with my scribbled over recipe and set to work.  When the Hubby came home and I set the plate in front of him, you really should have seen his face.  He looked so hopeful!  He took one bite, declared the beans "amazing" and hugged me.  In the middle of dinner!  Success!  So I am now a pro at making Dominican beans, if I do say so myself.  And this is the recipe Wady and I came up with - a long time in coming!


Dominican Style Pinto Beans:


Pot 'o Steaming Dominican Beans!


Serves 4-6 (or 2 big Dominicans and one blanquita ;)

8 oz. pinto beans, soaked
4 tablespoons olive oil
1 large onion, small diced, about 1 1/2 cups
1 medium green pepper, small diced, about 3/4 cup
1 stalk celery, halved and thinly sliced, about 1/2 cup
6 cloves garlic, minced
10 sprigs cilantro, thick stems removed
1 large jalapeno, small diced, about 1/4 cup
6 tablespoons tomato paste
8 tablespoons homemade sofrito (recipe to come later)
1/2 teaspoon black pepper
2-2 1/2 tablespoons unchicken boullion
1/2 teaspoon garlic powder


1.  Search through the beans and discard any stones.  Soak them overnight preferably, but if time doesn't allow, do my quick method: Place beans in a covered pot filled with water.  Bring to a boil and boil for 5 minutes.  Turn off the heat, but keep the lid on the pot.  Let beans sit in hot water for an hour and they will look like they have been soaking for 8 hours.
2.  Drain the water and plumped beans.  You can either cook them in an open pot or pressure cook them, which takes a fraction of the time.  Do not add salt to the cooking beans - it will not allow them to cook properly.  Cook until they can be easily squeezed and squished between your fingers.  DO NOT drain the water!  This is one of the most important things!  There should be several inches of water on top of the beans - do not dump any of it out.  Set pot aside. 
3.  While the beans are cooking, you can move onto the next step.  In a medium pot over medium-high heat, add the olive oil and allow it to become hot.  Add the onions, pepper, garlic, cilantro, jalapeno, tomato paste and sofrito.  Do not add the spices.Cook for 5-10 minutes, stirring frequently, until the entire mixture is thick, well seasoned and fragrant. 
4.  Once the beans are cooked, keep them at a high simmer and add the seasoned mixture you sauteed.  Stir into the beans well.  Now add the spices: the black pepper, vegetable boullion powder and garlic powder.  You shouldn't need salt because it is in the boullion powder, tomato paste and sofrito.  But you can add some if you feel like.


Close Up of the Tasty, Steamy Beans


5.  Continue simmering beans, turning the heat down a little.  The longer they simmer, the more flavorful they become and the thicker the sauce.  Keep tasting the liquid.  After a half hour of simmering, they should be ready.  The sauce should have thickened and they should be nice and flavorful. 
6.  That's it!  So tasty!  Make it and appreciate all my hard work learning to make beans for my Hubby.
7.  Serve over white or brown rice.


Dinner: Dominican Beans over Brown Rice, Sauteed Zucchini
and Mixed Green Salad with Avocado


Enjoy!

-Koko

Thursday, March 28, 2013

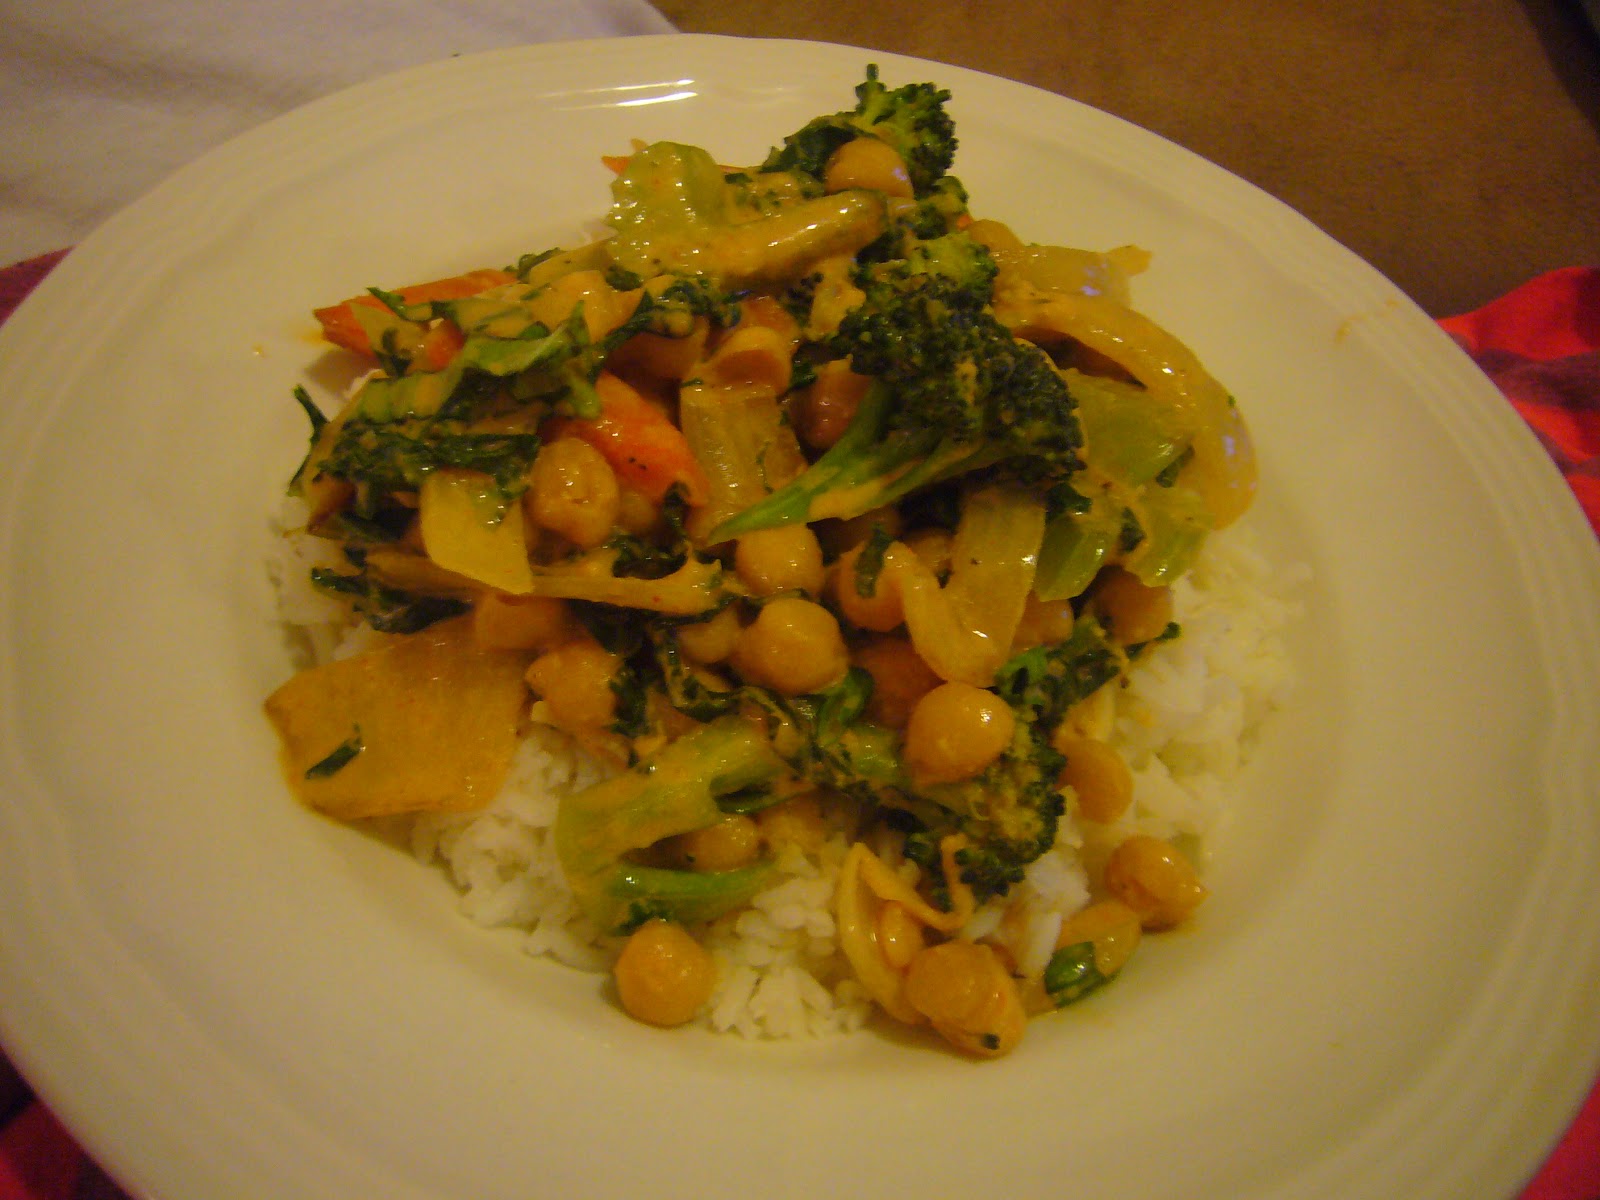
Veggies in a Curried Coconut Sauce

Today's dish was a clean out the fridge kind of meal.  I had cooked a batch of chickpeas a couple days ago and had a little over a cup of cooked beans left, plus some miscellaneous veggies and the first thing that came to mind was a stir fry.  I haven't made a stir fry/sauteed veggies in a while, and also had a little jarred curry paste in the fridge, so I immediately thought curried coconut sauce.  Can't get enough of that!  Once I chopped all the veggies and started the rice cooking, it all came together very quickly - in about half an hour or so.  Who said you can't have tasty, healthy meals in a short amount of time?  If you want to use brown rice instead, by all means do.  When I opened up the jar with my long grain brown rice, I realized I only had half a cup left, and that certainly wasn't enough for Hubbs and I.  Or you could even use quinoa or millet.  Super easy and super delicious.


Veggies in a Curried Coconut Sauce:


So flavorful and delicious!

Serves: 4

1 1/2 tablespoons olive oil
1 stalk celery, diced
1 carrot, sliced into matchsticks
1 head broccoli, cut into florets, stems peeled and chopped
1 small onion, cut into strips
2 cloves garlic, minced
1" piece ginger, peeled and minced
2 large leaves kale, chopped finely

1 1/2 cups cooked chickpeas
1 can coconut milk (lite or regular)
2 tablespoons red thai chili paste
1 teaspoon granulated garlic
1/4 teaspoon black pepper
1/2 teaspoon sea salt
a few fresh basil leaves, chiffonaded


1.  Prep all the veggies.
2.  Place a large saute pan over medium-high heat.  Add the olive oil and allow it to become hot. 
3.  Once the oil is hot, add the celery, carrot, broccoli and onion.  Saute for several minutes, or until the broccoli is crisp-tender.  Add the garlic and ginger and continue sauteing for a couple more minutes, or until the garlic is cooked through.  Season with sea salt and black pepper.


The Veggies Sauteing


4.  In a small bowl add the seasonings: the coconut milk, red thai chili paste, granulated garlic, sea salt and black pepper.  Whisk together until the chili paste is incorporated into the milk. 
5.  Add the milk to the sauteing veggies, as well as the garbanzo beans and chiffonaded kale.  Simmer, stirring frequently, until the kale has cooked slightly and the sauce thickens.  Season to taste with additional salt and pepper, as necessary. 
6.  Stir in the fresh basil.  Serve over rice (white or brown), quinoa or millet.


Enjoy!

Koko

Wednesday, March 20, 2013

Chickpea Vegetable Soup with Sweet Potatoes

I am fortunate to work in a place where I can purchase large bulk quantities of organic foods.  I do a lot of recipe testing and go through a lot of ingredients that are expensive when paying the retail cost.  I recently purchased a 25 pound bag each of organic unbleached flour, organic sugar, organic chickpeas and a case of soy free earth balance (the 2 lb. containers).  I've gone through almost all of the flour, 1/4 of the sugar and probably a couple pounds of the beans.  I use beans all the time in my cooking at home, the vast majority of the time I cook them from dry, using canned only when I am in a super hurry.  Garbanzo beans (chickpeas) are by far my favorite bean - I put them in everything.  Sometimes when I am cooking them from dry, I get carried away and make too many.  I don't love the texture of frozen garbanzo beans, so I try to use them all fresh, but I would much rather freeze them than throw them away, so sometimes they end up in the freezer.  Whenever I freeze them, I use them in soup - how this recipe came about. 

I have pretty much been making soup 2-3 times a week in this cold weather.  Even though today is technically spring, it is still pretty chilly out, so I felt like making this tasty, comforting soup.  I am a fan of the brothier soups and love me some greens in my soups, added at the end to still have a nice bite.  Try this soup before the weather starts to actually turn nice and warm!

Chickpea Vegetable Soup with Sweet Potatoes:


So hearty with delicious chunks of sweet potatoes.


Yields: 2 1/2 Quarts (6-8 servings)

2 tablespoons olive oil
1 medium yellow onion, diced
2 medium yams, peeled and diced
2 cloves garlic, minced
3 tablespoons red curry paste
2 teaspoons sea salt
1 teaspoon cumin
¼ teaspoon black pepper
¼ teaspoon cayenne pepper
8 cups vegetable stock
4 large leaves kale, shredded
2 cups chickpeas, cooked


1. Place a large stockpot over medium-high heat and add olive oil. Allow the oil to become hot.
2. Once the oil is hot, add the onion, yams and garlic and sauté for several minutes.
3. Add the seasonings: red curry paste, sea salt, cumin, black pepper and cayenne pepper. Toss to coat.
4. Add the stock and bring to a boil. Once the ingredients boil, reduce to a simmer.
5. Once the yams are just tender, turn off the heat and add the kale and chickpeas, stirring to combine.
6. Season to taste.  That's it!


Enjoy!

Koko

Thursday, March 14, 2013

Chickpea Kale Salad

Today is the first day off I've had in several weeks.  I flew back to Michigan a couple weeks ago when my Grandmother wasn't doing well and stayed there for about a week after she passed away to help my mom out.  Then I came back to New York and was immediately thrust back into work with tons of meetings and tons of stuff to catch up on, immediately followed by two classes scheduled on both of my days off.  No complaints, just super tired!  So, today being my day off, I did 4 batches of laundry with our portable washing machine and clothes drying racks.  After actually using a real washer and dryer while in Michigan, it was hard to go back to washing our clothes the old fashioned way!  Time to also do some pre-spring cleaning, including cleaning and organizing the refrigerators and freezers, pantry and writing up ideas for simple meals to make for Hubbs and I when I come back home from work.  After being up and working like a maniac for so many hours, I suddenly discovered that I was starving and wanted to eat something yesterday.  Remembering I had cooked some chickpeas for dinner a couple nights ago and that I bought a bunch of kale from the coop yesterday, I decided to make a warm chickpea kale salad, which always makes me happy and is super tasty and satisfying.  So now I'm taking a nice break, eating my tasty salad and watching some tv.  Sure feels nice to take a break, even if it is only for a couple hours!

Chickpea Kale Salad:

Serves 4 as a side

So simple and delicious!!

2 cups cooked chickpeas (warm)
2 tablespoons olive oil
1 very large onion or 2 small onions, sliced into strips
4 cloves garlic, minced
1/2 teaspoon sea salt, or to taste
1/4 teaspoon black pepper, or to taste
1/8 teaspoon red pepper flakes
1/2 bunch kale, sliced into strips
1 tablespoon water

1.  Warm the chickpeas by placing in boiling water for 1-2 minutes, or until heated through.
2.  Drain and place in a large mixing bowl.
3.  Heat a large saute pan over medium heat and allow it to become hot.  Add the olive oil, onions and garlic and cook till softened and golden.  Remove from heat and add to the bowl with the chickpeas. 
4.  Sprinkle with the sea salt, black pepper and red pepper flakes. 
5.  Into the same hot pan add the kale and 1 tablespoon water and cover with a lid to steam.  Allow the kale to steam for about 1-2 minutes, or until vibrantly green.
6.  Sprinkle with sea salt and black pepper and add to the bowl with the remaining ingredients. 
7.  Mix ingredients thoroughly and season to taste with additional sea salt or pepper flakes.

That's it!

Enjoy!

Koko

Wednesday, November 14, 2012

Spicy Black Bean & Quinoa Stuffed Peppers

I love me some stuffed peppers!  I ate these many times growing up and have thought about them over the years, but it never really went beyond simply thinking about them.  They were naturally meat filled (beef), so I couldn't get over thinking about using a soy substitute, but that didn't really sound all that appetizing to me.  I love beans (hubbs loves beans) and I love love quinoa (hubbs tolerates it but says it's too vegan - insert roll of eyes), so I thought about doing a black bean, quinoa stuffed pepper.  To keep it from being bland, I added some ground chipotle pepper powder and some other tasty peppers and they turned out amazingly!  So yummy and the pepper texture was just as I remembered it as a kid - firm enough to hold up, yet soft enough to be cut with a fork. 

They were really great and pretty quick, since I have been in the habit lately of cooking beans in large batches and freezing them in bags or plastic containers, then thawing them as I need them. I usually put 1-2 cups of cooked, drained beans in plastic bags, label them and freeze them flat.  Sometimes I will reserve the cooking liquid and place some beans in plastic deli containers, label and freeze them as well.  I use these for cooking Dominican beans.  Using the cooking liquid is the secret to having a thick sauce with the beans, and it gives them a lot of flavor as well.  Not to mention when the hubbs gets hungry and wants beans, all I have to do is thaw out the beans, add my seasoning, simmer and we have dinner in the amount of time it takes for the rice to cook.  Easy and delish!


The uncooked peppers stuffed with the quinoa/bean mix


Serves: 4-5

4 assorted color peppers, top removed and all insides taken out
2 cups cooked quinoa
1 cup cooked black  beans
3 chipotles in adobo sauce, chopped finely
1/2 teaspoon onion powder
1/2 teaspoon garlic powder
1/4 teaspoon black pepper
1/8 teaspoon cayenne pepper
2 teaspoons boullion powder
1 tablespoons olive oil
1/2 cup shredded carrots
1/2 small red onion, small diced, about 1/2 cup
3 cloves garlic, minced
Pepper tops, chopped
1 jalapeno, seeded and small diced
Fire roasted tomatoes with chipotles, to top peppers


1.  Preheat the oven to 375 degrees.  Place an 8" square baking pan on the stove and fill with 1/2" water.  Set aside until ready to  use.
2.  In a medium saute pan over medium heat, add the olive oil and allow it to become hot.  Add the shredded carrots, onion, garlic cloves, tops of peppers and jalapeno pepper.  Saute, stirring frequently for about 5 minutes, or until softened.
3.  In  the meantime, in a large mixing bowl, add the cooked quinoa and black  beans, the chipotles in adobo sauce, the spices (onion and garlic powder, black and cayenne peppers and boullion powder).  Add the cooked veggies and stir the mixture to coat. 
4.  Taste - it should taste a bit on the over-spicy side, but that's ok - it will mellow as it cooks.
5.  Fill the peppers with the stuffing, pressing down firmly to ensure the filling will not come out as it cooks.  Place the stuffed peppers into the prepared baking pan.  If the peppers have a tendency to tip over, prop them up with the other peppers.
6.  Cover the peppers with aluminum foil and bake for 35 minutes. 
7.  After the 35 minutes, remove the foil and top each pepper with a couple tablespoons of the fire roasted chipotle tomatoes. 
8.  Return the peppers to the oven without the foil and bake for an additional 5-10 minutes.
9.  Allow the peppers to cool for at least 10 minutes, then serve. 


Topped with fire roasted tomatoes


Dinner - stuffed pepper and a simple mixed green salad

Enjoy!


-Koko

Sunday, March 4, 2012

Homemade Hummus

Snack time!  Seriously!  Lately at my new job we have not had enough coverage in my department, and I have been having to cover the shifts, which means no break and long hours.  Since there are always customers around and I am working with food, I can't just stop and grab something to eat - it doesn't look good.  So, I came home from work yesterday super hungry, and since it was Hubbs' day off he didn't want to cook, so I had to throw something together really quickly.  I was looking through my fridge and found some cooked chickpeas and immediately thought hummus!  It's been a while since I've made it - I usually make the recipe out of the Candle Cafe's cookbook  - it is delicious and perfect every time - with my modifications of course!  I was too lazy to do that though, so I just improved this recipe and it turned out really nicely.  The only thing I did was toss the chickpeas into a pot of boiling water briefly to heat them up - hummus is much much much better when it is made when the chickpeas are hot.  While they were heating, I put all of the other ingredients in the food processor.  Once the chickpeas drained, I added those to the processor and blended everything. 

I was feeling hungry and lazy, but you can be really creative with this recipe.  You can roast a pepper, skin it and add it to the mix.  Or roast a head of garlic, squeeze out the bulbs and add it.  Or roast a tomato with some garlic and herbs and add it to the mix.  Or add a ton of garlic, lemon, parsley and finely chopped carrots.  Or add some sour cream and dill!  Yum - seriously the possibilities are endless!  Try whichever one suits your fancy at that moment.  Even kalamata olives!  Or chipotle peppers!

Homemade Hummus:


Creamy, Tasty, Spicy Goodness (That's cayenne & olive oil on top!)

Yields: about 3 1/2 cups

3 cups cooked chickpeas, preferably still warm
1/4 cup tahini
3 tablespoons lemon juice
1/4 cup extra virgin olive oil
2 teaspoons sea salt
1/4 teaspoon black pepper
1/2 teaspoon paprika
3/4 teaspoon cumin
2 pinches cayenne
3/4 cup filtered water, or as needed

1.  Place all of the ingredients in the bowl of a food processor, but leave 1/4 cup of water on the side in case you don't need it.  Pulse until the mixture is completely smooth and silky, adding more water as needed to achieve your desired consistency.  That's it!
2.  Eat immediately.  Serve with raw baby carrots, celery sticks, raw broccoli or cauliflower, or be bad and eat it with chips!

Enjoy!

-Koko

Friday, January 27, 2012

Greek Lentil Salad

Whenever I get my Vegetarian Times Magazine in the mail, I am like a little kid, seriously.  I go through the entire magazine, page by page, looking at the tasty pictures, going through the recipes and dreaming about preparing every dish out of it. What usually ends up happening though, is after looking at the magazine for a week or so, I retire it to the bookcase and maybe will look at it again several months later when I am reorganizing the book cases.  Then I'll sigh about the recipes again, but I usually don't make the recipes.  Not sure what was different this time around, but I saw this recipe for a Green Lentil Salad and decided I had to make it.  It was good that I was going to a picnic in Prospect Park, because I could use it all up, so I decided to make it and bring it along.  It was pretty decent and everyone seemed to like it, though I likely should have added the chopped cucumbers right before serving it, because they got a little soft from sitting in the dressing.  But it was a nice addition to the rest of the meal.  I probably wont make it again, but it was good.

Greek Lentil Salad:


A lot of Pretty Colors and Contrasting Textures!

Serves 6 as a side dish, 4 as an entree

1 cup French Green lentils, rinsed
2 bay leaves

1large shallot, small diced, about 1/4 cup
2 tablespoons lemon juice
1 small cucumber, seeded & diced, about 1 cup
2 medium tomatoes, diced, about 1 cup
1/4 cup chopped fresh mint
1 tablespoon extra virgin olive oil
1/4 cup crumbled mock feta

1.  Place lentils and bay leaves in a medium pot, cover with water, and cook over medium heat for about 25-30 minutes, or until lentils are tender. 
2.  Drain, remove bay leaves and allow to cool while preparing the rest of the salad. 
3.  Stir together the lemon juice and shallot in a medium bowl and allow to sit while prepping the remaining ingredients.  This will allow the bite of the shallot to mellow a bit. 
4.  Add the remaining ingredients to the bowl: the lentils, cucumber, tomatoes, mint and olive oil.  Toss together.  Add the mock feta and season to taste with sea salt and black pepper.  Toss gently. 
5.  Store in the refrigerator until ready to eat.  That's it!  Super simple!

Enjoy!

-Koko


Saturday, January 14, 2012

Rice and Garbanzo Bean Stuffed Peppers

I love stuffed peppers.  I really do.  I'm sure I would love other stuffed foods like tomatoes, zucchini, etc.  I know I like stuffed mushrooms and cabbage too.  Stuffed foods are really fun and homey and so simple to make.  I have always thought that my mom used to make them, which is why I love them so much and make so many different varieties.  I was making a variation of them for the family I cook for about a week ago, and I was running late and wanted to expedite the process.  So I called my my mum and asked her advice.  I was very surprised when she informed me that she never made us stuffed peppers or stuffed anything as kids, yet I distinctly remember eating them at home.  Of course, at the time they were filled with white rice and ground beef.  I asked her several times if she was sure she wasn't mistaken, but she was adamant.  I'm just wondering where or whom the hell I ate these peppers with that I distinctly remember eating as a child. 

It's so strange how you have memories of things that happened when you were a kid that actually didn't happen as you remember them.  Such a strange thing.  There is one particular incidence I have in mind that happened when I was about five.  I have an older sister who is over 10 years older than me and shared a room with me for several years when I was very young.  Have I ever mentioned that I am one of 6 kids?  I know it sounds crazy in this day and age, but I loved and still love every moment of it.  Well, one day my sister was cleaning our room, tossing all of my/ "our" toys into the toy boxes in the closet.  I was in the closet, going after a Cabbage Patch doll (did those things really ever exist?!) she had just thrown in the box, and I had the misfortune to stand up as she was tossing in a Barbie doll horse with sharp hooves.  Of course the hoof gashed the side of my head and cut it open.  I didn't cry until I saw that my hand came away covered in blood.  My mom took me to the hospital and I remember being a very good girl, and being rewarded by the doctors with a small stuffed smiley face and then later with some bubble gum by the foot from my mom.  When I brought up the incidence many many years later, my mom told me I was actually the worst in the hospital - screaming at the top of my lungs, crying, making a huge fuss, and just generally being a hideous pain.  Funny right?  Because I truly remember it happening that I was a good girl.  Long way of saying it's funny how you remember things differently than they actually happened, right?  I'll have to figure out where it is that I first ate those stuffed peppers.  It's driving me crazy that I don't know how it is I fell in love with them!

Stuffed Peppers:


The Cooked Pepper Filling


Serves 4

Stuffed Peppers:
4 medium peppers, assorted colors tops removed, insides scraped out and tops reserved
1/2 cup green pepper, small diced (from reserved tops of peppers)
1/4 cup orange pepper, small diced (reserved from top of peppers)
1 medium onion, small diced, about 1 cup
2 stalks celery, small diced, about 3/4 cup
2 small carrots, small diced, about 3/4 cup
1 jalapeno pepper, minced
2 cloves garlic, minced
2 cups cooked white or brown rice
1 cup cooked chickpeas
2 tablespoons sofrito
2 teaspoons vegetable bouillion powder
1/4 teaspoon cumin
1/8 teaspoon black pepper
1/8 teaspoon chipotle pepper powder
Daiya, for top of pepper, optional

1.  Place a wok on the stove over medium-high heat.  Add the oil and allow it to become hot.  Once it is hot, add the green, orange and jalapeno peppers, onion and celery.  Saute for several minutes, or until veggies are crisp-tender.  Add the minced garlic and cook until fragrant.
2.  Add the sofrito, boullion, cumin, black pepper and chipotle pepper powder.  Stir to coat the veggies.  Add the cooked rice and cooked garbanzo beans.  Stir all ingredients to coat.  Season to taste. 
3.  Place the empty peppers into a pan that has been lightly oiled.  Portion out the filling into the peppers, really packing it tightly into the pepper.  Only three of my peppers could fit into a square 8" baking pan, and my 9x13" pan was busy with a casserole, so I baked my peppers in batches.
4.  To help the peppers cook faster and more thoroughly, place about 2/3 cup of water in the bottom of the baking pan.  Cover the pan tightly with aluminum foil and bake for 25-35 minutes, or until the peppers can be easily pierced with a fork. 


The Raw Stuffed Pepper, Bottom of Pan Covered in Water


5.  If you would like, once the peppers are soft, remove the foil, top with daiya and return to the oven for about 5 minutes, or until the cheese melts.  These, you really should let cool for at least 10 minutes, because the peppers themselves will retain a lot of heat.  Once these cooled, I put them into leftover plastic 1 lb. deli containers - they fit perfectly, and were an easy, secure way for the Hubby to transport them to work for lunch the next day.

Enjoy!

-Koko

Tuesday, January 3, 2012

Happy New Year! Lentil Stew over Yellow Rice

Happy New Year!

Hope all is going well for everyone and you greet the year with great happiness and health!  I think this is the first year I have not actually written down any resolutions.  I have written them down since I was in my teens.  I know all of my resolutions and feel like I may actually have a greater chance of accomplishing them if I don't write them down and keep looking at them obsessively.  Cooking-wise, I definitely want to use my cookbooks a lot more, cook more healthfully and get in a lot more testing for Hubbs and my future cafe!  I'm just finishing taking some antibiotics (I always try not to take them and am so bummed when I end up having to!), which wreaked havoc on my digestive system at the end of last year and am just feeling better.  So I wanted to make something rather simple to digest, that didn't contain lots of spices or oil. 

So, thinking about the fact that I really need to start using my cookbooks, I went through several of them and found this base recipe from the Candle Cafe's cookbook, which I have had since way back when I was living in Michigan.  I was going through one of my plentiful phases of deciding to prepare every recipe (or at least the realistically decent sounding ones) in every cookbook I possess.  There are tons believe me!  One day I will inventory and count them, I swear!  Until then, I will just go to my shelf of cookbooks, select a book and find a recipe that I have most of the ingredients to prepare.  And today it just happened to be the Candle Cafe's cookbook.  I have made about half of the recipes in that cookbook by the way, with varying degrees of success and happiness.  Some recipes work and are very tasty and some look disgusting and unrealistic just by reading the ingredients - and then turn out disgustingly of course!  But for the most part, most of the cooked (not the baked) recipes are pretty good. 

This recipe was nice and simple, nice and tasty and really hit the spot for something hearty and filling.  And of course I modified it to suit my tastes.  You could easily make is as spicy as you want, which is what I would do on pretty much any day, but today my stomach didn't feel like making it spicy.  Funny story about looking at the picture I took for this recipe too.  Back when I was working at Vegan Divas as the Executive Pastry Chef, I would normally bring my food from home because where the kitchen was located (Long Island City, Queens) is extremely lacking in food, especially of the vegan variety.  Pretty much the only option is Subway.  I worked at a Subway for years when I was back in Michigan by the way and I will still eat there, if that is consolation, although I only have ever gotten the veggie sub, so ....  I have also worked at an Applebee's, also in Michigan and would not send anyone in my family there, so I'm sure you get it! 

Anyway, back to the kitchen in LIC.  One day I forgot/was too busy to pack my lunch, so Chico, one of he owners of the location we rented told me he would order some Spanish food for me - just yellow rice and cooked lentils - absolutely no meat.  Ok, just this once I was thinking.  It ended up setting me back about $10, and  I was eating some of the rice on its own, then opened the top off of the lentils.  My first spoonful came with a piece of a metal cleaning scrubby *gratis*.  Yuck!  Chico was horrified, saying that he had ordered from them for months and nothing of the sort had happened.  Just my luck I guess.  Just goes to show that I should always bring my lunch!  Anyway, try this - it is amazing, and no metal scrubbies!


Lentil Stew over Yellow Rice:


Hearty Lentil Stew over Yellow Rice


Serves 4-6

Yellow Rice:
2 cups white rice, rinsed
2 tablespoons annatto oil
1 teaspoon sea salt
4 cups water

Lentil Stew:
1 1/2 tablespoons olive oil
1 cup medium diced onion
1/4 cup medium diced celery
1/4 cup medium diced carrot
1 cup green lentils, rinsed and picked through

1 cup medium diced peeled potato
1 1/2 cups medium diced butternut squash
1 cup medium diced tomato
1 1/2 teaspoons sea salt

1 teaspoon dried thyme
1 teaspoon vegetable boullion powder
1/2 teaspoon black pepper
2 tablespoons tomato paste

4 cups filtered water


1.  Start preparing the lentil stew first.  In a large pot over medium-high heat, add the olive oil and allow to become hot.  Add the onions, carrots and celery.  Cook, stirring frequently, until slightly softened, about 5 minutes. 
2.  To the pot, add the lentils, potatoes, butternut squash and diced tomato.  Cook, stirring periodically for about five minutes, or as long as it takes you to gather the spices. 
3.  Add the sea salt, thyme, boullion and black pepper.  Stir to coat.  Add the tomato paste and also stir to coat. 
4.  Add the filtered water and lower heat to medium-low.  Cook uncovered, stirring periodically until lentils and vegetables have softened, but not become mushy. 
5.  While the stew is cooking, prepare the rice.  In a medium pot over medium heat, add the annatto oil and allow to become hot.  Once it is hot, add the rinsed rice and toast, stirring frequently until the rice is no longer wet.  Add the sea salt and water.  Cover the pot with a lid, lower the heat to low and allow to cook until the rice is tender, about 20 minutes.
6.  Season the stew to taste and serve a potion of the stew over top of the cooked yellow rice. 

Enjoy!

-Koko