Wednesday, September 26, 2012

Spicy Chorizo Calzones

Sometimes when Hubbs and I pass the pizza store on Church Avenue as we do our grocery shopping, he thinks he needs pizza suddenly, but costing $3 a slice (meaning just sauce and cheese - Hubbs is not vegan, remember), it can add up.  And what quality of ingredients to they really use anyway?  I am always telling him that I would much rather make it myself with quality ingredients and have him eat something made with love.  So he got the brilliant idea the other day to make calzones.  I'm not sure if he's even ever had them before, but saw them in the pizza store, got really excited and wanted them. 

I have definitely mastered the pizza thing, but I've never made a calzone before.  So, I of course went online and followed some instructions off of someone's blog (of course I can't remember which blog now).  I really liked how they weighed out the dough to keep things consistent.  They suggested using 4 oz. pieces of dough.  I've made the dough a thousand times before but have never weighed it, so that seemed like a decent number to me.  Now, however, thinking back, that was a HUGE piece of raw dough, because it still had to proof, then bake, which would make it about 2 times the size. 

So, using a double batch of pizza dough, I ended up making 8 incredibly giant calzones, 3 of which I ended up freezing, because once we ate them for several days straight, we didn't want to see them for a long time to come!  So here is the process I went through making them for the first time.  I will definitely make them smaller next time and not fill them as full, because several of them lost their delicious cheesy filling.  We'll just have to wait till next time to see how much better they will be.  They were crazy delicious though, especially when dipped in warm homemade marinara sauce!  Yum!

Spicy Chorizo Calzones:

Yes, I am a GIANT calzone, but made Hubbs happy!

Pizza Dough:
1 cup warm water, not too hot
2 teaspoons instant yeast
1 teaspoon turbinado sugar
1 tablespoon olive oil
1 teaspoon sea salt
3 cups unbleached flour

Toppings:
vegan cheese, shredded
sauteed green peppers and onions
homemade marinara sauce
vegan sausages, cooked and sliced

1.  To prepare the dough: place the water, yeast and sugar in the bowl of a stand mixer and whisk to combine.  Allow the mixture to sit for 5 minutes until bubbly.  If it does not bubble up, the yeast may be dead, so start over.
2.  Into the bubbled up mixture, add the olive oil and sea salt.  Mix again.  While the stand mixer is working, add the flour in 1/2 cup increments until it is all incorporated.  Mix for a couple minutes, until when the dough is touched, it springs back. 
3.  Place a towel over the dough, place it in a warm place and allow it to double in size, about 45-60 minutes. 
4.  In the meantime, prepare the rest of the ingredients: saute the veggies, prepare the marinara sauce, shred the cheese, saute and slice the sausages.
5.  Punch the dough back down and separate the dough into 2 ounce pieces.  Generously flour the countertop, roll the piece of dough in the flour and roll out into a nice sized circle. 
6.  Place the cheese, veggies, sausages and marinara in the very center of the circle.  Do not overfill.  Carefully place the top of the dough over the center, and using a fork, press the dough together to create a good seal. 
7.  Finish the rest of the calzones as above.  Once the calzones are filled, place on a oiled baking sheet and again cover with a towel.  Allow to rise for about 30 minutes.
8.  Preheat the oven to 375 degrees.
9.  Once the calzones have risen again, place in the oven and bake for 15-20 minutes, or until the dough has cooked all the way through and the top is nice and golden.  Let cool for several minutes before serving.


The uncooked pizza dough with the "cheese" & sauteed veggies
& my flour bin in the background (didn't notice it there before)


Topping with the cooked vegan sausages


Homemade Marinara


Sealed the calzone


After the calzone baked, all the cheesy goodness
seeping out the side.


Fresh baked calzone sliced in half for the Hubbs
 
How freaking delicious does this look??


Enjoy!

Koko

Homemade Marinara Sauce

I know there are a lot of people out there that always but their own marinara or pasta sauce, either because they think they are too busy or because they think marinara is difficult to make.  I don't think there should be an excuse to buy marinara ever again, because this recipe is so simple and so quick.  The only vegetables you actually have to cut/chop are the onions and the garlic.  And it only needs half an hour to cook, most of which is inactive time.  This means that you are free to do something else while the sauce is cooking itself.  Keep in mind that this is a very basic, but incredibly tasty marinara sauce.  Most of the time I make this exact recipe, but I have been know to add things to it depending on my mood.  I have added chiffonaded fresh basil at the very end of cooking, Trader Joe's Soy Chorizo to make a spicy marinara, as well as a vodka sauce - add vodka and a cream substitute (unsweetened soy or almond milk works well), and a marinara with red wine.  There are so many options, but start off by making this one.  And if you like your sauce smooth, simply use an immersion/hand blender and blend it right in the pot, or allow it to cool slightly and blend it in the blender.  So easy.  Another great idea is to at least double or triple the recipe.  Use what you need and freeze the rest in pint and quart containers.  The next time you need marinara in a hurry, you won't have to reach for that bottled sauce - simply place the frozen marinara in a small pot over medium heat, and you will have a hot homemade sauce in ten minutes. 

Marinara:

Large Bowl of Homemade Marinara!  Yummy!

Yields: 1-1 1/2 quarts

2 tablespoons olive oil
1 large onion, small diced, about 1 1/2 cups
8 garlic cloves, minced
4 cups of cooked tomatoes, crushed with your hands
2 tablespoons tomato paste, optional - makes sauce thicker
1 teaspoon sea salt
1/4 teaspoon black pepper
1 1/2 teaspoons dried basil
1 1/2 teaspoons dried oregano
1 teaspoon dried thyme, crushed with fingers

1.  Place a large pot over medium heat, add the olive oil and allow it to become hot.  Once the oil is hot, add the onion and garlic and cook, stirring periodically, for about 10 minutes, or until golden and fragrant.  Now add the spices: sea salt, black pepper, dried basil, oregano and thyme.  Stir to combine.  You could add the spices to the sauteed onions and garlic, or you could wait until after adding the tomatoes - whichever you prefer.  I prefer to add them to the sauteed veggies because I feel that it helps to evenly distribute the spices. 
2.  Now add both the crushed tomatoes and tomato paste, stirring until all the ingredients are well combined. 
3.  Allow the marinara to come to a simmer.  Once the mixture begins to simmer, turn the heat down to medium-low.  Allow the marinara to gently simmer for about half an hour, stirring periodically.  At the end of the half hour of simmering, taste the marinara and adjust spices or salt level. 
4.  The marinara is now ready to use.


Close Up of the Deliciousness!


Enjoy!

-Koko

Wednesday, September 12, 2012

Vegan Takeout in Brooklyn: "Shrimp" Pad Thai & Sesame "Chicken"

Hubbs and I try not to eat out a lot.  Here in NY eating out can happen a lot and is so convenient that you're eating out before you even think about it.  Unfortunately, with our busy schedules, sometimes it's unavoidable.  Thankfully we have this place in the neighborhood that delivers right to our apartment.  It's called Zen Vegetarian House.  It's an Asian Fusion restaurant that has pretty tasty food, you just have to watch out for the overly fried stuff.  Hubbs being from a tropical place right on the water loves everything to do with fish.  Even vegetarian fish (I know it doesn't seem to make sense, but it tastes very realistic).  So he ordered the Shrimp Pad Thai and I ordered the Sesame Chicken.  I'ev used the vegan shrimp before in recipes I've made at home, so I know how tasty it is, and that was my suggestion for the Hubby to order.  He loved it!

I used to absolutely love the sesame chicken offered at Chinese restaurants back in Michigan when I wasn't vegetarian.  I've tried to make the sauce several times and serve it over seitan, but it isn't exactly the same thing.  However, when I ordered it for the first time at Zen, I was amazed that it tasted exactly like what I remembered it tasting all those years ago.  So, that's another challenge I think I should take on coming up - figuring out how to make sesame sauce so I can make my own vegan sesame chicken using the soy chicken I buy at May Wah in Chinatown.  The best place ever - check it out!


"Shrimp" Pad Thai


Sesame "Chicken" with Broccoli

Enjoy!

-Koko

Tuesday, September 11, 2012

8/31/2012: The Art of Baking & Decorating Vegan, Gluten Free, Soy Free Cakes Class

I have been very busy lately with teaching my vegan, gluten free, soy free baking classes at the Natural Gourmet Institute in Manhattan these last few weeks.  I have had one class per week for the last three weeks, which doesn't seem like a lot, but that amounts to lots of organizing and planning and 16-18 hour days.  But I love teaching.  It has become such a great passion and excitement in my life and I only wish I could do it more.  I also love that I am always meeting new and interesting people from so many different walks of life.  I really enjoy this little part of the class I do in the beginning, where I ask all of the students to give a little introduction about themselves and why they are taking the class. I am always surprised by the wide range of answers.  Sometimes it is because of food allergies or sensitivities.  Other times because people want to learn to bake vegan or gluten free, or both.  Sometimes there is also a person in their lives that is following a certain diet that they need to accommodate; they have a business where customers are requesting gluten free and they want to learn to incorporate dishes into their business, etc.  I love to hear their stories!

As I have said in the past, with my schedule being pretty crazy with work, menu writing, recipe testing and business plan writing, it does not leave a lot of time for blogging.  However, I am still taking the same volume of pictures, maybe more as my husband claims (insert roll of eyes) and I have at least 200 blog posts half finished with the recipes written down and/or the pictures hanging around.  So I really want to get these recipes or pics out there for you guys to check out, so perhaps for a while I am going to be posting some with pictures, some with recipes, and some with a short blurb.  I'll see how that works and go from there. 

Until then, take a look at some of the cakes my students decorated in the gluten free cake and cake decorating class I taught on August 31st.  Until recently, I had been taking my own pictures of the cakes or pastries the students make, but I feel like that takes time away from the students, so lately I have been having one of the amazing assistants take the pictures throughout the class, and that has been a tremendous help.  I am so thankful for those ladies!  Couldn't do my classes without them, that is for sure!!

Cakes Decorated by my Students:

Pineapple Coconut Cake with Toasted Coconut Frosting


Demo Cake - I know it isn't pretty, but it shows the different
techniques we were practicing.


Strawberry Swirl Cake with Strawberry Creme Frosting,
Garnished with Hazelnuts


Strawberry Swirl Cake with Strawberry Creme Frosting


Hazelnut Cake with Maple Frosting & Chocolate
Frosting Decorations


Hazelnut Cake with Maple Caramel Frosting


Spiced Banana Cake with Creamy Chocolate Frosting


Enjoy!

-Koko

Tuesday, August 21, 2012

Gluten Free Vegan Masterpieces Class in Manhattan

I taught a class last night at the Natural Gourmet Institute in Manhattan.  As usual when I teach the classes at the school, it was a vegan, gluten-free, soy free baking class that also had several ingredient restrictions - such as no refined sugars, oils or flours, as well as utilizing mostly organic ingredients.  This is definitely great, but forces me to be very creative and imaginative with the recipes and ways to present the dishes.  In the class, we made 7 different recipes and I brought along a gf bread I have been working on testing.  I received great reviews on the bread, which I am very happy about, but I think it still needs a little tweaking to get it exactly where I want it to be, but it is definitely in the right direction.  I can't wait to be making it into multigrain bread, "rye" bread for my tempeh reuben (it is so ridiculously good, especially when I add tomato and avocado.  YUM!) and all kinds of flavors in between.

I'm not going to share any recipes at this point, perhaps at a later date, however, I will share some of the pictures I took, and am hoping one of my assistants in the class that took a ton of pictures will share hers with me and I can post them later.  It was a blast and I enjoyed meeting and working with everyone in the class.  Till next month, and the next baking class I teach at the school!


Coconut Raspberry Roll Cake


An aerial view of the Roll Cake


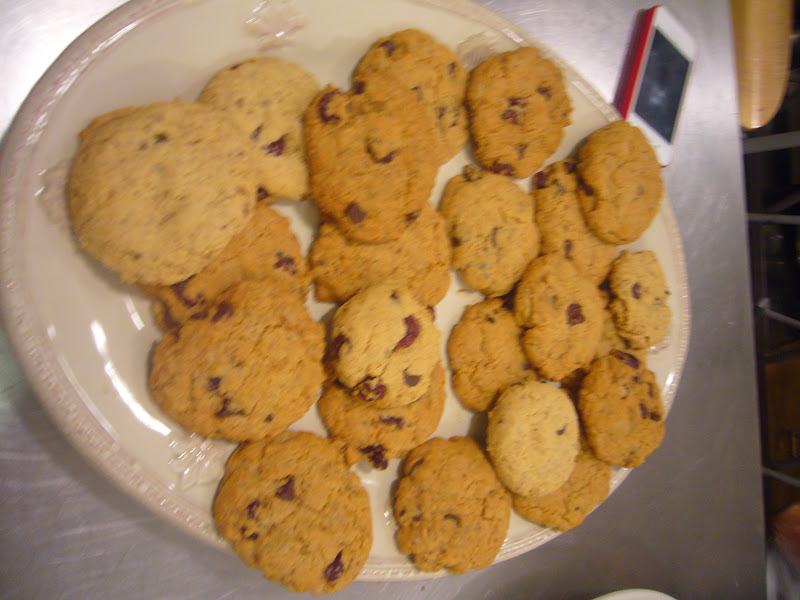
Chocolate Chip Cherry Cookies - a little blurry


Peach Coffeecake with Pecan Sucanat Struesel Topping


Chocolate Cupcakes with Coffee Frosting
Iced by almost everyone in the class!


Gluten Free Yeasted Bread test!


Pistachio Thumbprints


Lemon Blueberry Loaf


A "Sample" plate.  Looks like a plate of dessert for dinner!

Enjoy!

Koko

Sunday, August 12, 2012

Homemade Lemonade

This is something the Hubbs and I have been having a lot of this summer.  Actually we can't seem to get enough of it.  It is so refreshing and not overly sweet - it's great in this hot hot heat!  I've done a lot of different things to it like adding other concentrated juices such as tart cherry, cranberry and blueberry.  I've also put the lemonade in the blender with some fresh berries, mostly strawberries and raspberries, blended till smooth and had an awesome frothy, fruity lemonade.  The possiblities are endless.  Hubbs suggested mango to try next - sounds good! 

Homemade Lemonade:


Fresh Lemonade garnished with lemon slices.

Lemonade:
1/4 cup turbinado/raw sugar
juice of 1 1/2 lemons, rolled on the counter to soften
2 cups filtered water

My mom always sends me amazing homemade canned goods from Michigan and I have also done my share of canning here in NY, so I have a ton of glass jars, which is what Hubbs and I store most of our food and all of our drinks in. 

1.  Juice the lemons and place in a jar.  Add the sugar and filtered water, cover with the lid and shake until the sugar dissolves - this will take some time because the sugar is large granulated. 

That's it!  So easy and tasty!

Enjoy!

Koko

Friday, August 10, 2012

Best Dinner Ever! Appetizers!

My Hubby and I went on an amazing vacation to Michigan to visit my family and came back to NY 1 1/2 weeks ago.  It's sad though, because it almost feels like it was a dream and that I never left ny at all.  I did actually get a little color and a disturbing flip flop tan, but that has unfortunately already disappeared.  As soon as Hubbs and I landed in MI and were greeted by my mom, dad and younger brother Danny, we knew immediately that ny was no longer the place we were meant to be.  We've been feeling for a while that we are tired of ny and ready to be around family, and it only cemented it in our minds that we need to be there.  My older sister has a 2 1/2 month old baby boy and my older brother and his wife are expecting their first baby (a girl!) on Thanksgiving.  I have never seen my sister pregnant (and this was her 3rd and final child!) and was blessed to see my sister-in-law with the bump (she's almost 6 months along).  The unfortunate thing is that I will not see my brother and his little one until she is 9-10 months old or so. Sad.  So those were a couple of the motivating factors, but certainly not all.  I miss my family.  My oldest brother's daughter is going to be 13 in November - I can literally remember the day she was born and we have always been very close. 

We are also getting close to starting our business - a vegan cafe, and have decided to open it in Traverse City, Michigan.  We have finished our menu, have tested and perfected it all, and are now working on the baked goods.  It is the most exciting and stressful thing ever, but we cannot wait to get started.  Lots of work on the business plan and lots and lots of cooking in this oppressive humidity and heat!  I have decided not to renew my teaching contract at the Natural Gourmet Institute in Manhattan when it finishes in March, and as soon as our lease is up at the end of July next year, we will be moving to Michigan!  I am so excited and cannot wait!

Until then, however, I'm gonna keep working on all the business aspects, keep cooking and baking and see my friends as much as possible.  And in this terrible heat, I do not want to be in the kitchen unless I'm testing recipes.  So dinners have been simple: a lot of sandwiches and salads lately.  This time, however, I wanted to have an appetizer dinner and just eat a little bit of this and that and it was a blast, Hubbs definitely thought it was fun, and I'm glad the only time I spent in the kitchen was slicing the cheese for him, slicing the bread and putting everything in ramekins.  Best dinner!

Appetizer Dinner:


So simple and tasty!
What I Used:

Baguette, sliced on the diagonal
Homemade dill pickles (sent to me from Michigan, made by my mum)
Assorted Olives
Earth Balance, Yellow Mustard
Sliced Cheese (dairy) for the Hubby
Sliced Daiya for me
Artichoke Salad (which for some reason was not in the picture)

Use whatever you'd like and have a super easy dinner!

Enjoy!

Koko