Saturday, January 29, 2011

Vegan Baking Basics: Pies and Tarts

I taught another of the vegan baking classes in Queens, and in this one, we focussed on pies and tarts (though mostly pies).  It's amazing to realize how many pies 2-3 people can bake in a couple hours.  It's also amazing how after inhaling the sugar and not eating anything while baking, that you can still get a sugar high!  When it was time to taste test all the pies, I literally only took one small nibble from each pie, and even then it was a lot.  That's not to say that the pies were too sweet or anything, just that when you are baking over and over again, the sugar is a little intense!  We made 6 pies and enjoyed all of them.

The next time I saw the ladies, two days later, they told me that almost all of the pies were eaten.  6 pies in two days!  Wow!  But, then they told me they took them to work, gave some to neighbors, etc. and everyone loved them.  They also have several vegan friends that are used to not being able to eat a lot of things when people bring them in, but were very happy to learn they could eat every one of the pies.  If they want to hang out for the rest of the duration of the classes, they will be eating a lot more vegan sweet things!  My favorite, and the simplest of the recipes by far was the Banana Creme Pie, which is funny because I am forever saying that the only thing I like that is banana flavored is the banana itself.  But this was amazing, and when I went home, I was daydreaming about it.  I will really have to make it, and sooner rather than later!  Yum!

Here is a list of all the pies we made:

Banana Creme Pie:

Graham Cracker Crust, Banana Pudding and Fresh Bananas on Top
 Apple Crumb Pie:

Whole Spelt Crust, Apples Tossed in Cinnamon & Nutmeg and
Topped with a Buttery Crumb Topping 
 Keylime Pie (looked ugly, so we didn't photograph it)

Lemon Meringe Pie: (the meringue part was disgusting, so we left it off)


Graham Cracker Crust, Creamy Tart Lemon Filling
 Coconut Custard:

Whole Spelt & Oat Crust, Creamy Coconutty Filling with
Shredded Coconut on Top


Pecan Pie:
Whole Spelt Crust with Maple Filling & Caramelizing of Sugars on Side


The Spread: (Clockwise from Banana on top) Banana Creme,
Lemon Meringe, Coconut Custard, Apple Crumb, Pecan Pie

Banana Creme Pie:

Yields 1-9" Pie

Crust:
1 1/2 cups graham cracker crumbs
2 tablespoons agave
2 tablespoons nondairy milk
2 tablespoons canola oil

Filling:
8 oz. Tofutti Cream Cheese
1 package (4-serving size) dry mix natural vanilla or banana instant pudding
2 cups sliced bananas (about 2 medium)
2 cups non-dairy milk


1.  Preheat oven to 350 degrees.
2.  Oil a 9”pie pan. In a medium bowl, mix the graham cracker crumbs, agave, nondairy milk, and oil. Press in bottom and side of pie plate. Bake 8 to 10 minutes or until golden brown; cool.
3.  In a medium bowl, add the cream cheese, and using a hand mixer, mix in the nondairy milk until smooth.  Add the dry pudding mix and beat for about 1 minute or until thickened. Refrigerate for a few minutes.
4.  Spread half the pudding mixture in baked crust. Top with 1 cup of the bananas. Spread remaining pudding mixture over bananas. Cover and refrigerate about 1 hour or until chilled. Top with remaining bananas just before serving.

So Simple and So Delicious!

Enjoy!

-K

Wednesday, January 26, 2011

Veggie Soup with Chinese Noodles

This is by far my favorite quick go-to soup whenever I am short of time or want a soup that will not fill me up too much.  I have been making this soup since I moved to the city 3 years ago.  Truthfully, I used to make this soup when I was first living in Manhattan, spending so much money on my rent because I was terrified if I went outside of the city, I would be in terrible danger.  What a crazy girl!  I was convinced that Queens, Brooklyn and the Bronx were the worst possible places one could find themselves in.  I was of course severely wrong, but didn't know it at the time and was busy paying my multiple thousand dollar-a-month rent.  That meant I had to be careful about everything else I spent money on, including and especially food.  There was a market four blocks up from where I lived, but I would purchase one plastic bag and the total would be more than $50 and I could barely make a meal and wonder where all the money went.  And don't get me wrong, I am a very thrifty shopper, it's just that there wasn't any possible way for me to be thrifty when I was paying ten times more that I should just because I was living in the city

It was about that time that my then roommate and I found out about China Town.  It was so crowded and the hundreds of Chinese people pushing you and themselves through the thick crowd initially really freaked me out, especially all the people shouting in heavily accented English "miss miss, handbag! handbag! dvd! dvd!", followed by shoving the item in my face.  But I quickly got used to it and then found my little place over on Mulberry Street that I have gone to now for over three years for my stock of wonton wrappers, nut milk bags, rice crackers, sesame oils, etc.  I love that little place, and that's where I got the idea for this soup after having purchased 3 gigantic plastic bags of groceries for like $25 and being able to eat for 1 1/2 weeks.  So here is this amazingly simple, delicious soup!

Veggie Soup with Chinese Noodles:


Deliciously simple soup with lots of red pepper flakes!
 Serves 4

2 tablespoons olive oil
1 large onion, small diced, about 1 cup
2 cloves garlic, minced
2 medium carrots, peeled and chopped
1/2 green pepper, small diced
6 large kale leaves, thick center removed and leaves thinly sliced
5-6 cups water
2 tablespoons no-chicken boullion base
1 teaspoon toasted sesame oil
2 circles/nests of quick cook Chinese Noodles or noodles of choice
Sea salt and black pepper to taste
red pepper flakes to taste

1.  In a medium-large pot, heat the oil over medium heat.  When it is hot, add the onions, garlic, carrots and pepper and saute for a few minutes. 
2.  Add the water, boullion, salt and pepper and bring to a boil.  Cook just until carrots are tender.  Add the quick cooking noodles and the kale and cook for 1-2 minutes or until just tender.  Add the sesame oil and season to taste.
3.  Ladle the hot soup into soup bowls and top with as many pepper flakes as you can handle.  Serve!  It's simple, quick and delicious every time!

Enjoy!

-K

Sunday, January 23, 2011

Vegan Chicken Patty on a Bun with Seasoned Broccoli, Beet Salad, Edamame

I'm going to be attempting to cook for one over the next couple of weeks, and so far, I've done better than I thought, but certainly have still made enough for at least two.  I keep saying that my mum is to blame because she would always cook enough to feed an army when I was growing up, and it's hard to cook small amounts when you're used to seeing that.  But, I did make something amazingly delicious today that really hit the spot.  One of my coworkers made this dish that was super simple, but super flavorful and I have tried to make it a few times, but I always overcook the broccoli and that completely changes how the dish tastes.  Broccoli, by the way, is my favorite vegetable.  I have been thinking about that a lot lately.  It's really a difficult thing to do to choose my favorite vegetable because I pretty much love everything out there.  But, there's just something about the versatility of broccoli and I love how the florets soak up all the juices and are so flavorful.  Yum!

So today I was going through the fridge, trying to picture what I could make, and after eating a slice of lasagna for breakfast- yes lasagna!, I was looking for something that would feed only one.  There was broccoli and some leftover boiled beets, then I remembered I had purchased these veg chicken patties, and just decided to go with it and throw it all together, and was very happy with the results.

Vegan Chicken Patty on a Bun with Seasoned Broccoli, Beet Salad & Edamame:


Vegan Chicken Patty on a Bun with Seasoned Broccoli, Beet Salad & Edamame
 Serves 2

Beet Salad:
2 medium beets, cooked, quartered and sliced thin
2 tablespoons apple cider vinegar
1 tablespoon extra virgin olive oil
1/8 teaspoons sea salt, or to taste
1/8 teaspoon black pepper
3 cloves garlic, minced

1.  Place the cooked beets in a medium bowl (they do not have to be warm- the salad is really good cold too), and add the vinegar, olive oil, salt and pepper.  Season to taste.  Mix until all the ingredients are well coated.  Sprinkle the top evenly with the raw chopped garlic.

Seasoned Broccoli:

1/2 head broccoli, stems peeled and chopped & florets separated
1 tablespoons olive oil
3 cloves garlic, chopped
1/2" ginger, peeled and small chopped
1 1/2 tablespoons shoyu/tamari
1/4 teaspoon  red pepper flakes
sea salt and black pepper to taste

1.  Bring a medium sized pot filled with water to a boil.  Drop in the broccoli and cook just until bright green and still crisp, about 1 minute.  Drain thoroughly. 
2.  Heat a wok over medium-high heat.  Add the olive oil and allow to heat.  Add the garlic and ginger and cook until fragrant.  Add the drained broccoli and saute until the garlic and ginger are cooked, about 1-2 minutes. 
3.  Sprinkle the red pepper flakes over top, followed by the sea salt and black pepper.  Stir to coat.  Add in the shoyu/tamari and stir until all the broccoli is coated.  Serve hot - so simple and delicious.  Could also add julienned red peppers in the second step when adding the garlic and ginger to the work for some extra flavor.

I just sprinkled sea salt over the edamame, and served the no-chicken patty with veganaise, red onions and tomatoes on the bun.

Enjoy!

-K

Friday, January 21, 2011

Vegan Baking Basics: Cakes and Decorating

I have been teaching these vegan baking basics classes in Queens for the last several weeks.  I have two more classes left to teach in this category, including gluten free baking and ice creams and sorbets.  Since one of my specials happens to be gluten free baking, I am excited to be teaching that class, but I also am in love with vegan ice creams and cannot wait to eat the things we make from that class. 

So, today my Hubby left for his home country for a few weeks, and to keep my mind off missing him, I have been trying to keep myself extremely busy.  After I dropped him off at the airport, I went right to work, about 2 hours early, and when work was finished, immediately went to teach the vegan baking basics class.  I spent a couple hours over what we were supposed to spend, which was great, and allowed us to make a lot of things.  Everything turned out so beautifully and the cakes that the ladies iced turned out beautifully!  Plus, everyone had so much fun, making everything worth it.

Here is a list of all the things we baked:

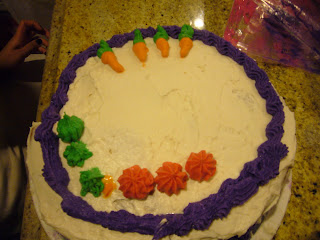
Red Velvet Cake with Buttercreme Frosting (See Picture Below)

Double Chocolate Fudge Cake with Chocolate Frosting:


Decorated Courtsey of J!


Lemon Cake with Coconut Frosting:

Decorated Courtesry of R!


Cheesecake with a Walnut Oat Crust:

Delicious!  Was too hot to take out of pan.
 
Tiramisu!:

Two Layers of Coffee Syrup Dipped Cake, Two Layers of Creme, and Cocoa

Strawberry Shortcake (forgot to take picture)

Vanilla Blueberry Loaf with Streusel Topping:

So Soft and Moist with Bites of Fresh Berries! 

Decorating Techniques:

Different Piping/Decorating Techniques.

Everything turned out beautifully!  I am just going to post one recipe, otherwise we would be here all day!  Here is the recipe for the Red Velvet Cake with Buttercreme Frosting:

Red Velvet Cake with Buttercreme Frosting


Red Velvet Cake with Different Fun Decorating Techniques.  A little overboard I know!
 Yields: 1 3-Layer 8" Round Cake

Cake:
3 1/2 cups unbleached flour
2 teaspoons baking soda
1 teaspoon sea salt
1/4 cup cocoa powder
1/2 cup maple syrup
1/2 cup agave
1 1/2 cups soymilk or other preferred nondairy milk
2/3 cup canola oil
1 1/2 tablespoons apple cider vinegar
1 tablespoon vanilla extract
1 1/2 teaspoons red food coloring, or as desired


Frosting:
1 cup organic non-hydrogenated vegetable shortening
3 cups florida crystals powdered sugar
1 tablespoon vanilla extract
1/4 cup soymilk or preferred nondairy milk

1.  Preheat oven to 350 degrees.  Generously oil 3 8" round cake pans.  Set aside.
2.  Prepare the cake first: in a large bowl, place all the dry ingredients: flour, baking soda, sea salt and cocoa powder.  Whisk until all ingredients are combined. 
3.  In the center of the dry ingredients, place all of the wet ingredients: maple syrup, agave, soymilk, oil, cider vinegar, vanilla extract and red food coloring.
4.  Whisk until all the ingredients are well incorporated and a smooth, thick batter forms.  Remember to be careful when working with food colorings, as they can stain hands and clothing.
5.  Evenly divide the batter between the three pans, using measuring cups if necessary.  Twirl the pans until the cake batter is evenly distributed throughout the pans. 
6.  Bake the cakes for 20-25 minutes, or until a toothpick inserted into the center comes out clean and the top springs back when lightly touched. 
7.  Allow the cakes to cool in their pans for about 10 minutes.  Remove the cakes from their pans and continue cooling on cooling racks until they are cool all the way through.
8.  In the meantime, prepare the icing.  In a medium bowl, place the shortening.  With a hand mixer set on medium speed, mix the shortening until light and fluffy, about 2 minutes.  Add the vanilla extract and nondairy milk and mix on low speed until incorporated and fluffy again.
9.  Add in the 3 cups of sifted powdered sugar and over low speed, mix until all the sugar is incorporated.  The frosting should be light and fluffy.  Set aside until ready to use - this frosting should not be refrigerated until the cake has been iced or it will firm up too much.
10  Ice the cake as desired, stacking the layers one on top of another.  Decorate as desired.  Delicious and beautiful!


The Spread.  A nice job (and fun time) overall.


Enjoy!

-K


Monday, January 17, 2011

Vegetable Lo Mein

I love Chinese Food.  I used to eat it all the time.  I have been trying to watch the budget a little more lately and so have been trying to make some of my favorite things at home.  I have definitely mastered the fried rice, dumplings, egg rolls and some other items, but what I would really like to make is the vegetable lo mein.  I'm not sure what it is about it that makes me so happy or it so delicious, but do I love it!  The vegetables mixed with the pasta and all that soy sauce - yum!  So, that was my goal tonight and although it was great and delicious, it wasn't Chinese Food lo mein.  The more the Hubby and I were discussing it, the more we decided it must be the oil coating it that makes it so flavorful - we were definitely trying to be more careful with our amount of oil added.  I added some simply seasoned tempeh to the top for some added protein and served it with lots of additional soy sauce and tons of red pepper flakes on top.  The hotter, the better!

Vegetable Lo Mein


Serves 4-6

12 oz. lo mein noodles, cooked until al dente

2 tablespoons olive oil

1 onion, cut in half and thinly sliced, about 1 cup
2 stalks celery, sliced thinly, about 1 cup
2 medium carrots, peeled and julienned, about 1 cup
1 cup snow peas, tough ends removed
1/2 green pepper, julienned, about 1/2 cup
1/2 red pepper, julienned, about 1/2 cup
1/2 cup broccoli florets
4 cloves garlic, minced
2 teaspoons minced ginger
5 tablespoons tamari/shoyu
1 1/2 teaspoons toasted sesame oil
1/4 teaspoon black pepper
1/4 teaspoon red pepper flakes
Seasoned tempeh, tofu or seitan to serve

1.  Begin by preparing all of the vegetables.  It takes the most time, and once they are prepped, the remainder of the recipe will come together in a snap.
2.  Cook the noodles according to package directions.  Drain and rinse in cold water.  This is an essential step to prevent the noodles from leaving their starchy residue all over the vegetables.
3.  Heat the olive oil in a wok over high heat.  Add the broccoli and snow peas and cook for 2-3 minutes - these take the longest time to cook.  Add the remaining vegetables, including the garlic and ginger, stirring frequently.  They will only take a matter or minutes to cook, as you want them to still have a crunch.
4.  Add the tamari or shoyu, toasted sesame oil, black pepper and pepper flakes, tossing to coat.  Add the cooked noodles to the vegetables in the wok and toss very well, being sure the sauce and vegetables are well incorporated.
5.  Top with the seasoned tofu, tempeh or seitan and serve with additional tamari/shoyu and sesame oil on the side.  (I used seasoned tempeh in this picture, which I simmered in a mixture of garlic, ginger, onions, shoyu, bay leaves, black pepper and apple juice, then pan fried until golden.)

Enjoy!

-K

Friday, January 14, 2011

Homemade Pizza!

There is nothing better than pizza.  Homemade pizza that is!  The stuff you buy out is just so disgusting and so bad for you and you have no idea what the ingredients really are or where they come from.  My family has made homemade pizza for as long as I can remember.  Don't get me wrong, they definitely still go out for pizza, but as a bonding family activity, they make pizza once in a while.  One of my older brothers initially came up with our recipe for the crust.  You see, all my brothers are great cooks, with the exception of the baby, who is more interested in cars and car parts than food.  Seriously.  Anyway, when it's time for pizza night, my mom, like usual, overdoes it and we end up with like 6 pizzas for 8 people.  So, we eat cold pizza everyday for breakfast, lunch and dinner for like a full week.  At least, that's what it was like when I was growing up.  She would always say that she cooks enough for an army, and she's right.  It is just the Hubby and I, and yet I cook like there are 4 of us- it's hard to get that quantity cooking out of my mind. 

Generally, when we make pizza night, we like to invite a couple people over for beer and movies.  It's lots of fun and we try as hard as possible to consume both pizzas, but even with 4 or so people over, it's not easy.  So, as in the days when I was a kid, we spend the next several days eating pizza for every meal.  Pizza for breakfast!  This recipe makes enough dough for 2 large pizzas and the sauce makes enough for 3.  You can store the rest of the sauce in the refrigerator and add it to pasta or other dishes.  The sauce will be a touch salty, but that is what we want, because it needs to season the entire pizza.

Homemade Pizza


Yields 2 large Pizzas

Pizza Crust:
4 teaspoons yeast
2 teaspoons raw sugar
2 cups warm filtered water

1 tablespoon sea salt
2 tablespoons olive oil

6 cups unbleached flour
coat in 2 tablespoons olive oil.  place towel over bowl and let rise for 1 1/2 hours

Pizza Sauce:
1 tablespoon olive oil
32 oz. canned tomatoes
1 cup small diced onions
4 cloves garlic, minced
1/4 teaspoon onion powder
1/4 teaspoon garlic powder
1 1/2 teaspoons dried basil
1 1/2 teaspoons dried oregano
1 teaspoon dried thyme, crushed with fingers
1/2 teaspoon dried rosemary, crushed with fingers
1/2 teaspoon sea salt
1/4 teaspoon black pepper

Toppings, as desired
Daiya or Follow Your Heart, shredded
Chopped:
Onions, Green Peppers
Sliced Roma Tomatoes, Olives, Mushrooms
Fresh Garlic
Mock Pepperoni or other protein

1.  To prepare the pizza dough, in the the bowl of a stand mixer, place the warm water, yeast and sugar and stir to combine.  Allow to sit for 5-10 minutes or until bubbly.
2.  Add the sea salt and olive oil and stir to combine. 
3.  In 1 cup increments, add the flour until all 6 cups are incorporated and the dough is extremely thick.  Continue mixing until the dough becomes a round smooth ball and bounces back lightly when touched.  Alternatively, if you do not have a stand mixer, mix the dough by hand, and knead dough on a floured surface until it springs back lightly when touched.
4.  Oil a large bowl with a couple tablespoons of olive oil and place the dough in the center.  Roll the dough around in the oil until it has been coated on all sides.  Place a clean towel on top and place in a warm place.  Allow to sit for 1 to 1 1/2 hours or until dough has doubled in size.
5.  In the meantime, prepare the sauce:  In a medium saucepan over medium heat, place the olive oil.  Once the oil is hot, add the onions and garlic, sauteing until golden brown and fragrant. 
6.  Crush the tomatoes with your hands and place them in the pan with the onions and garlic.  Stir to coat.  Add the spices - the onion and garlic powder, basil, oregano, basil, thyme, rosemary, sea salt and black pepper.  Stir to coat.  Lower heat to medium-low and simmer for about 15 minutes, or until well seasoned.
7.  In the meantime, prepare your pizza toppings.
8.  Once the dough has risen, use your hands to punch it back down.  Separate the dough equally into two portions.
9.  Preheat oil to 425 degrees.  Oil a pizza round and sprinkle with cornmeal if desired.  Press dough onto pizza round, being sure to cover the entire surface.  Repeat with the second ball of dough. 
10.  Poke the dough all over with a fork and place in the oven.  Bake for about 10 minutes, or until dough has puffed up and is slightly baked.  Remove from oven. 
11.  Spread the sauce evenly over the pizzas.  Top with shredded cheese and sprinkle on the toppings evenly. 
12.  Return to oven and bake for 20-25 minutes or until the cheese is browned, the sauce is bubbling and the crust is cooked. 
13.  Allow pizza to cool for approximately 10 minutes before slicing. 

Serve sprinkled with a Vegan Parmesan Cheese and tons of red pepper flakes.

Enjoy!

-K

Monday, January 10, 2011

Apple Berry Cobbler

I've had this fun opportunity recently of teaching lots of private cooking and baking classes, teaching anything from vegan baking to gluten free classes with meat (chicken or fish - but of course I don't eat any of it!).  I've signed on with one of my good friends that I went to culinary school with here in the city and am teaching two of his sisters the basics about vegan baking, starting with the ingredients and how they work to puddings, fruit desserts, cookies and bars, up to cakes and cake decorating and gluten free.  I recently had my first class with them and had a blast - I absolutely love teaching!  There is nothing more rewarding than enabling people to learn and grow and do for themselves. 

The first class we did was discussing ingredients and making baked fruit desserts as well as puddings and vegan jello.  I enjoy a baked fruit dish as much as anyone else, but there was something about one of the dishes we made that really stuck out to me.  It was a Pear Berry Cobbler and was absolutely delicious.  My downfall is anything bready and biscuitty - I love my carbs!  So beautifully baked fruits and berries simmered in fruit juice in the oven and topped with a biscuitty/cakey topping makes my day.  We tested all of the dishes, but as I went home, I found myself wanting some more.  When I came home, the Hubby was amazing enough to have made dinner (it was very good!), so I made a salad to go with it and we were good.  When we finished, he asked if we had dessert, and once again, my mind went back to that cobbler.  I decided that I would make it the next day and surprise him (and make myself happy in the process) by making it.

So here is the recipe of the delicious cobbler.  In the original recipe, I used apple juice, but I didn't have any at home, so I substituted fresh squeezed orange juice instead, which was equally delicious.

Apple Berry Cobbler


The Whole Cobbler.  Yum!

Serves 8-10 as a dessert

Berry Mixture:
2 1/2 cups peeled and medium diced apples (about 2 large)
1 1/2 cups fresh or frozen strawberries, cut in half and diced
1 cup fresh or frozen blackberries
1 1/4 cup fresh orange or apple juice
1/4 cup raw sugar
1 tablespoon arrowroot powder

Topping:
1 1/2 cups unbleached flour
1/2 cup raw sugar
2 teaspoons baking powder
pinch sea salt
1 cup soymilk
2 tablespoons canola oil
1 1/2 teaspoons vanilla extract

1.  Preheat oven to 350 degrees.
2.  Place fruits in a large bowl.  Add the sugar and arrowroot powder and toss to coat with hands. 
3.  Add the fruit juice and stir to coat.  Place this mixture into an 8x8" square baking pan.  Even the top with the back of a spoon.
3.  In a separate medium bowl, place the flour, sugar, baking powder and salt.  Whisk to combine.  Add the soymilk, oil and vanilla and using a spatula or wooden spoon, stir to combine  - it will be thick, between the consistency of a cake and a biscuit batter.
4.  Spoon the topping all over the surface of the fruit.  Bake for 30-35 minutes, or until the topping is completely baked through, firm to the touch and a toothpick inserted into the center comes out clean.
5.  If you can stand it, let it cool for at least 10-15 minutes.  Serve by itself or with vegan whipped cream on top.  Yum!  ( I promise at some point to post a recipe for my vegan whipped cream that is out of this world and has the most beautiful taste and texture!)


Apple Berry Cobbler Slice with Vegan Homemade Whipped Cream

Enjoy!

-K

Friday, January 7, 2011

Falafel Salad with Tahini Dressing

I received this really great sample from work several months ago that is very allergy friendly.  It is a ready-made falafel mix that is gluten free, dairy free, soy free, nut free and delicious!  It is from Authentic Foods (I wish I hadn't thrown out the package - I should have taken a picture of it to post) and is basically ground garbanzo beans and spices.  You can check it out at their website here:

http://authenticfoods.com/products/item/10/Falafel-Mix   

Anyway, it is a huge package (1 1/4 lbs!) and has lasted a long time.  I've probably made falafel balls 4 or 5 times, fried of course!  Naughty me!  They are so delicious!   I had enough of the mixture left to make one more batch, but I wanted to try it baked.  I didn't have enough to exactly follow the instructions on the package, so I guessed for the water, and as it turned out, I was a little overzealous and added too much.  Unfortunately, that meant that the batter was too liquidy, so instead of forming balls, I formed little patties, which were equally delicious, just a little different looking.  I have made these homemade once of twice before and will again, and will record the recipe the next time, but it seemed foolish to do so while I still had the ready-made mixture.  So I made a salad with lots of veggies and a delicious homemade tahini dressing.

Falafel Salad with Tahini Dressing


Falafel Salad with Veggies and Tahini Dressing

Serves 4

1 1/2 heads romaine lettuce, chopped, washed well and drained
2 carrots, peeled and julienned
1 bunch scallions, green parts only, sliced thinly
1/2 green pepper, julienned
1/2 red pepper, julienned
1 roma tomato, skin and flesh removed, seeds left in tact, julienned

1 Recipe Baked Falafel Burgers from Authentic Foods

Dressing:

1/2 cup roasted tahini
1/3 cup filtered water
2 garlic cloves, minced
1 teaspoons fresh grated ginger
2 teaspoons tamari or shoyu
1/8 teaspoon sriracha
1/8 teaspoon sea salt
2 pinches cayenne pepper
pinch black pepper
1/4 teaspoon umeboshi vinegar (lends important tangy flavor)
squeeze fresh lime juice

1.  Place the tahini and water in a small mixing bowl.  Whisk together until combined.  It will be thick, but will thin out once the other ingredients have been added.
2.  Add remaining ingredients, whisking well to combine.  Season to taste.

To Assemble:

Place a mound of romaine lettuce in center of plate.  Top evenly with vegetables, followed by falafels.  Drizzle dressing over top, using as much or as little as you'd like.  This was a really tasty, lite lunch- one I will make again.

Enjoy!

-K

Monday, January 3, 2011

Roasted Portabella Mushroom with Sherry Sauce

Lately I have felt inspired to cook pretty much every night this week, which, truth be told, doesn't happen too often.  Teaching classes, working full time and hanging out with the Hubby sometimes makes it difficult to get up the energy to go back into the kitchen and make a nice full meal.  (Thankfully though we do not yet have children, or on top of everything else, we would have to cook every night!)  Well, happily for the Hubby's belly, I have been in the mood lately to make nice dinners, and tonight was no exception. 

I have been going through my tons of cookbooks lately to get inspiration for cooking fun things for dinner.  If I do not periodically go through these books, I feel like I'm making and serving the same thing over and over again and get tired of it very easily.  I'm sure the Hubby feels the same although he would never say anything of the sort.  So, I was going through a cookbook, and saw a roasted portabella mushroom dish that called for a sherry sauce, and used it as a base to create the delicious dinner we had.  It included white rice (the Hubby is Dominican and is against any kind of rice other than white), some leftover baked seitan, sesame kale and the roasted portabella mushrooms with the sherry sauce.  Two of the recipes are outlined below:

Roasted Portabellas with Sherry Sauce:


Roasted Portabella Mushroom, Sesame Kale, White Rice & Seitan


2 portabella mushrooms, destemmed and rinsed
2 tablespoons olive oil
sea salt and black pepper to taste
garlic powder to taste

Sherry Sauce:
1 tablespoon olive oil
1/2 small onion, minced
6 garlic cloves, minced
1 teaspoon dried rubbed sage
1/4 cup sherry
1 1/2 cups roasted mushroom stock
1 tablespoon unbleached flour
1/4 teaspoon dried rosemary, crushed with fingers
1/4 teaspoon dried thyme
sea salt and black pepper to taste

Sesame Kale:
1 bunch kale, washed, deveined and chopped into bite sized pieces
1 1/2 tablespoons toasted sesame oil
2 pinches of sea salt - do not add more

1.  Start roasting the mushrooms.  Line a sheet pan with aluminum foil and place mushrooms on top.  Drizzle both sides with the olive oil and sprinkle the top and bottom of each mushroom with sea salt, black pepper and garlic powder at 400 degrees.  This will take about 15 minutes.
2.  Make the sherry sauce.  Heat the olive oil in a saute pan over medium heat.  Add the onions and garlic, cooking for about 2-3 minutes, then add the rubbed sage, dried rosemary and thyme, sea salt and black pepper, continuing to cook for an addition 2-3 minutes.  Deglaze with the sherry- do not pour directly from the bottle.  Allow the sherry to reduce by half before continuing onto the next step.
3.  Once half of the sherry has evaporated, add the flour and whisk until it is completely smooth and thick.  Add the stock and whisk continuously until everything is well mixed.  Bring to a boil and reduce heat.  Continue simmering until sauce is thick and has reduced slightly.  Season to taste with sea salt and black pepper.
4.  Make the sesame kale.
5.  Place the kale on a sheet tray and drizzle with the oil, using your fingers to massage it in.  Sprinkle the sea salt evenly over the kale and stick in the oven with the roasted mushrooms.  This needs to cook for 10-12 minutes and will become nicely crisp on top. 
6.  Once the mushrooms are done, drizzle the sauce over top (or you can do what I did and eat the mushrooms as they are because they're so tasty that way and use the sauce for something else).  Serve the kale on the side.  Yum!

Enjoy!

-K